
Adjustable Frame Low Tunnel: Complete Instructions with Pictures
Posted by Organic Heirloom Gardens on Jan 28th 2018
In this post I am going to give you detailed instructions on how to build the adjustable low tunnels mentioned in my earlier blog post. They are very easy to make and work great!
If you have not read that post you can see it HERE.
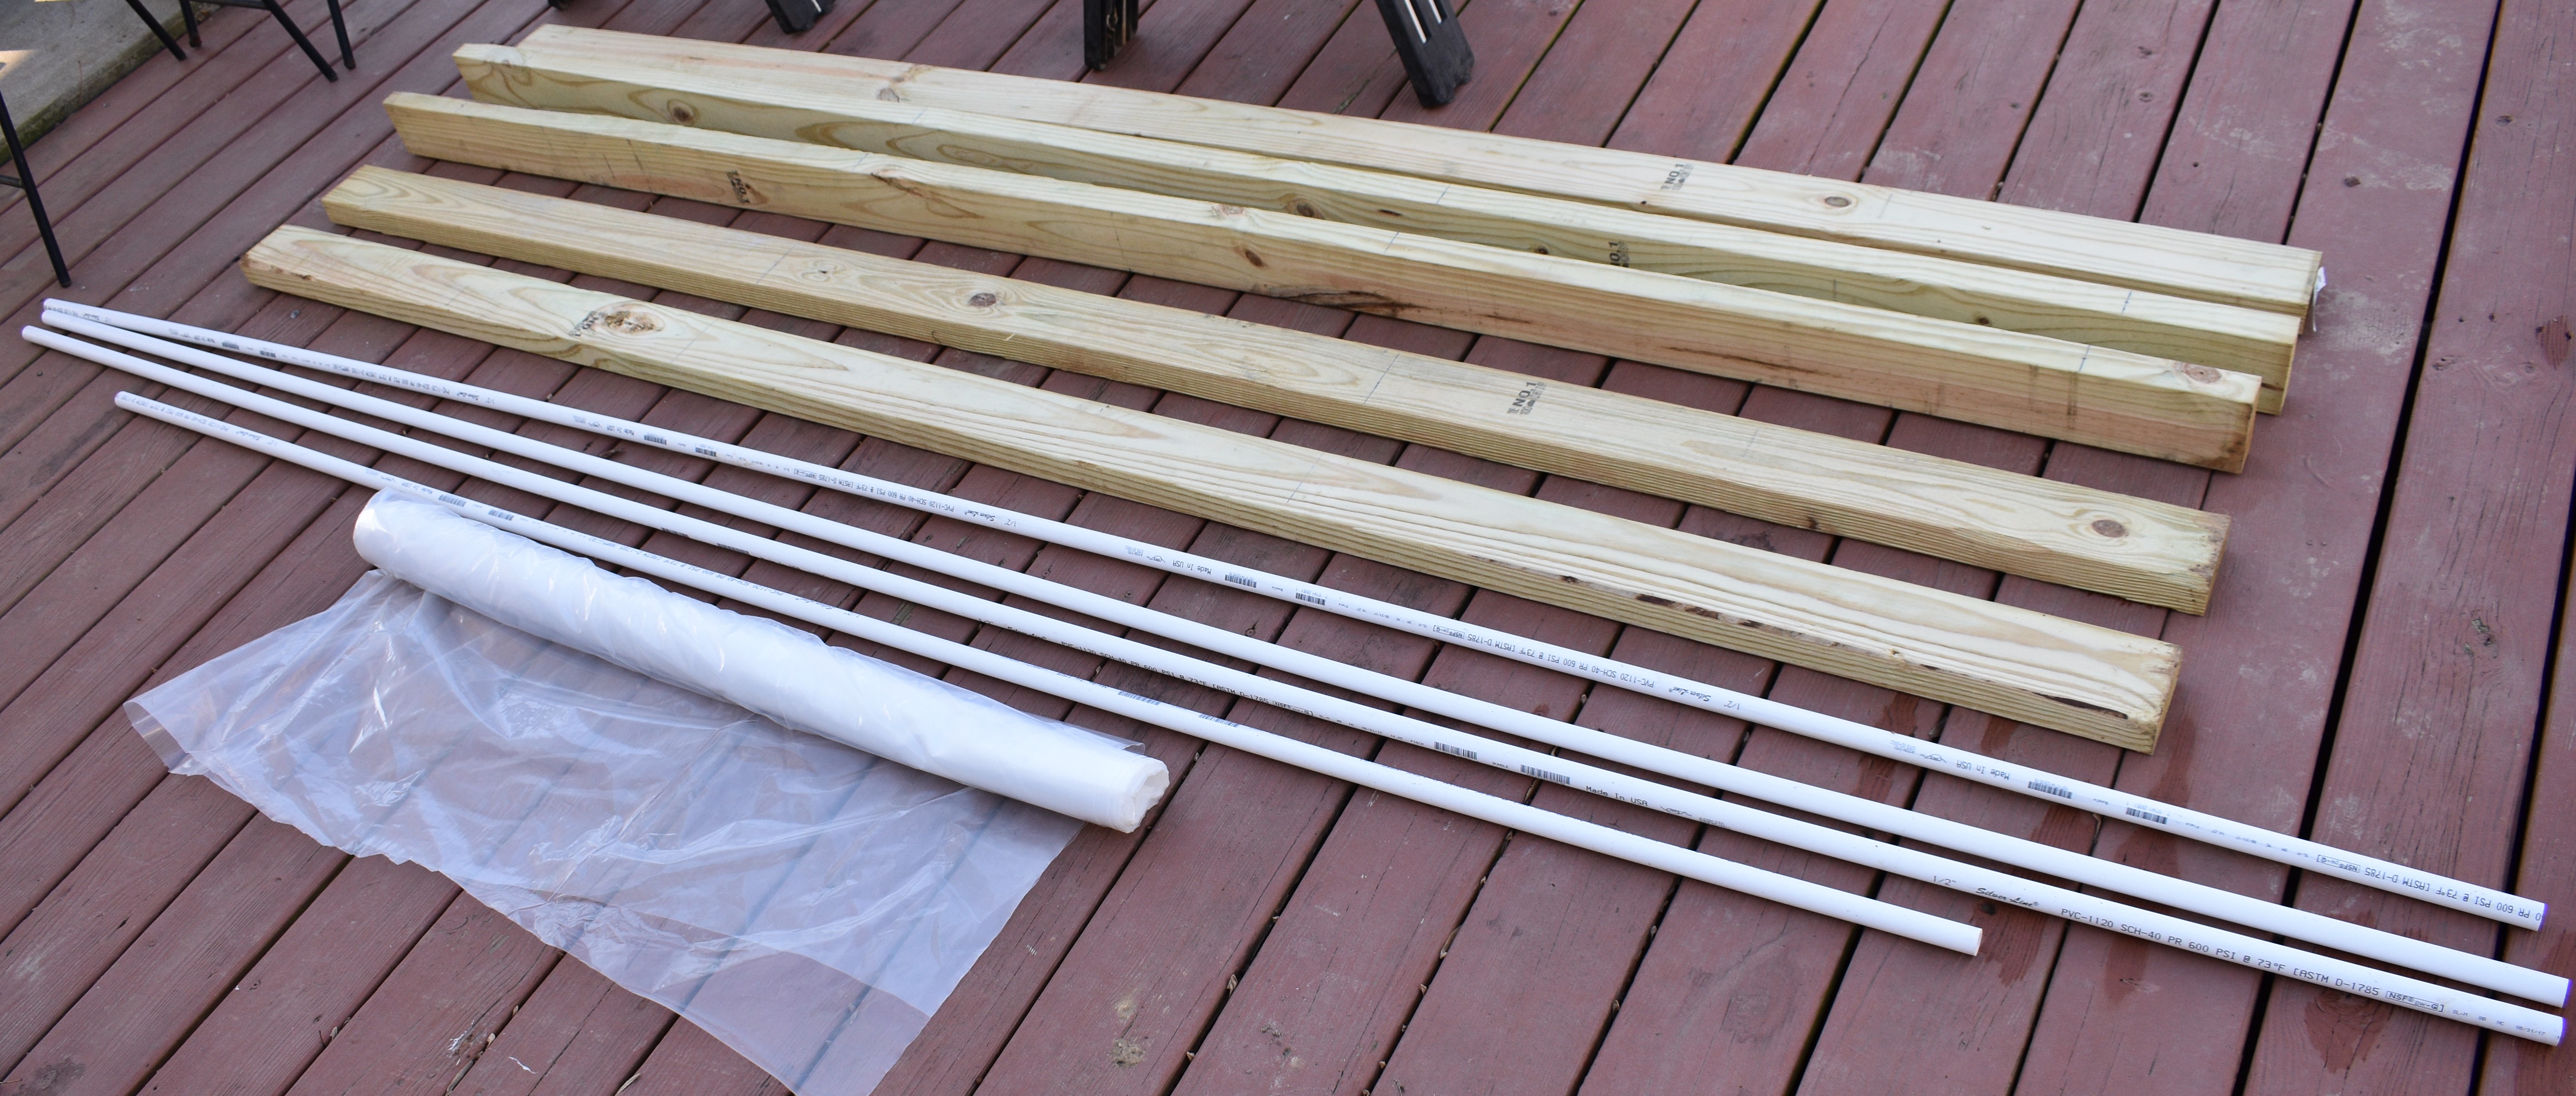
Materials Needed:
- (5) - 8 ft - 2x4s (Made For Ground Contact Outdoors)
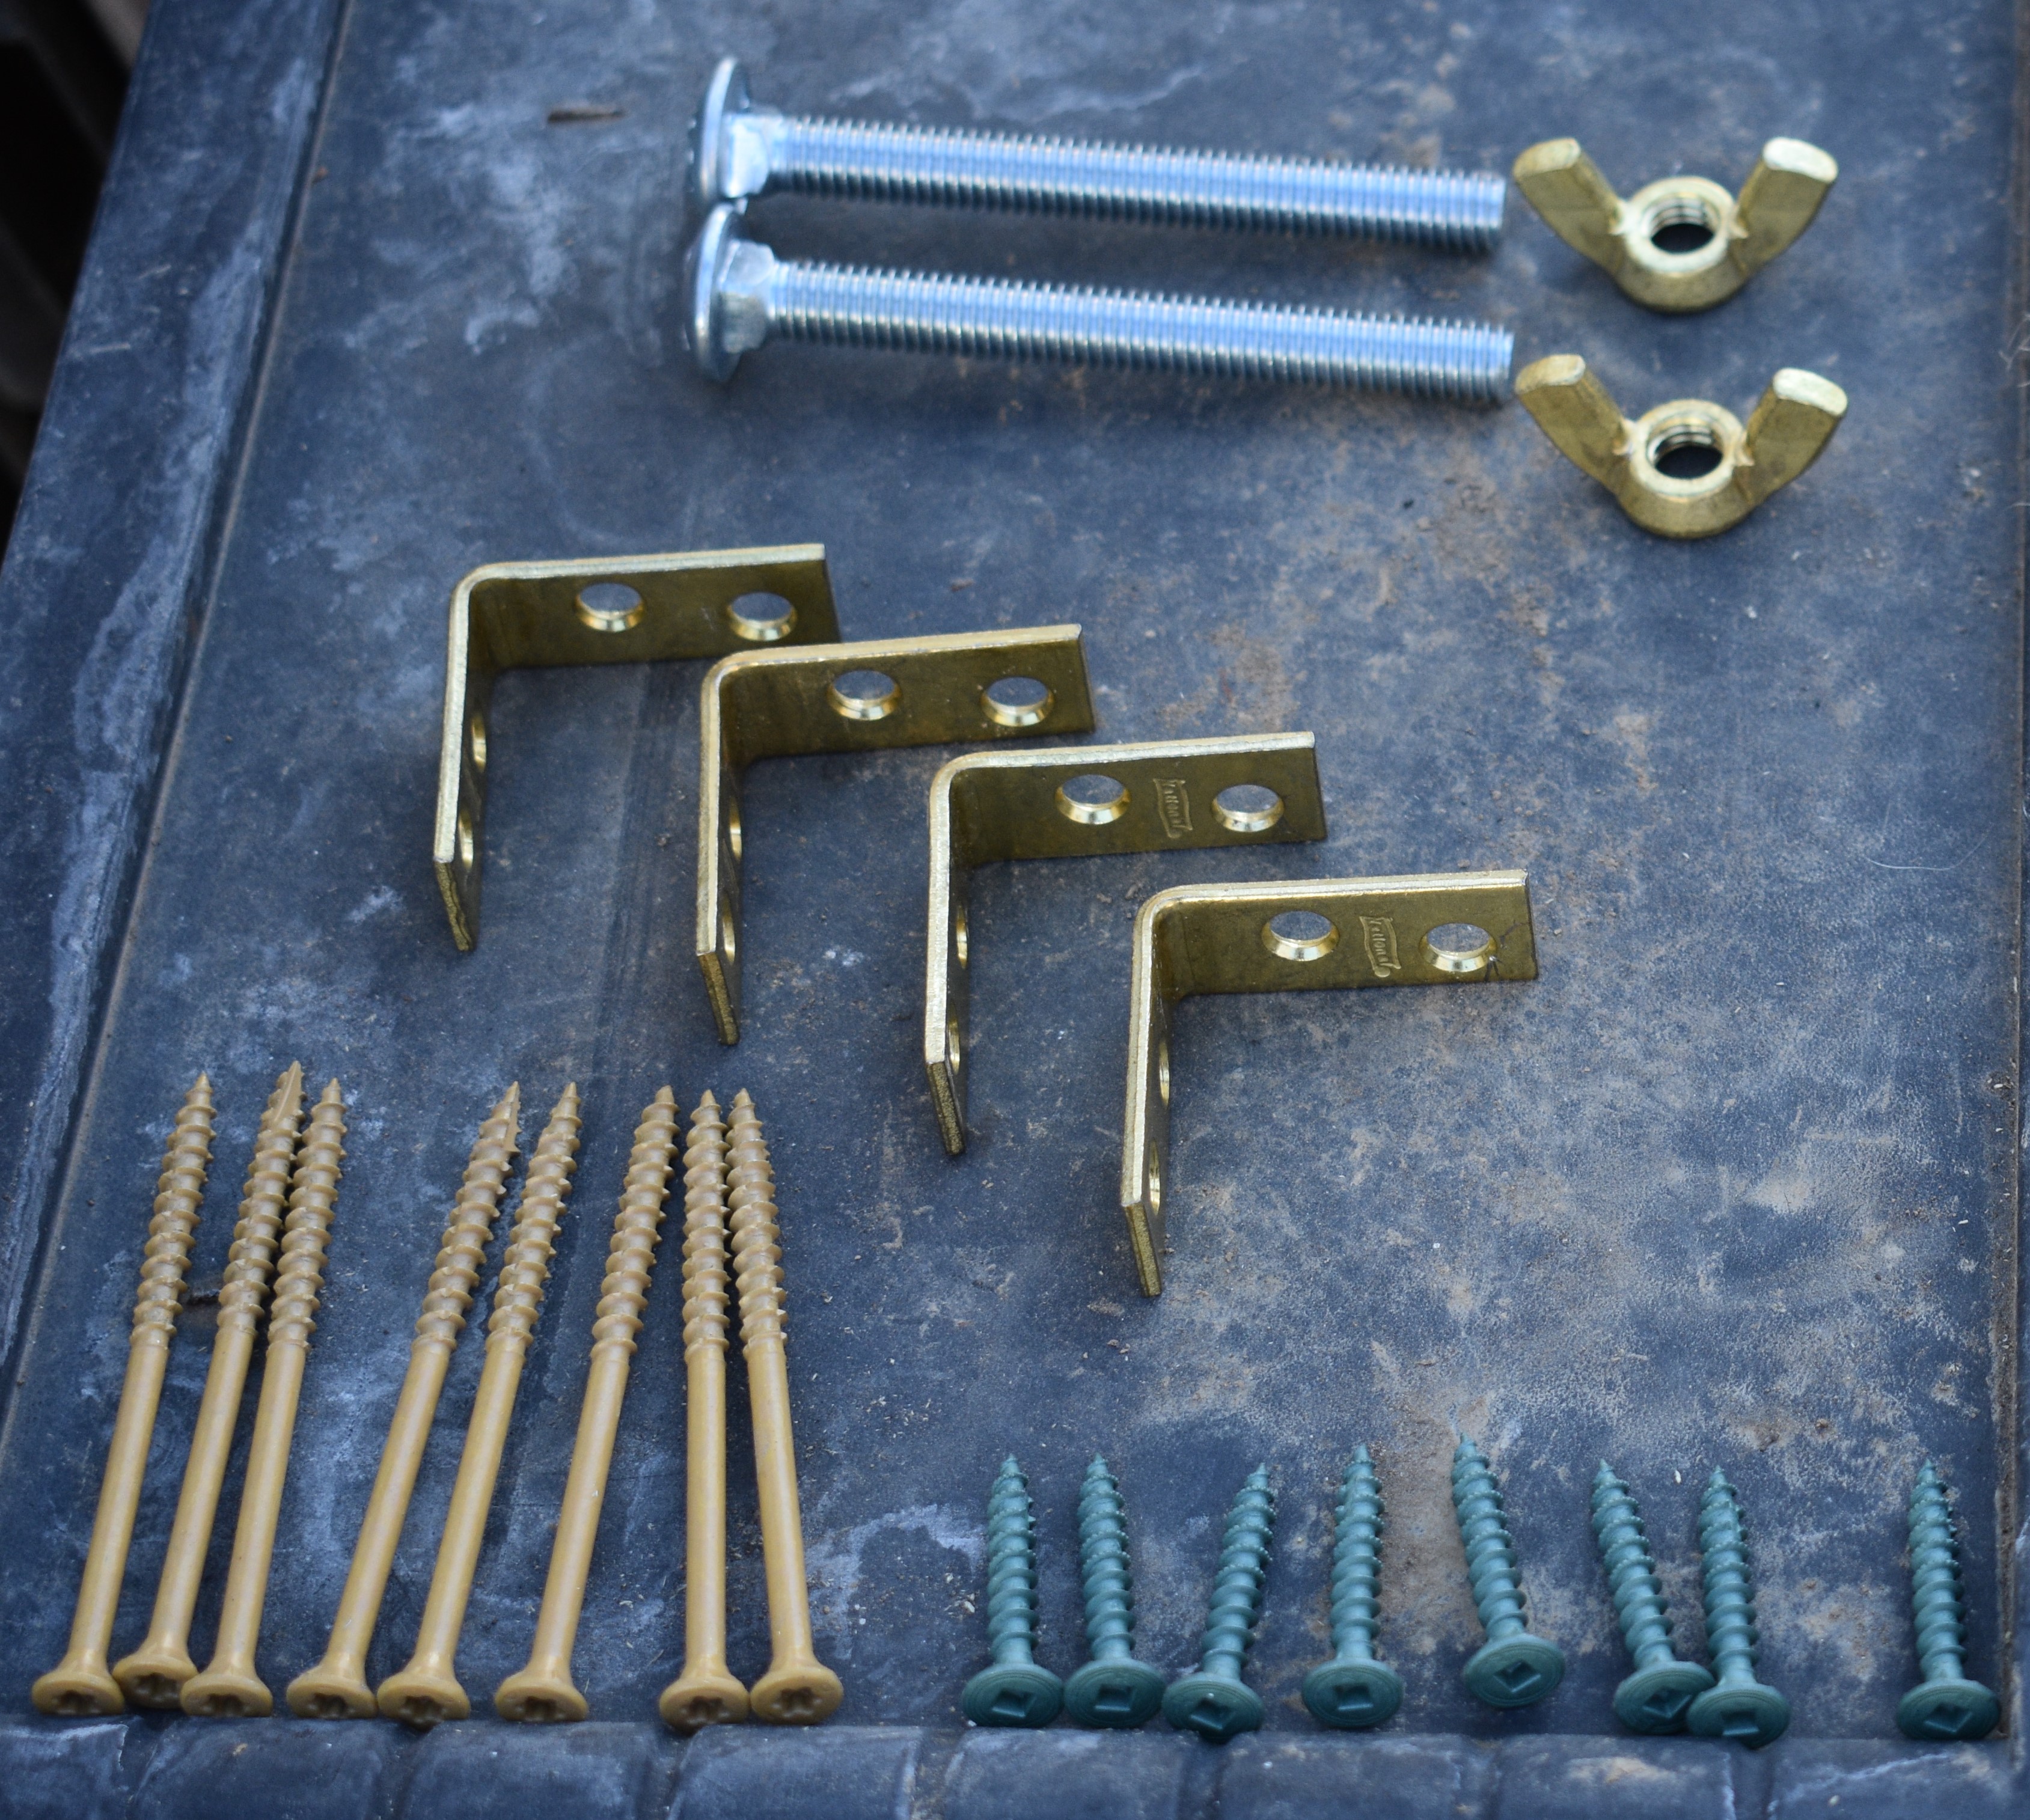
- (8) - 3”+ Decking Screws
- (8 to 16) - <1.5” Screws (These are for the L brackets so they need to fit the holes)
- (A lot) - Heavy Duty Staples
- (16 Feet) - 6 ft Wide Ag Fabric Plastic
- (4) - 6’8” x ½” PVC Pipe
- (2 to 4) - ⅜”x4+ Carriage Bolts with Wing Nuts (any size, needs to be 4+ length)
- (4) - Small to Medium L-Brackets
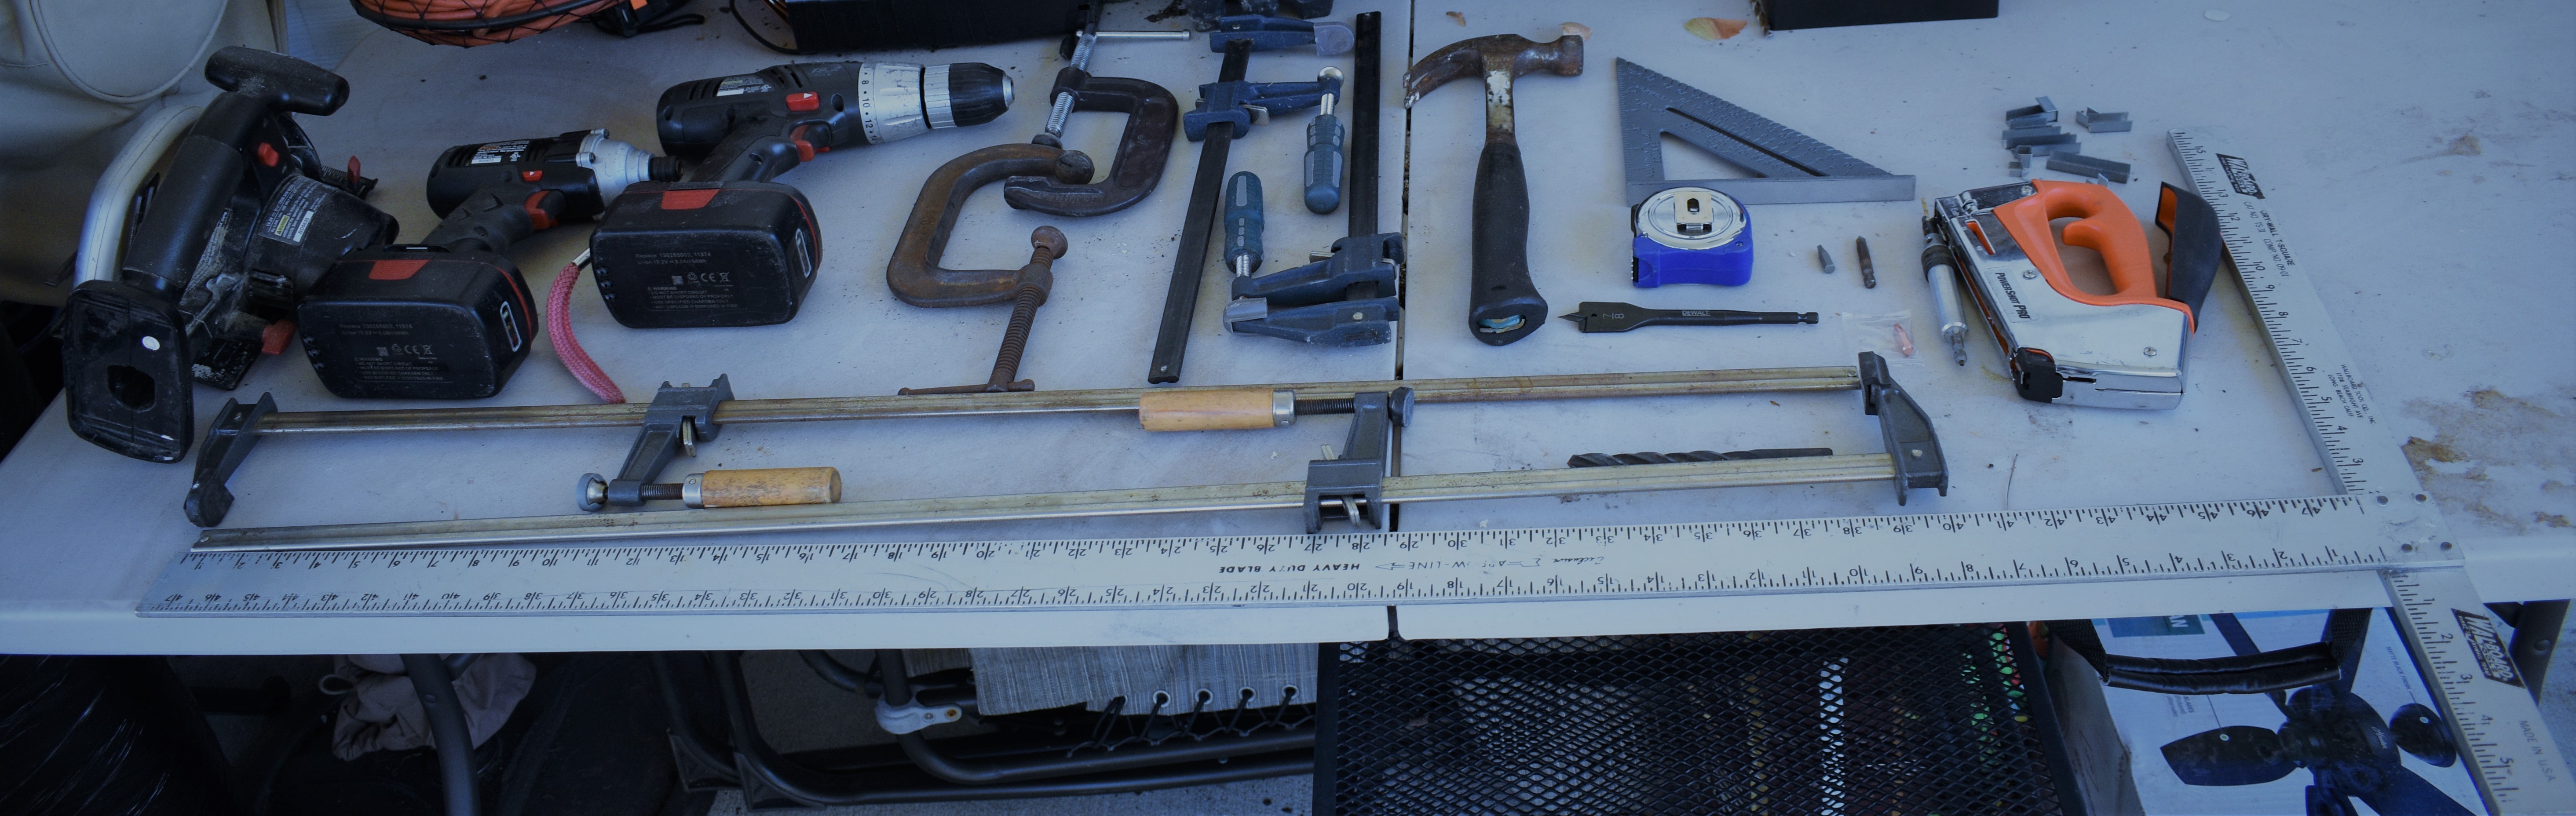
Tools Needed:
- Pencil/Pen
- Tape Measure
- Yardstick or Long Straight Edge
- Electric Saw
- Electric Drill
- Framing Triangle
- ⅞” Paddle Drill Bit
- 7/16” Drill Bit (This should be your bolt size + 1/16”-⅛”)
- Screwdriver Bit(s)
- Heavy Duty Stapler
- Saw Horses (Optional)
- Hammer (Optional)
- 4”+ C-Clamps (Optional)
- 36”+ Material Clamps (Optional)
- Screw Drill Bit with Countersink (Optional)
Instructions:
- Take 2 of your 8’ long 2x4s and cut them into 3 even sections measuring 32” each using your saw. You will lose a bit for the width of the blade of course but this does not matter. By cutting them 32” every 2 tunnels you make you get a free set of 32” sides so you use less lumber and save money.
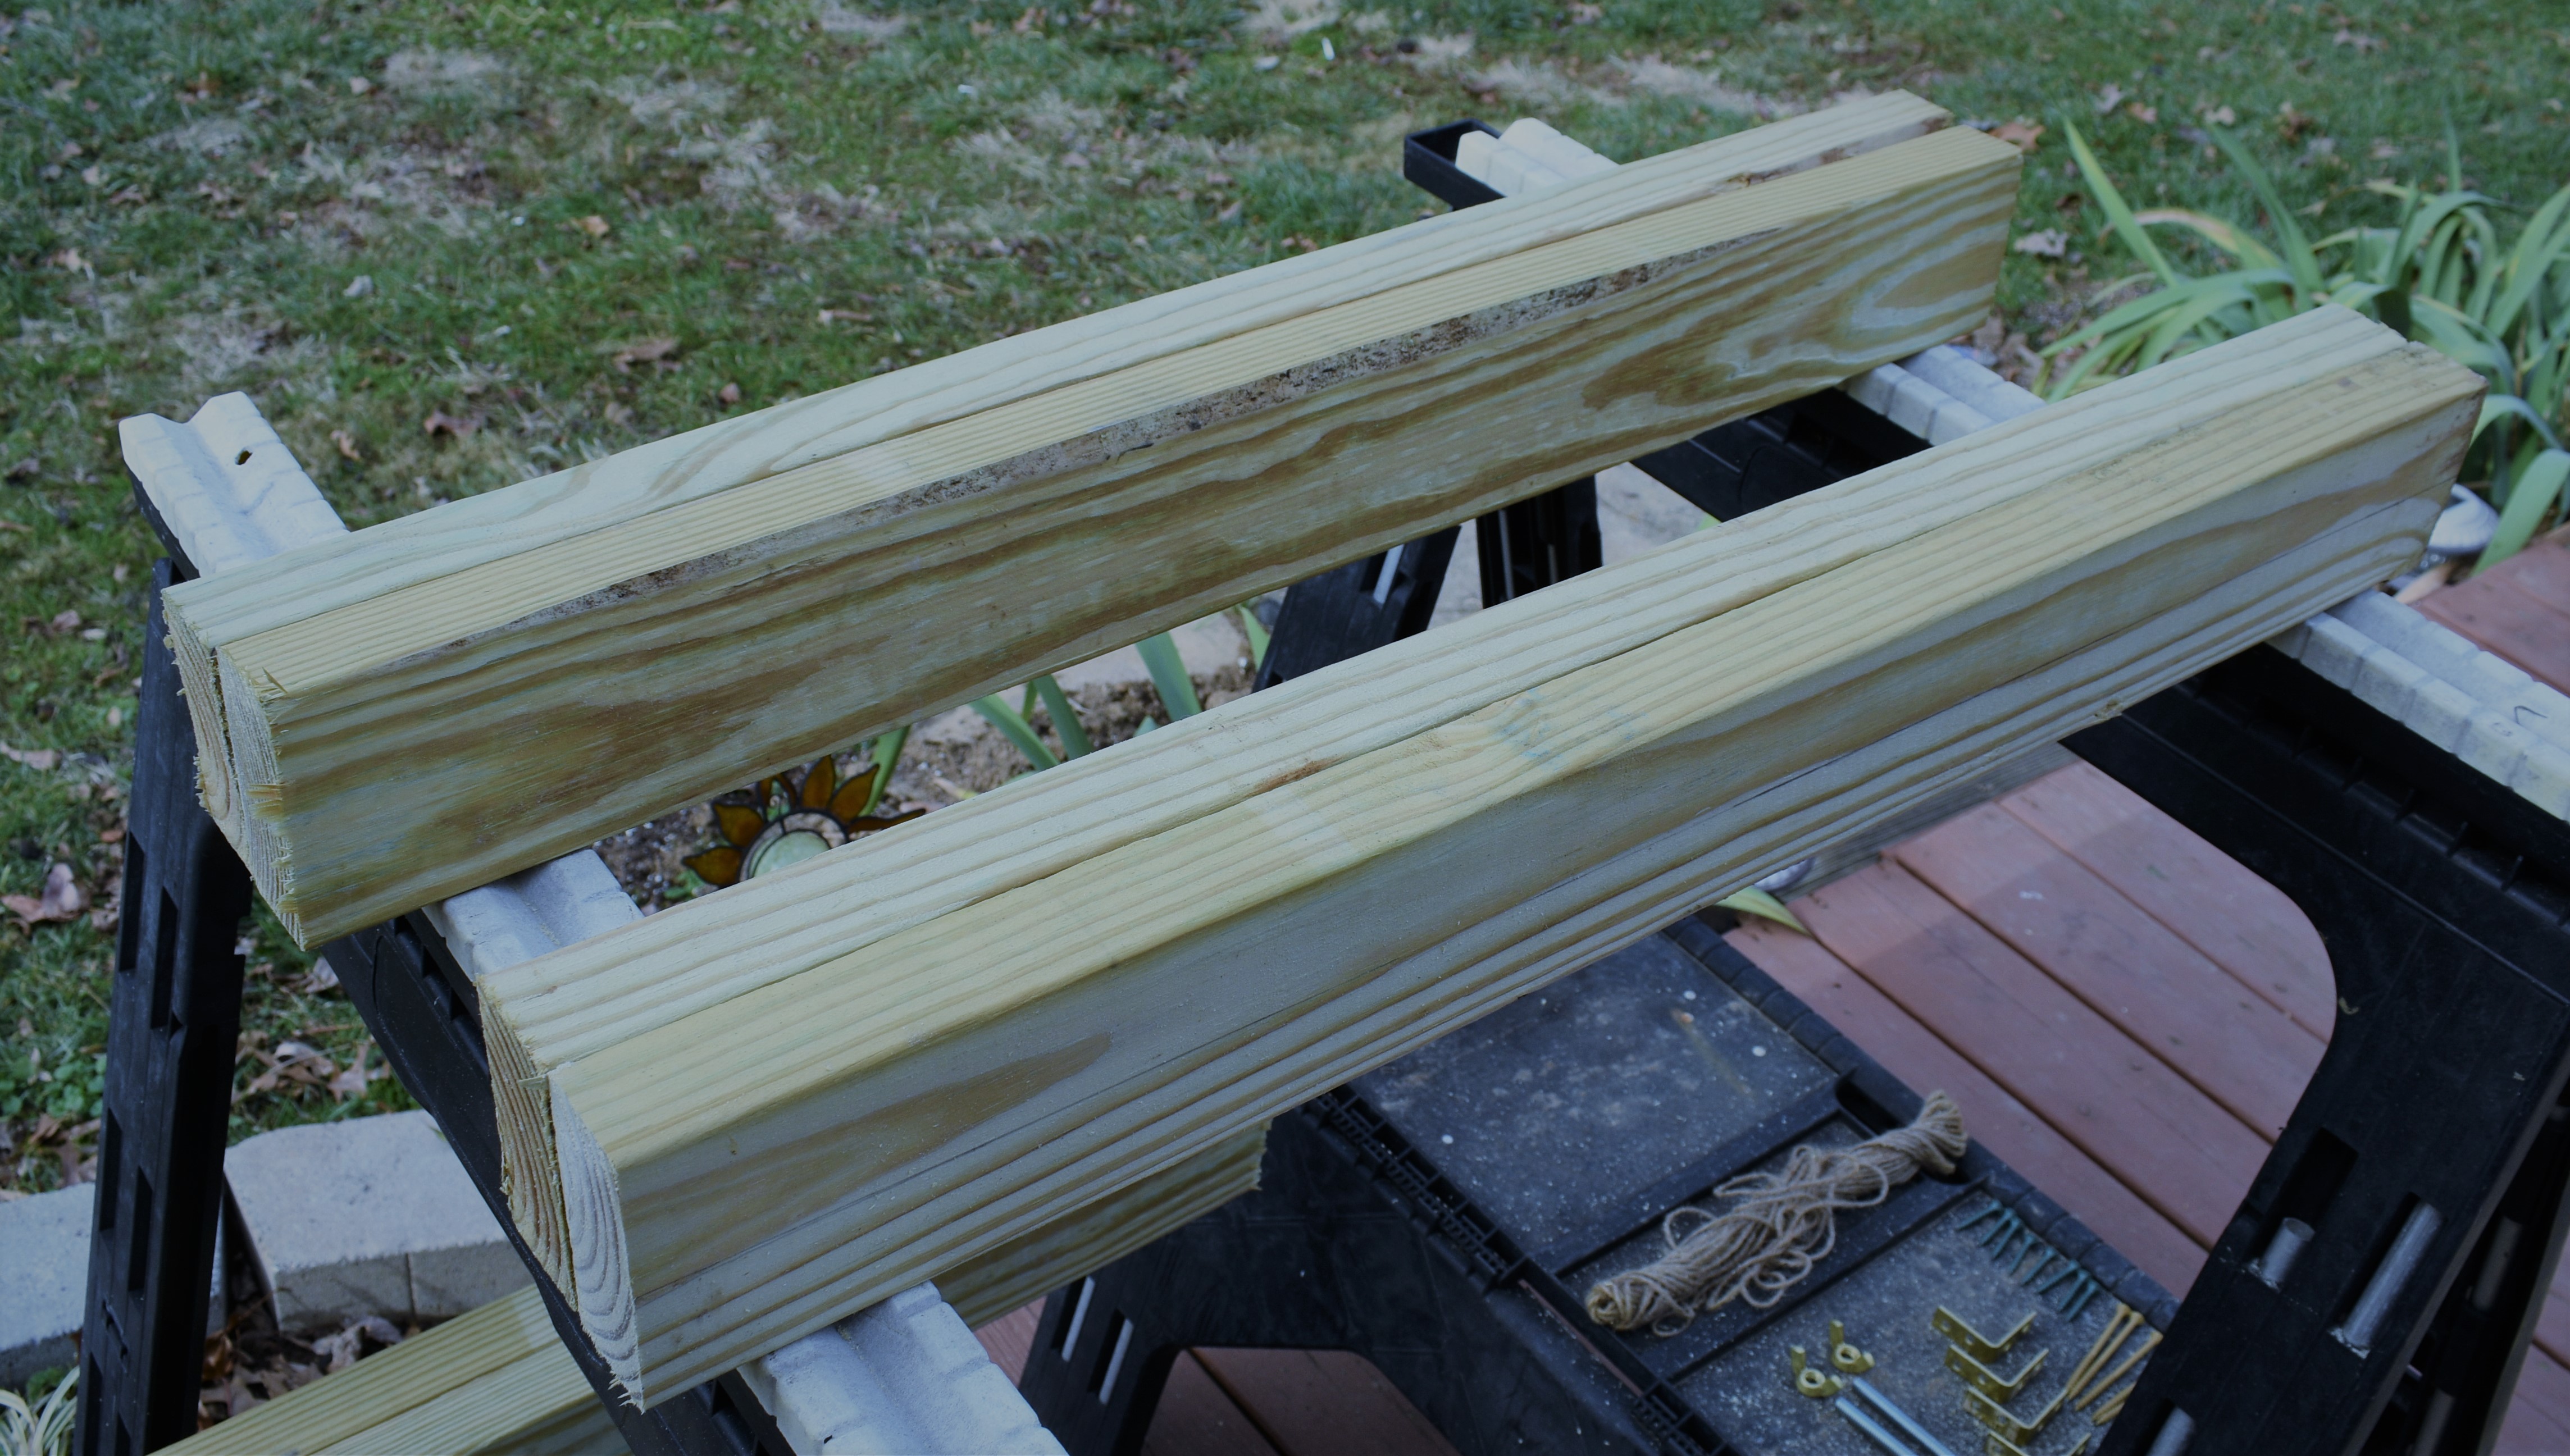
- Using your square and yard stick or straight edge, draw a line directly down the center of 2 of the 32” pieces of wood you just cut. The line should be 32” long on 2 of the 4 boards you just cut.
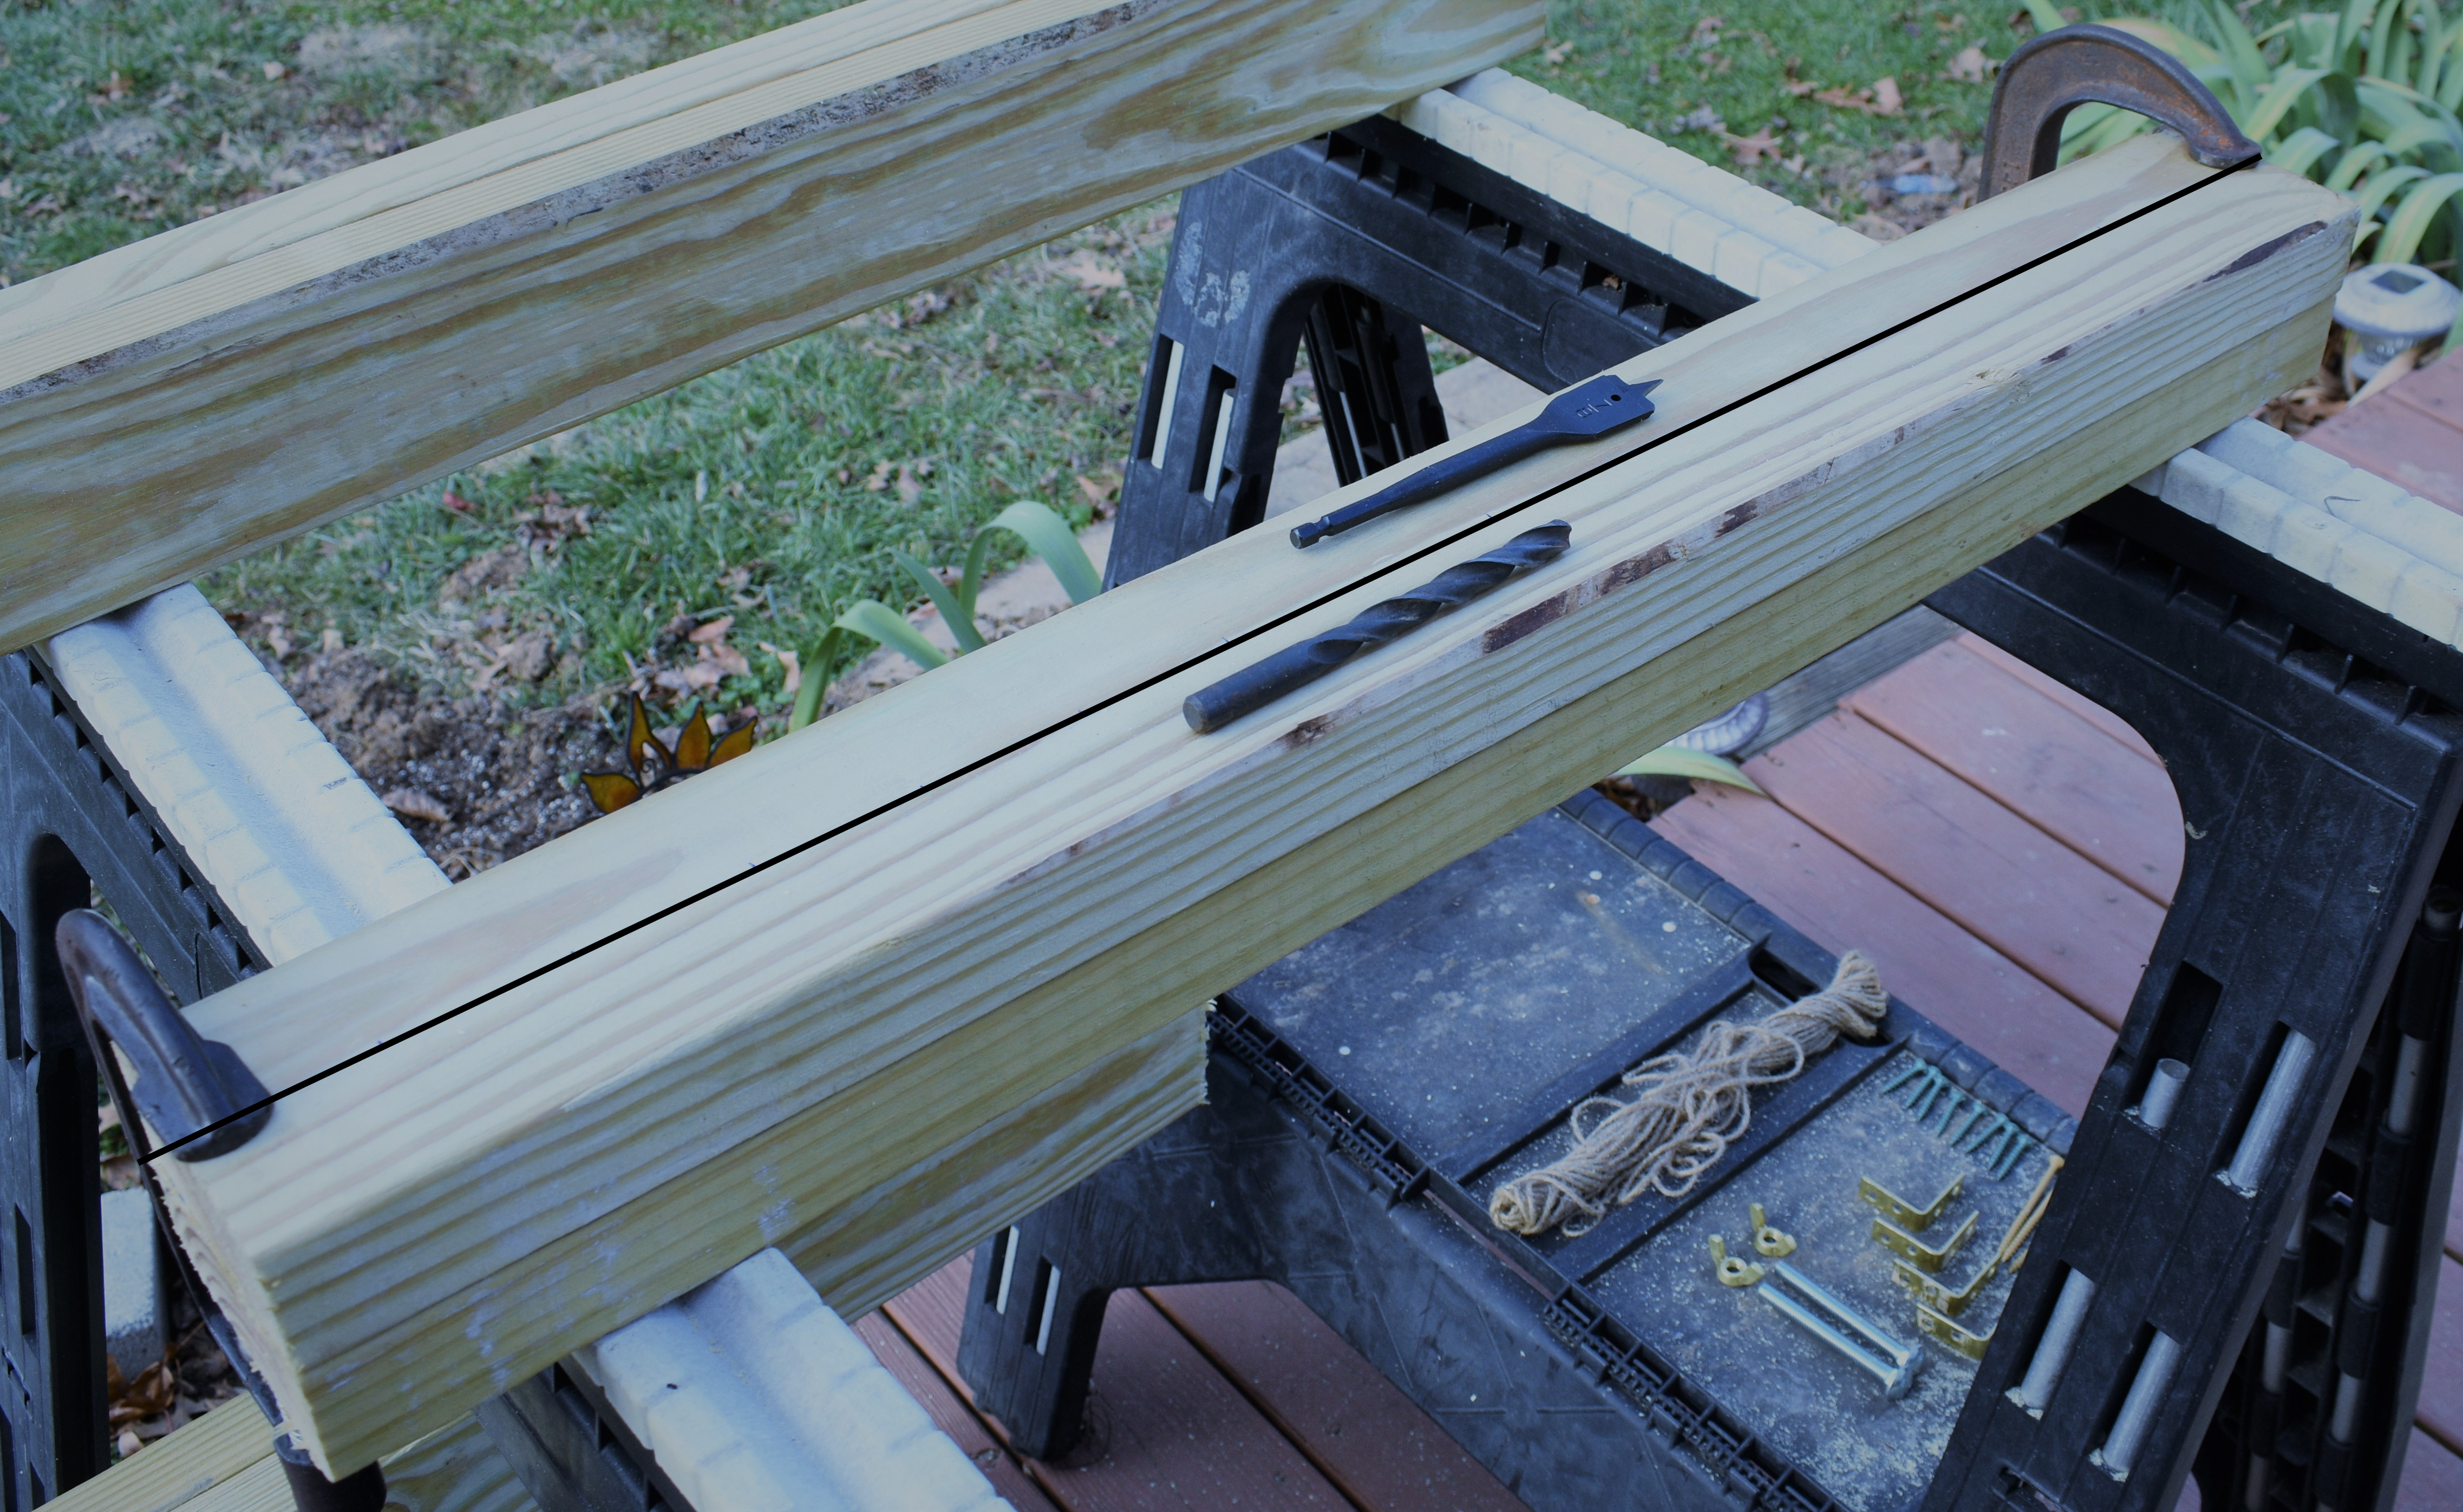
- Using your measuring tape or yard stick measure in 2” increments from end to end on the line you just drew. Make a mark every 2”. You should have marks @ 2”, 4”, 6”, and so on.
- After you have marked both 32” boards take one with the markings and one without markings, using your C-clamps line the boards up and clamp them together. Your line with the marks should be facing outwards so you can see it (AS PICTURED ABOVE). Repeat this step for the other set of 32” boards.
- Take one of the sets of boards you clamped together and lay them with the line you drew facing upward. (AS PICTURED ABOVE) Using your ⅞” paddle drill bit make a ½” deep hole at each mark. This is to recess the carriage bolts. This step is not required. (I didn't do it in these tutorial pictures but normally I do.)
- Using your 7/16” drill bit (or whatever size you ended up using for your bolts, 1/16”-⅛” larger) make a hole through both boards at each mark you drew. Get these as accurate as possible so they line up as you adjust the size. Make sure to reem the holes out well so your bolt goes in easy. Repeat this step for the other set of boards you have clamped together.
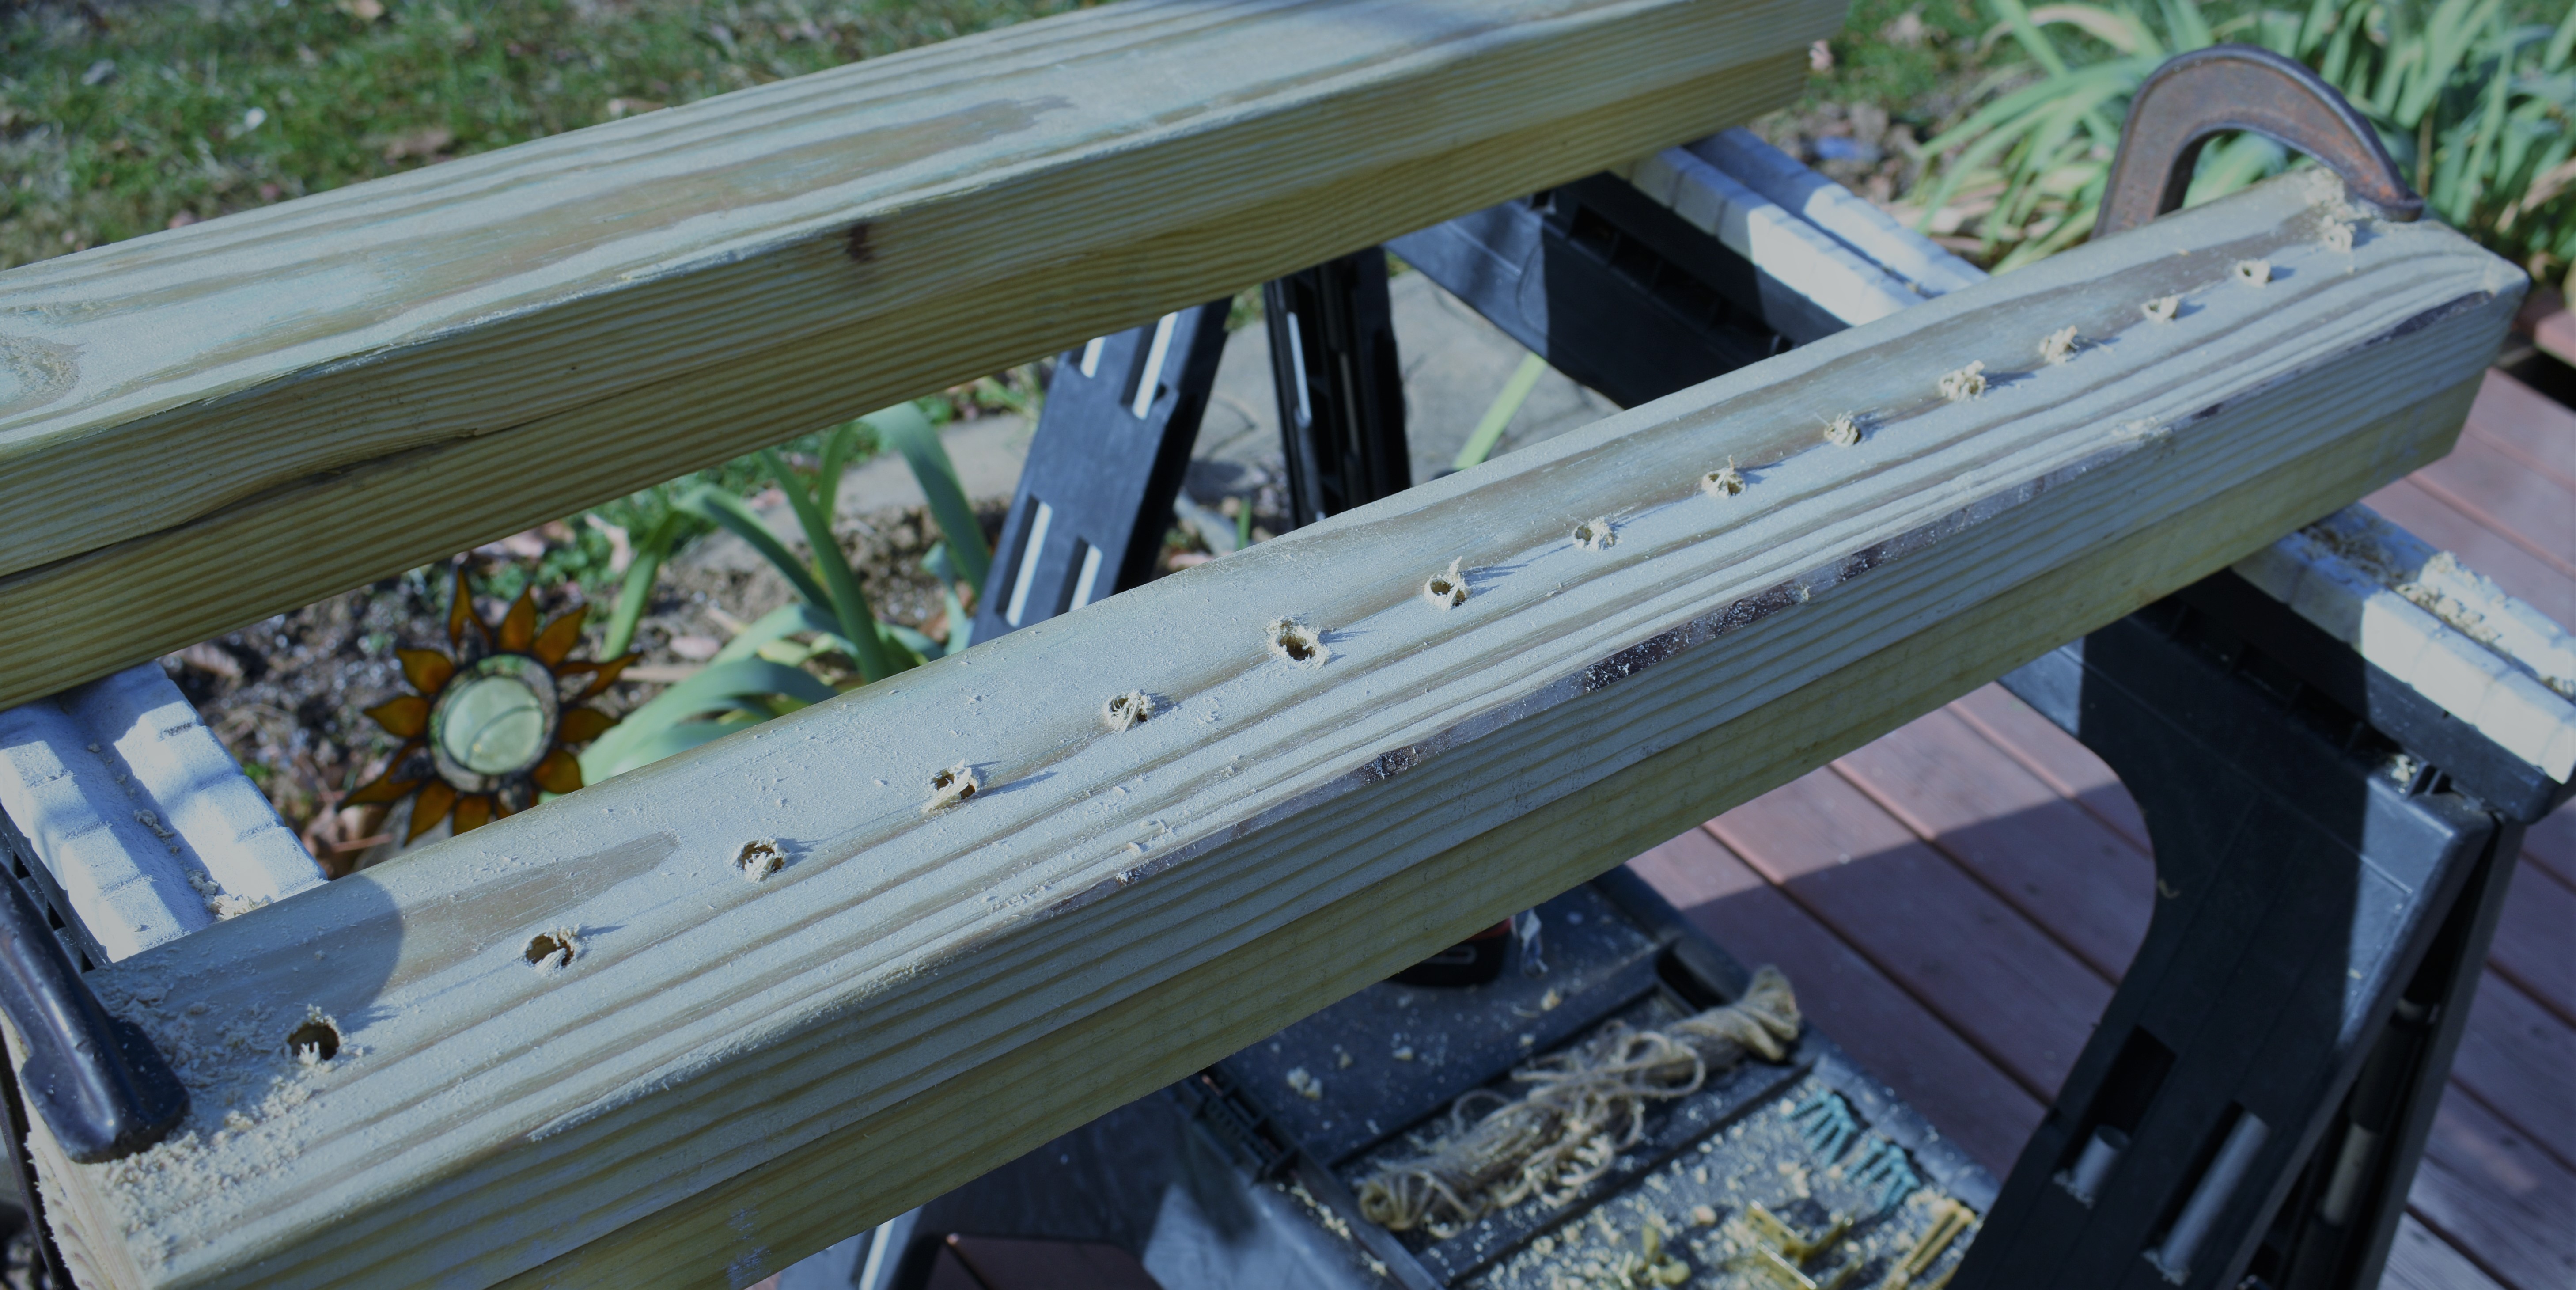
- With your holes drilled you can now release the clamps. When you release them move each set from the position they were in (lined up together) out 2 holes. This will mean about 4 inches will be hanging over each side. Put your clamps back on and line the boards up in this position. You can also put your bolt with wing nut through a hole to help hold the sections square for the next steps.
- On a flat surface (porch, driveway) lay out 2 of your 8’ long 2x4s, on their sides, about 36 inches apart. Take one clamped section and put on each side forming a box frame shape.
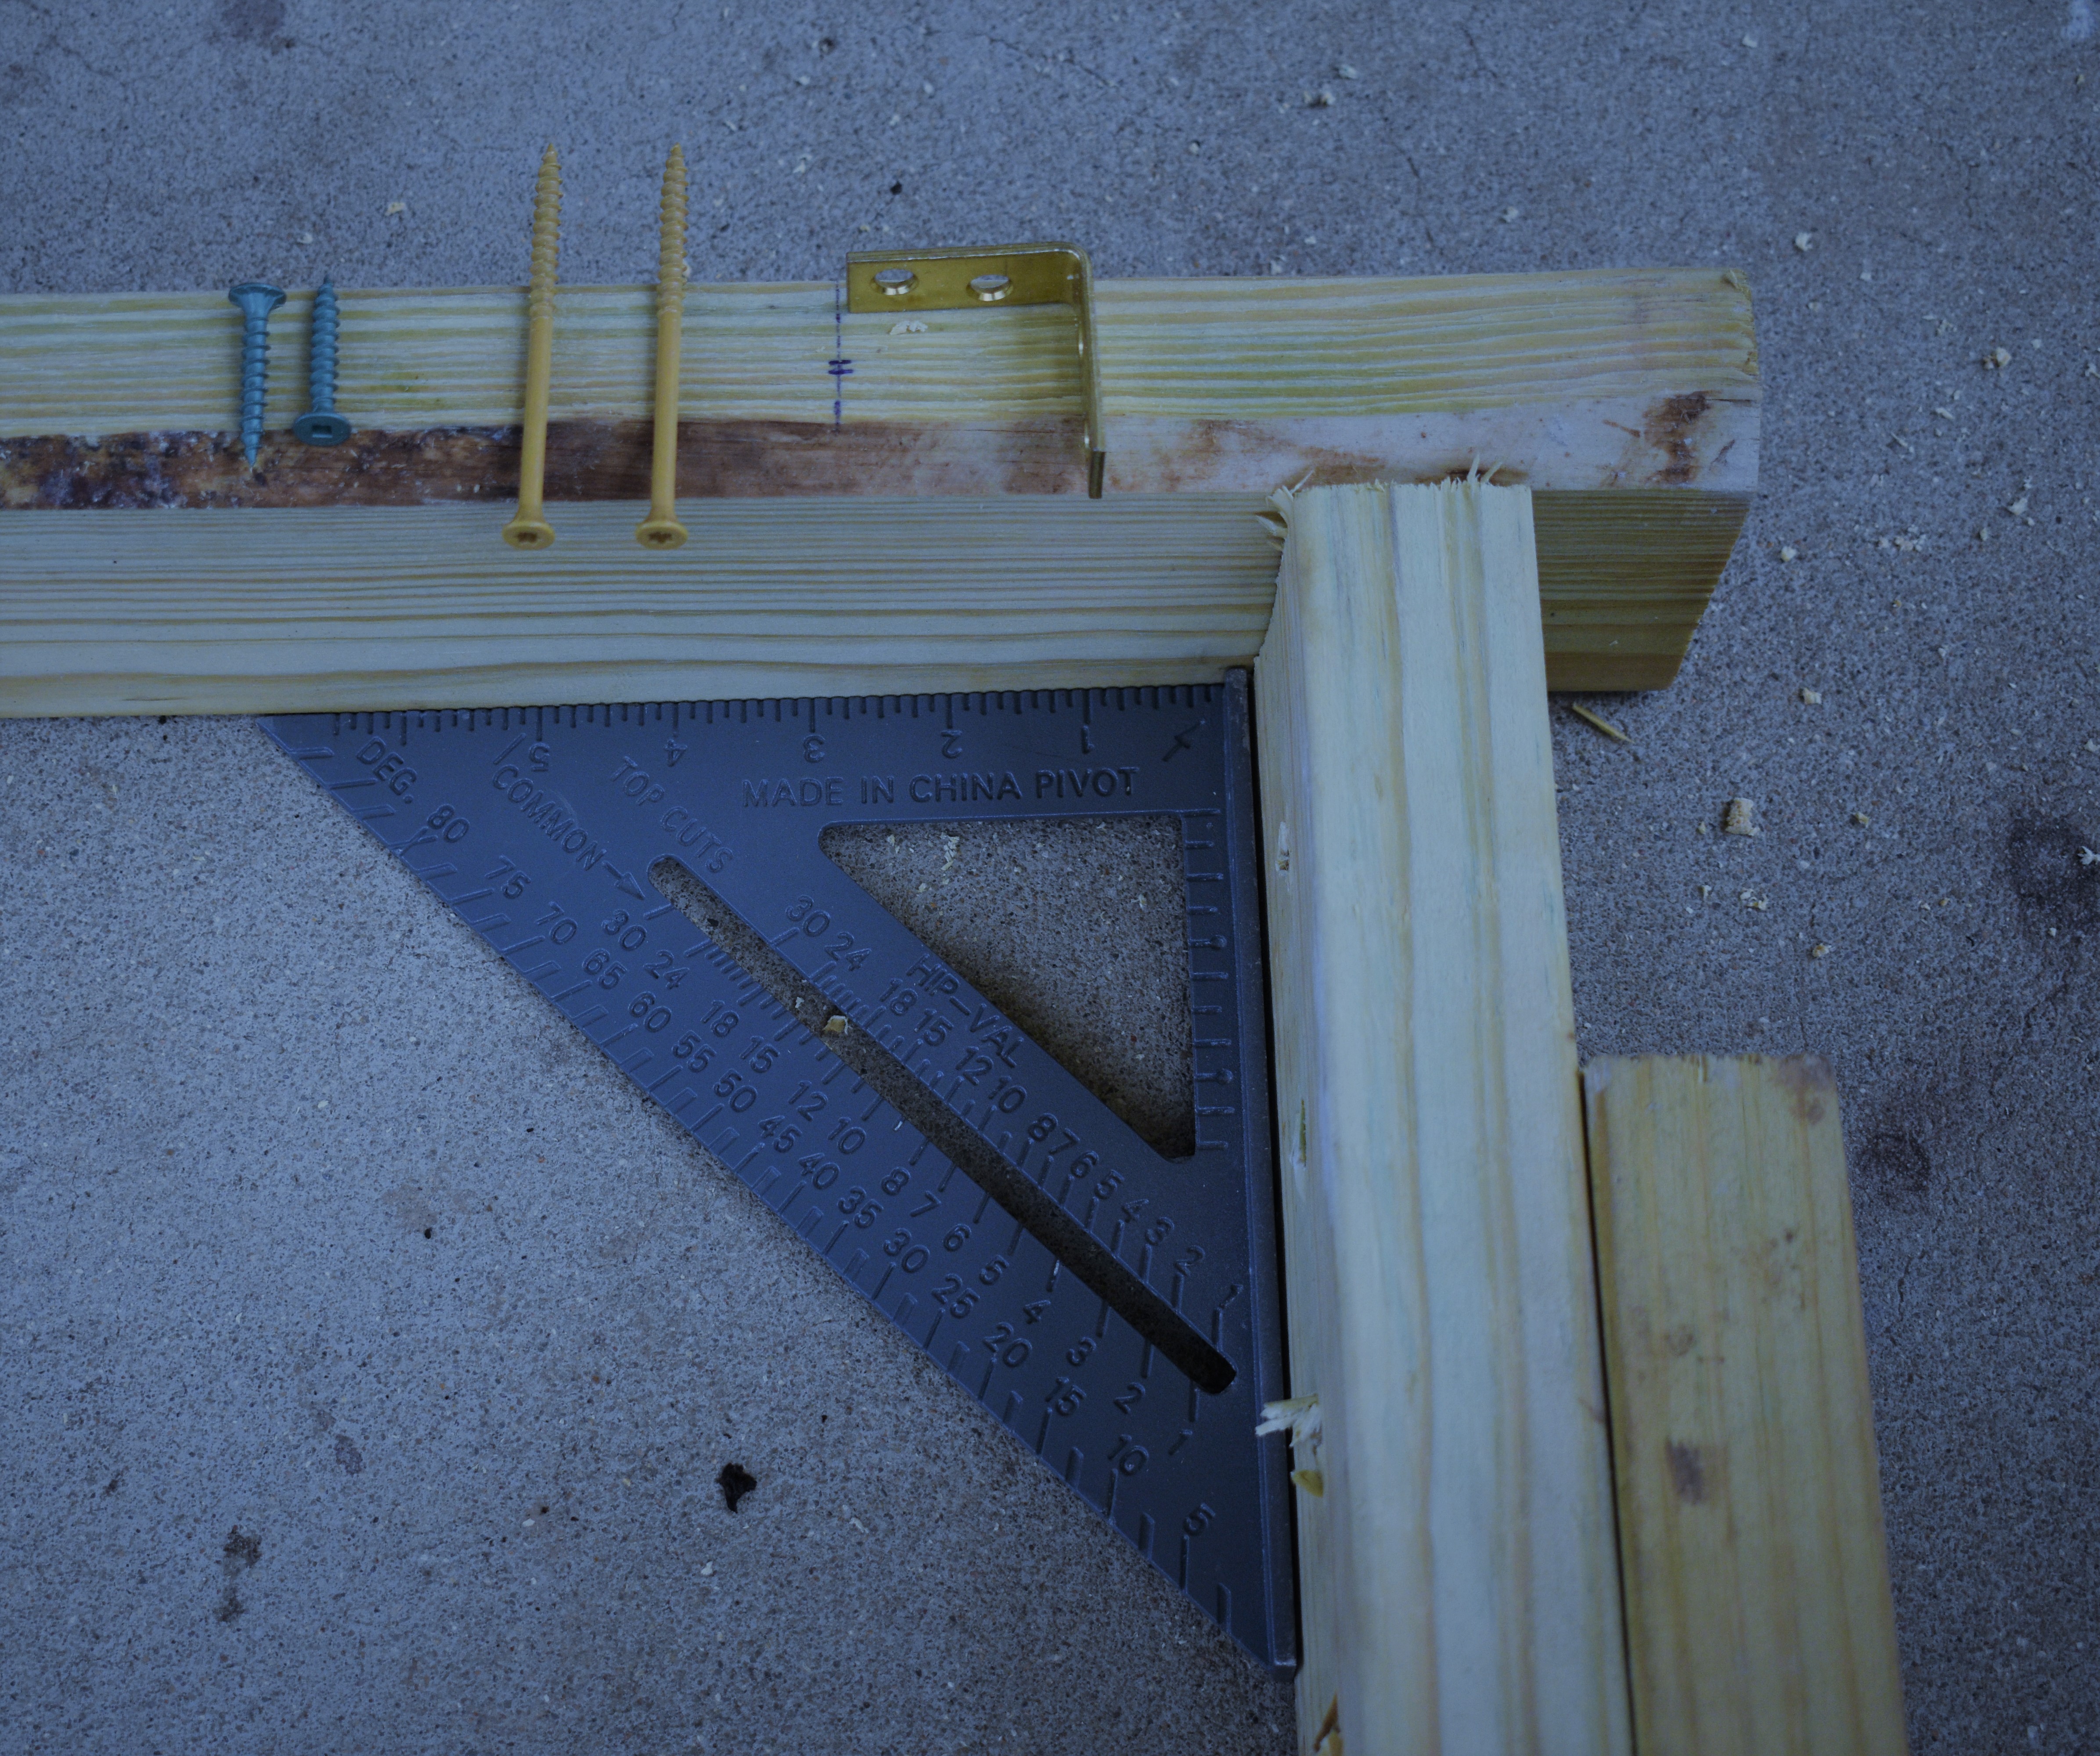
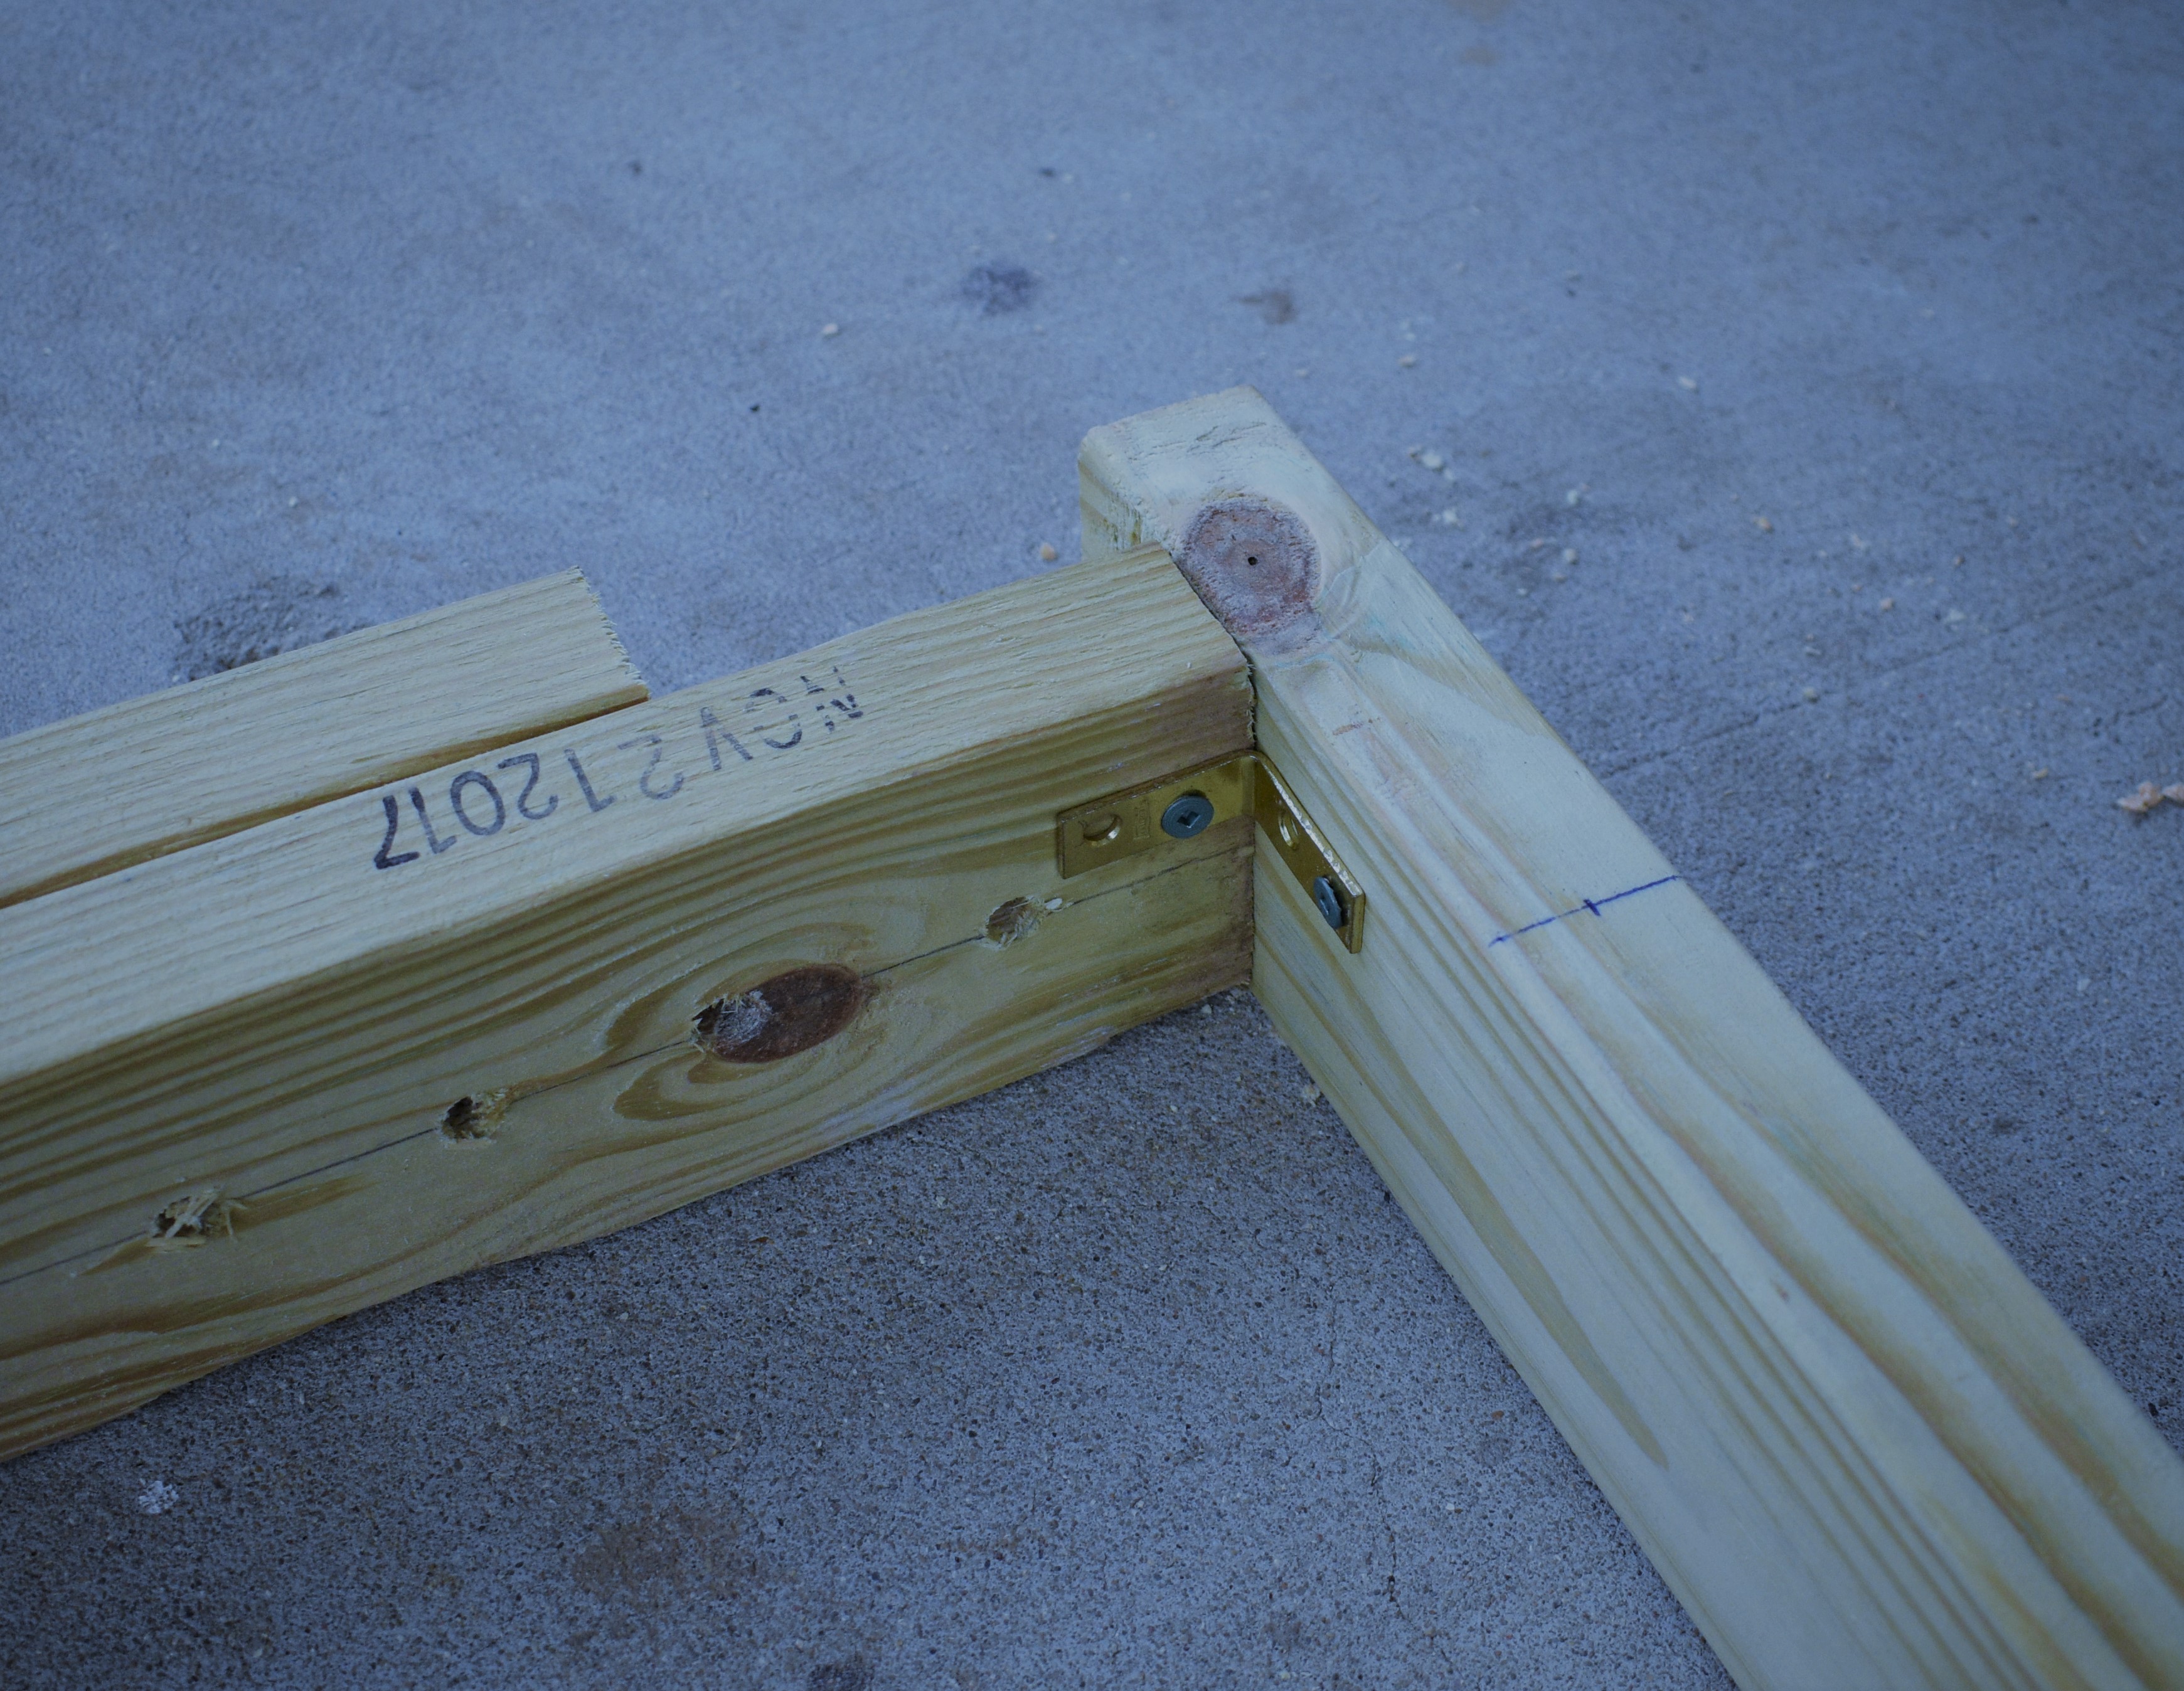
- Line up all the edges of the sections and using your framing triangle check the square in each corner as you go. It might take a few times around the box to get 90 degree angles everywhere. Just take your time make sure it is all straight. You want the adjustable sections to be the same on each side where they attach to the long section. One 8’ side will be screwed to the shorter side right at the end of the board. The other side will be screwed to the shorter side about 2 inches in from the end of each board. This allows the frame to collapse into a sturdy storage shape.
- Now take your 36”+ material clamps and clamp the short sides to the long sides. This will make sure they do not move as you drill all your screw holes. Recheck all corners for square once it is clamped together and adjust if needed.
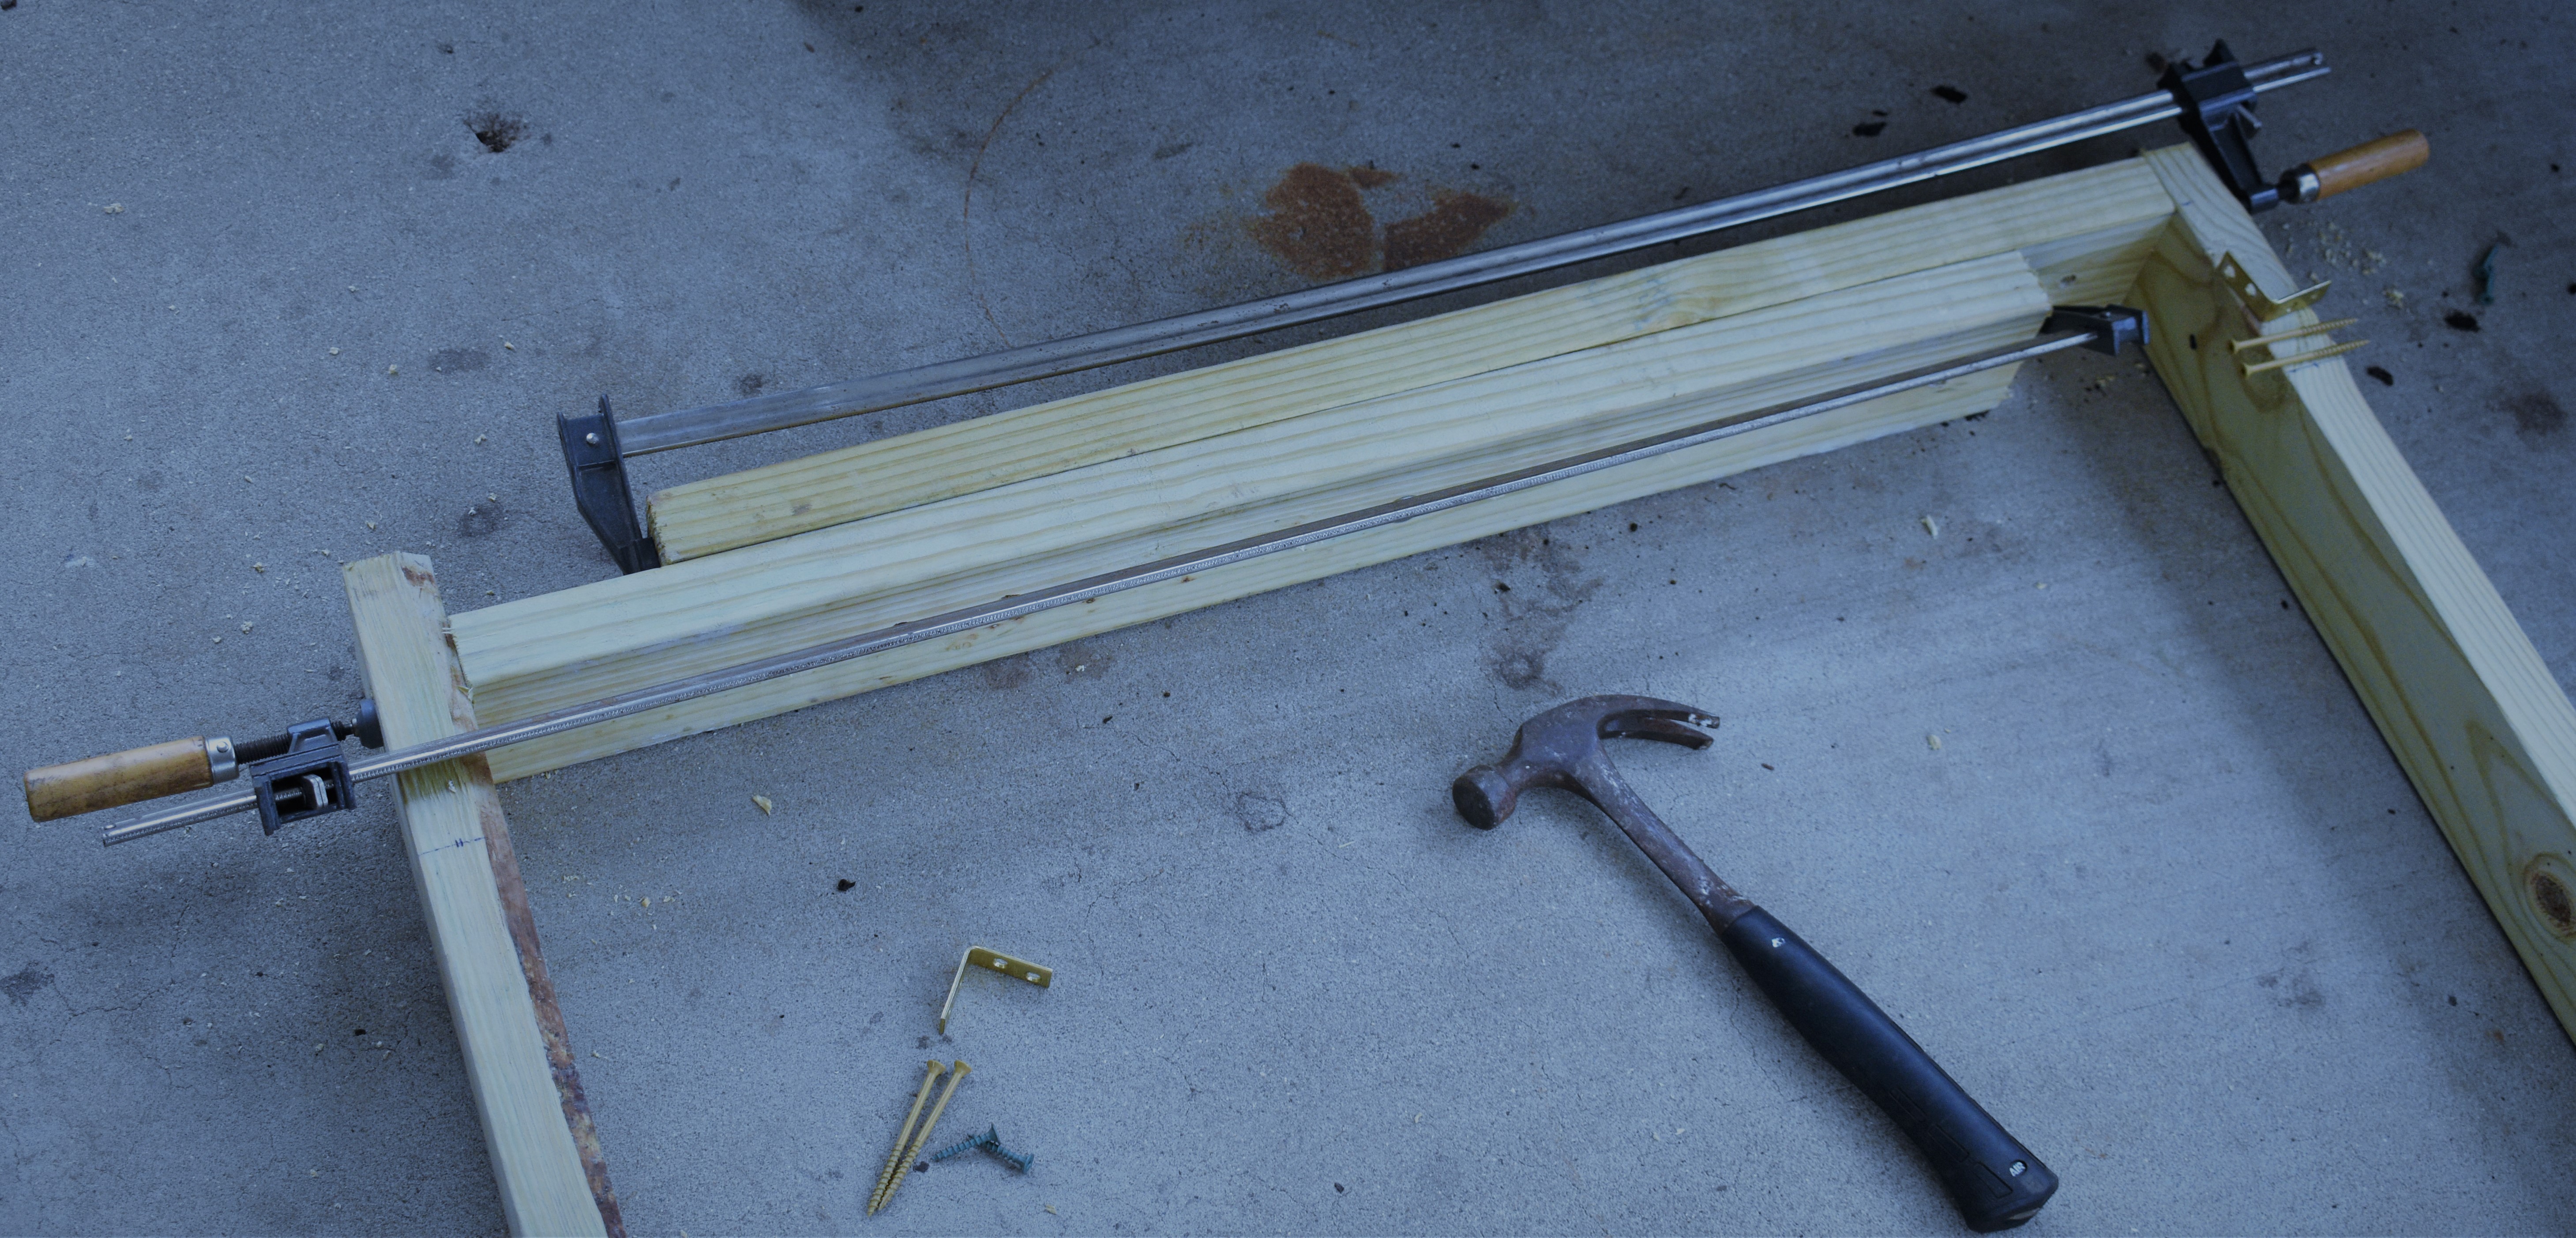
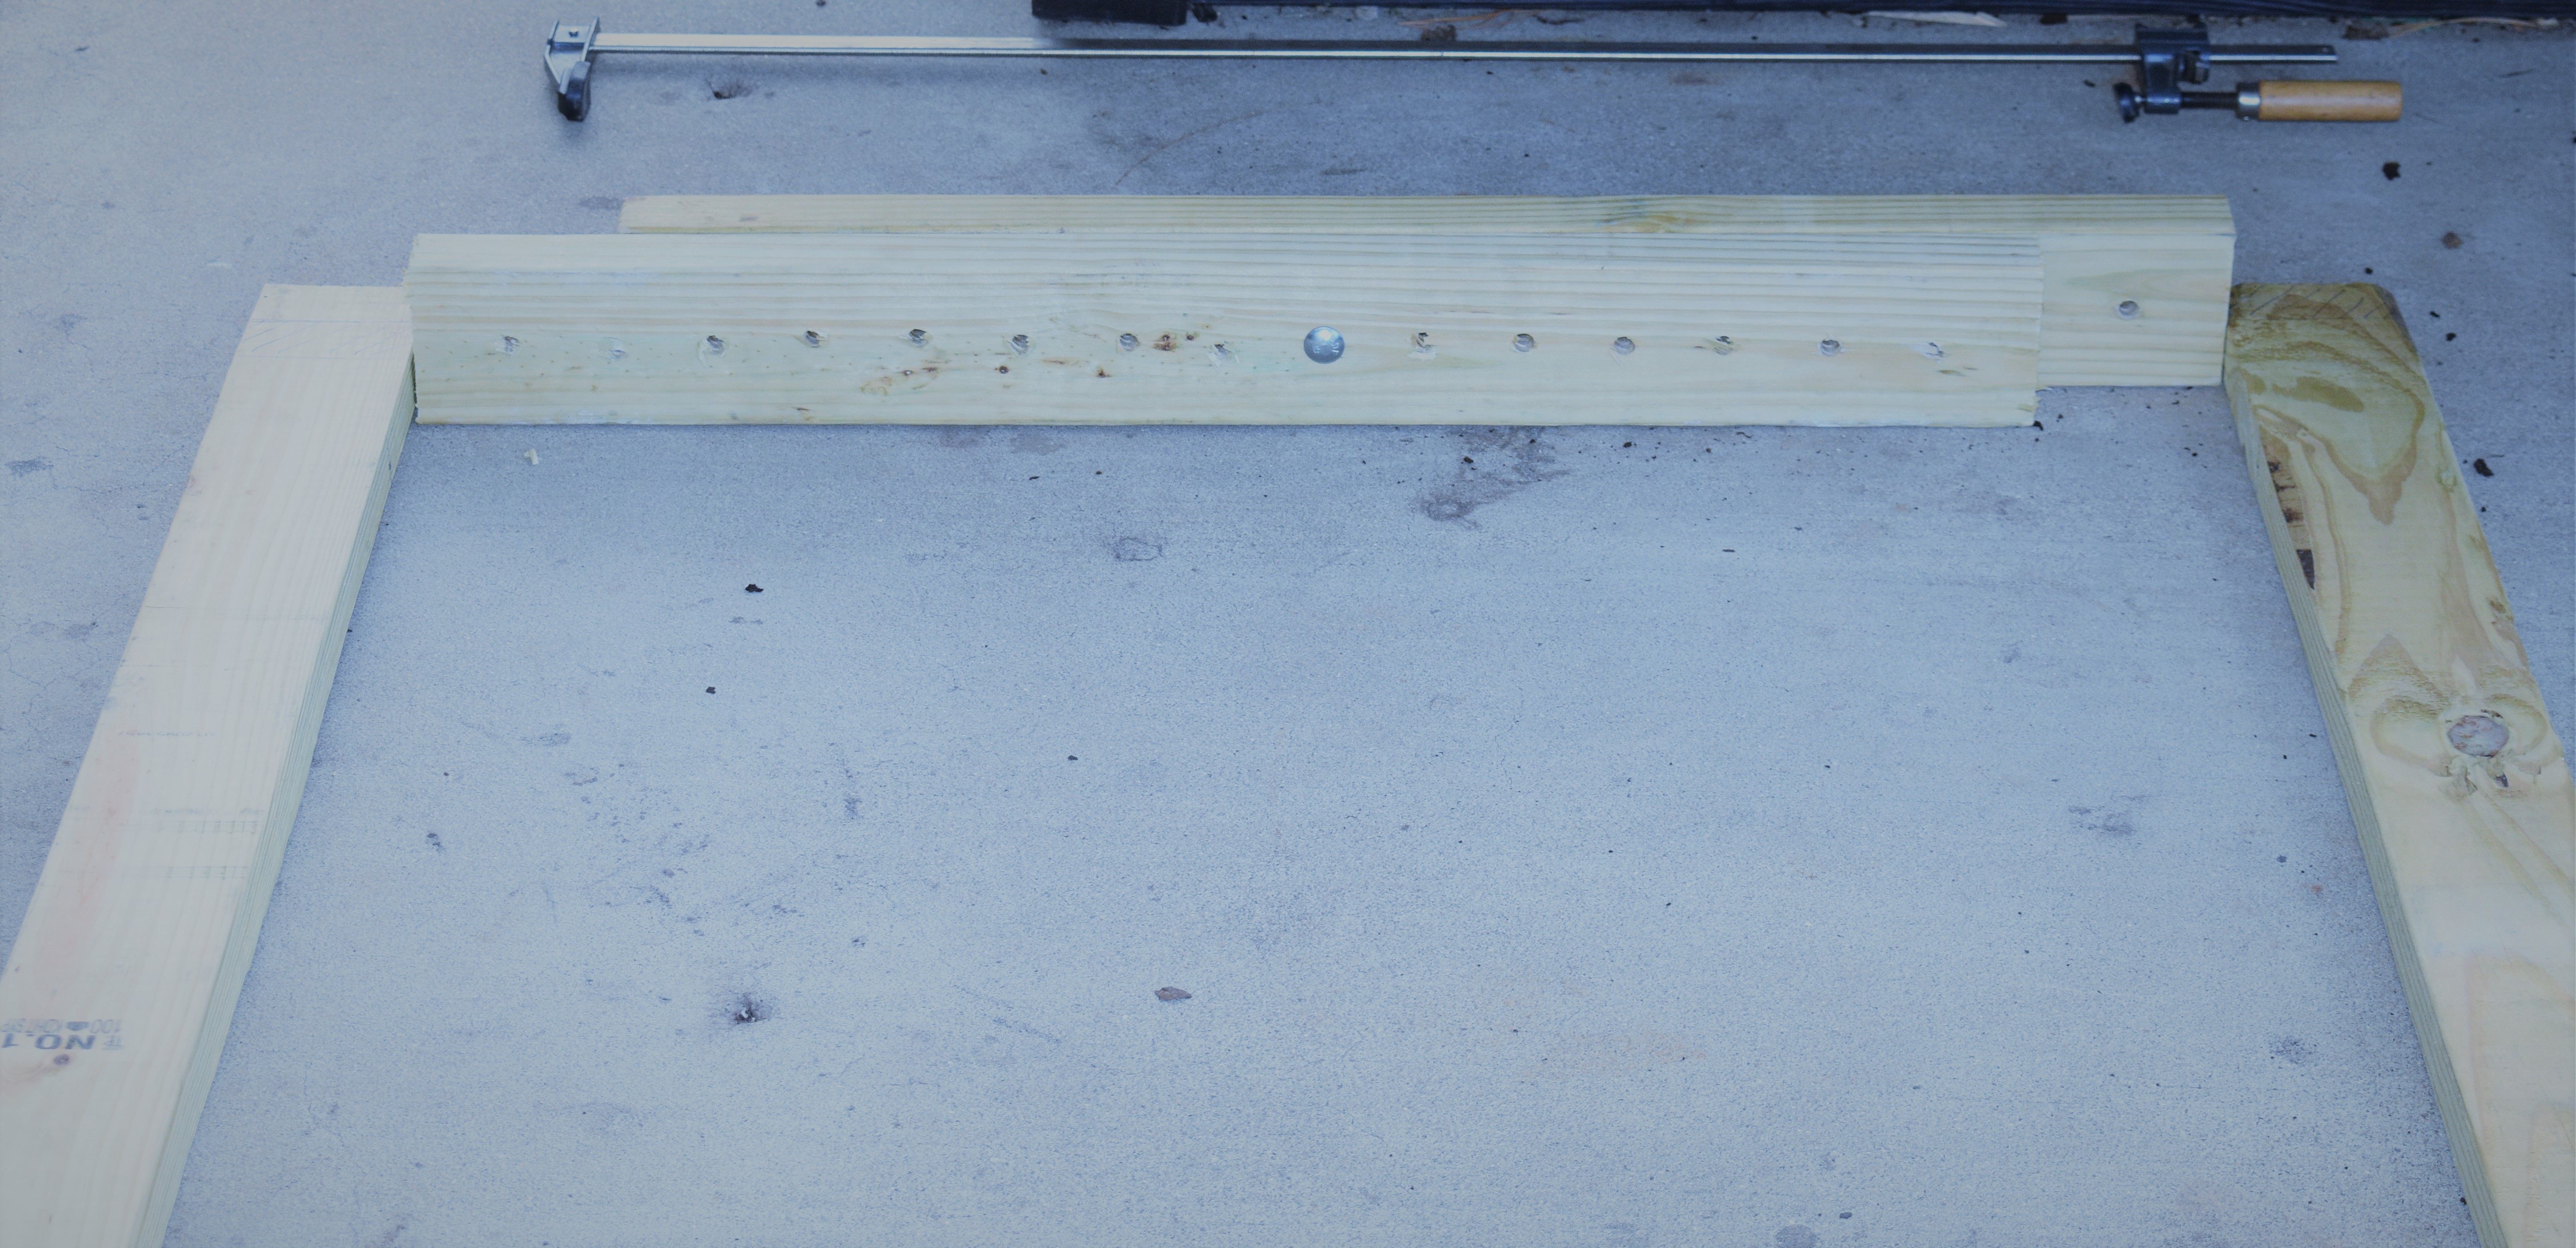
- Using your drill and the small screw drill bit with countersink, drill 2 screw holes from the outside of the long side going into the end of each short side. One hole top, one hole bottom. You will be drilling 8 holes total.
- In each of the counter sunk holes you drilled put 1 x 3” deck screw in and tighten with drill and bit.
- Go around and check your corners again real fast for square. Fix them if needed.
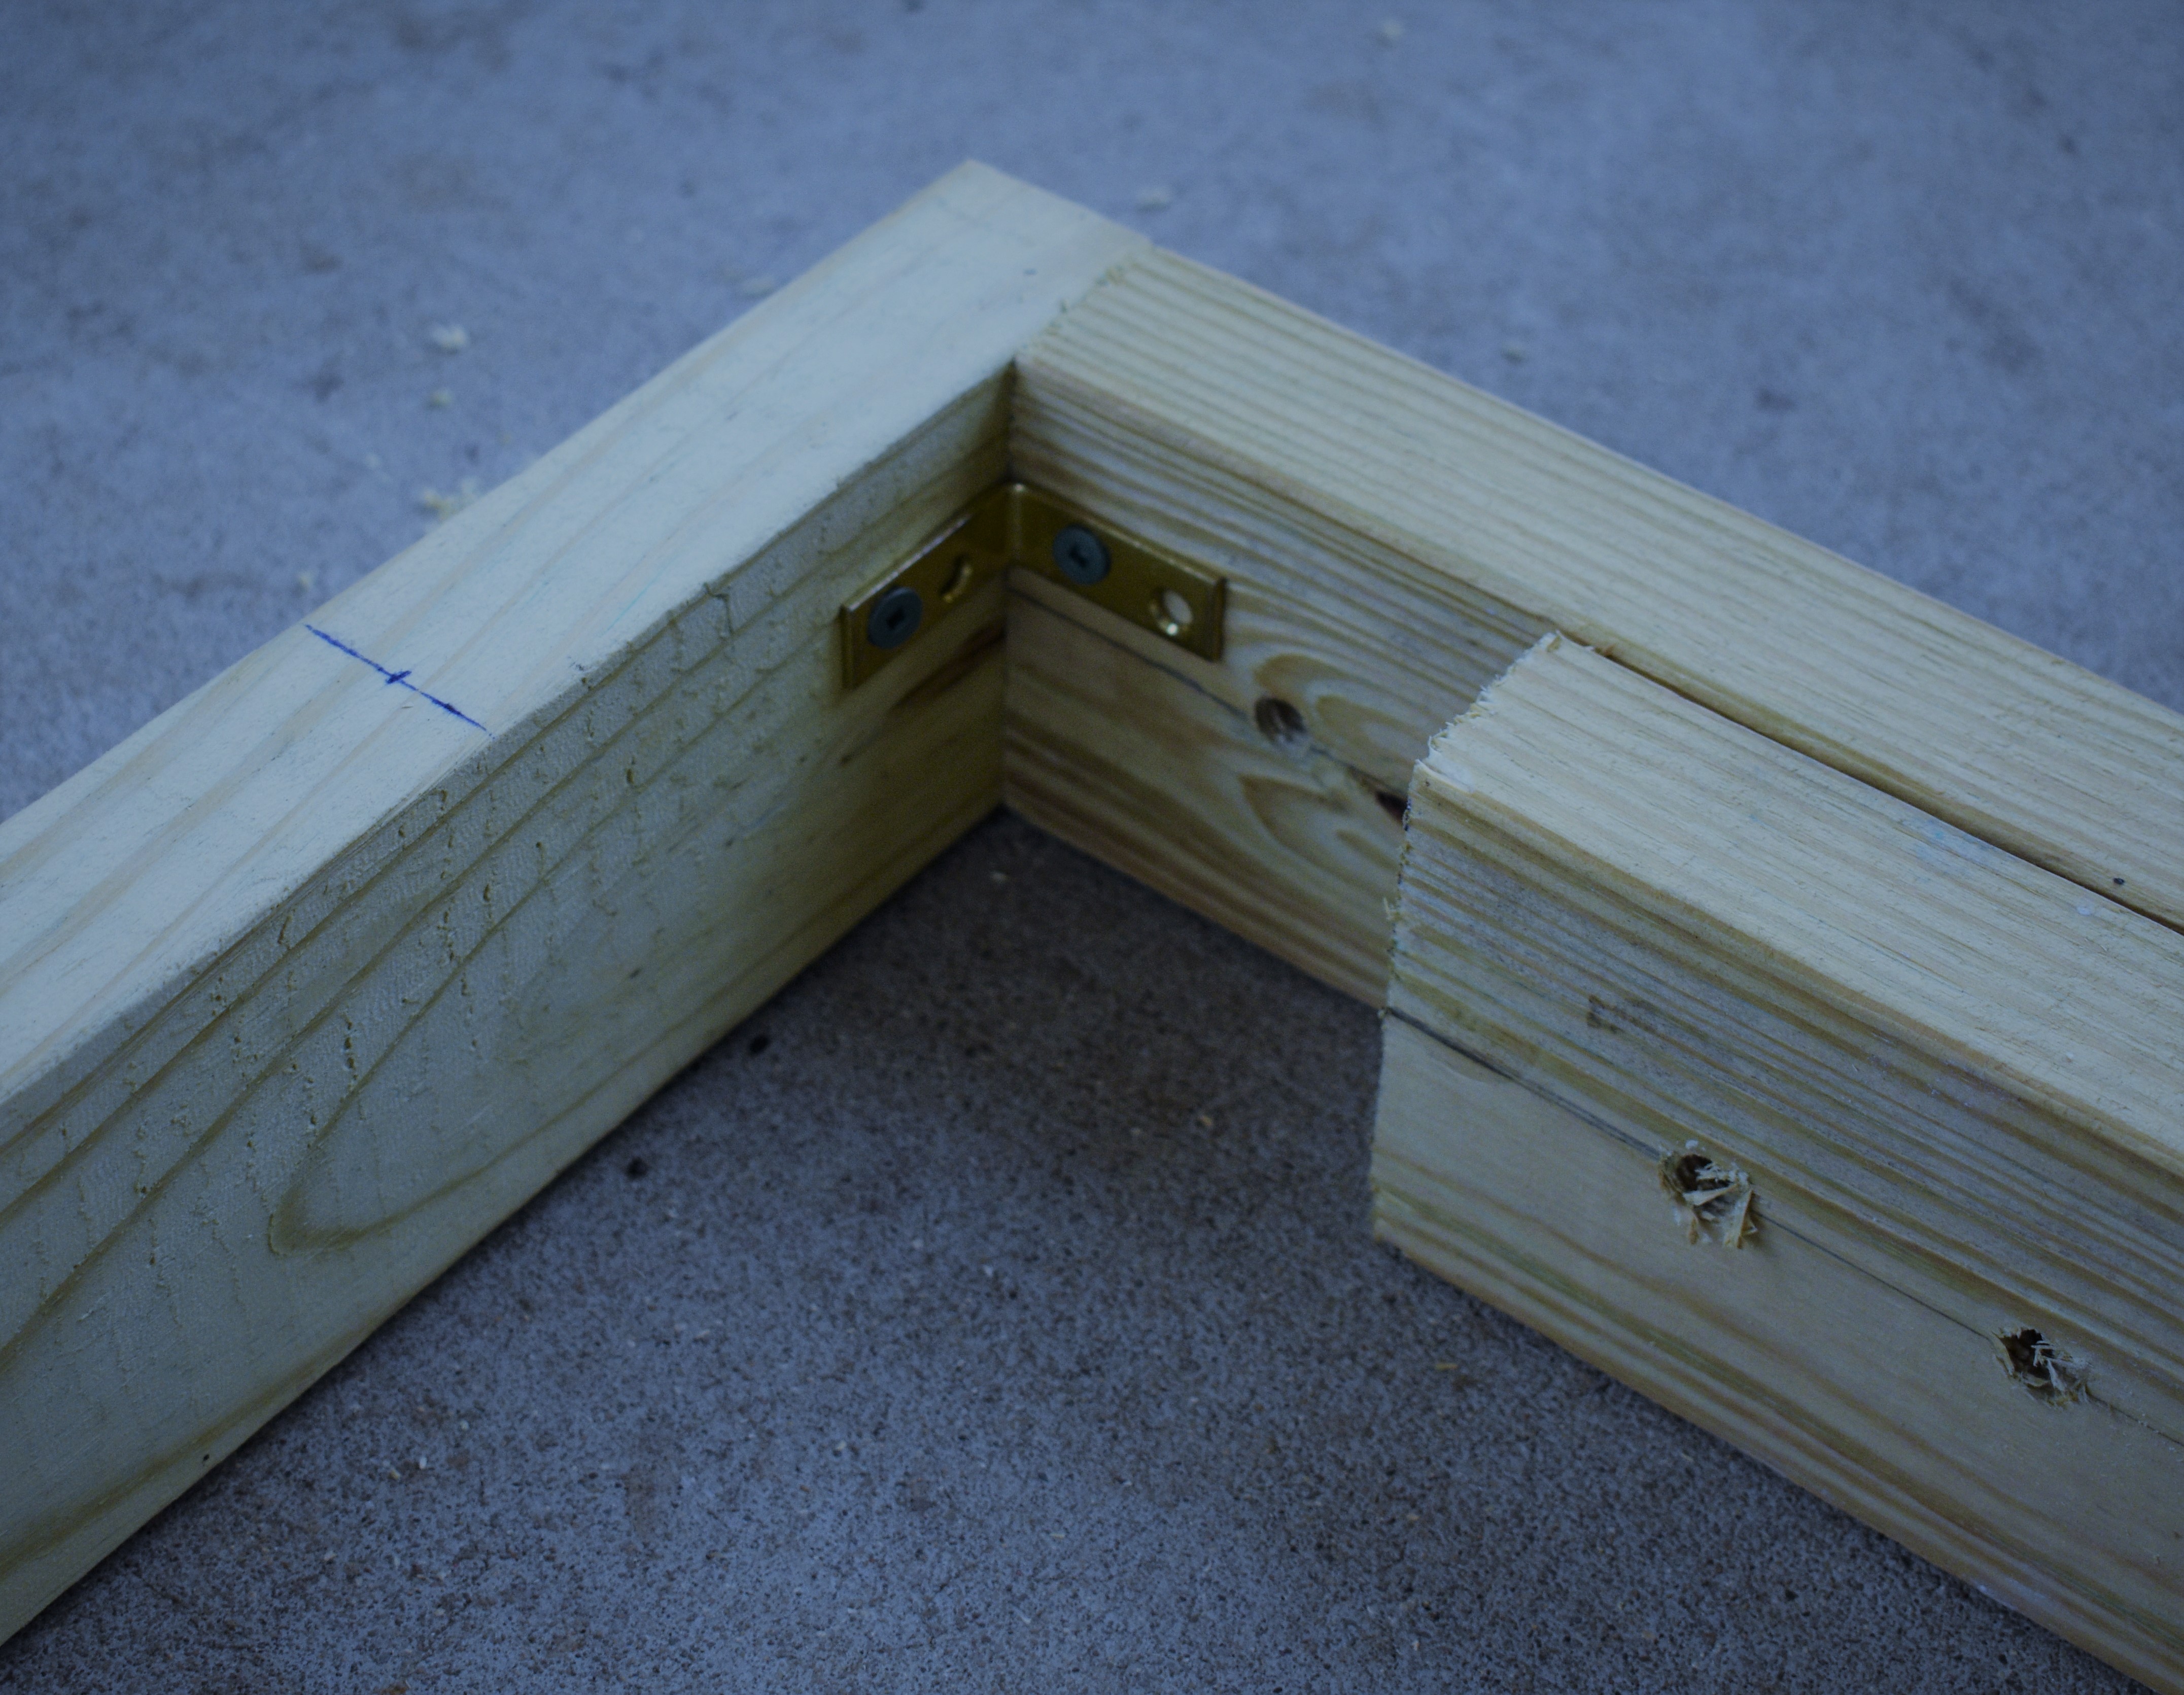
- Take your L-brackets and on the inside of each corner using your <1.5” screws attach them. This will give the frame some added rigidity and hold its square better.
- Release all of the large material clamps but leave the C-Clamps in place. They will not be in the way yet.
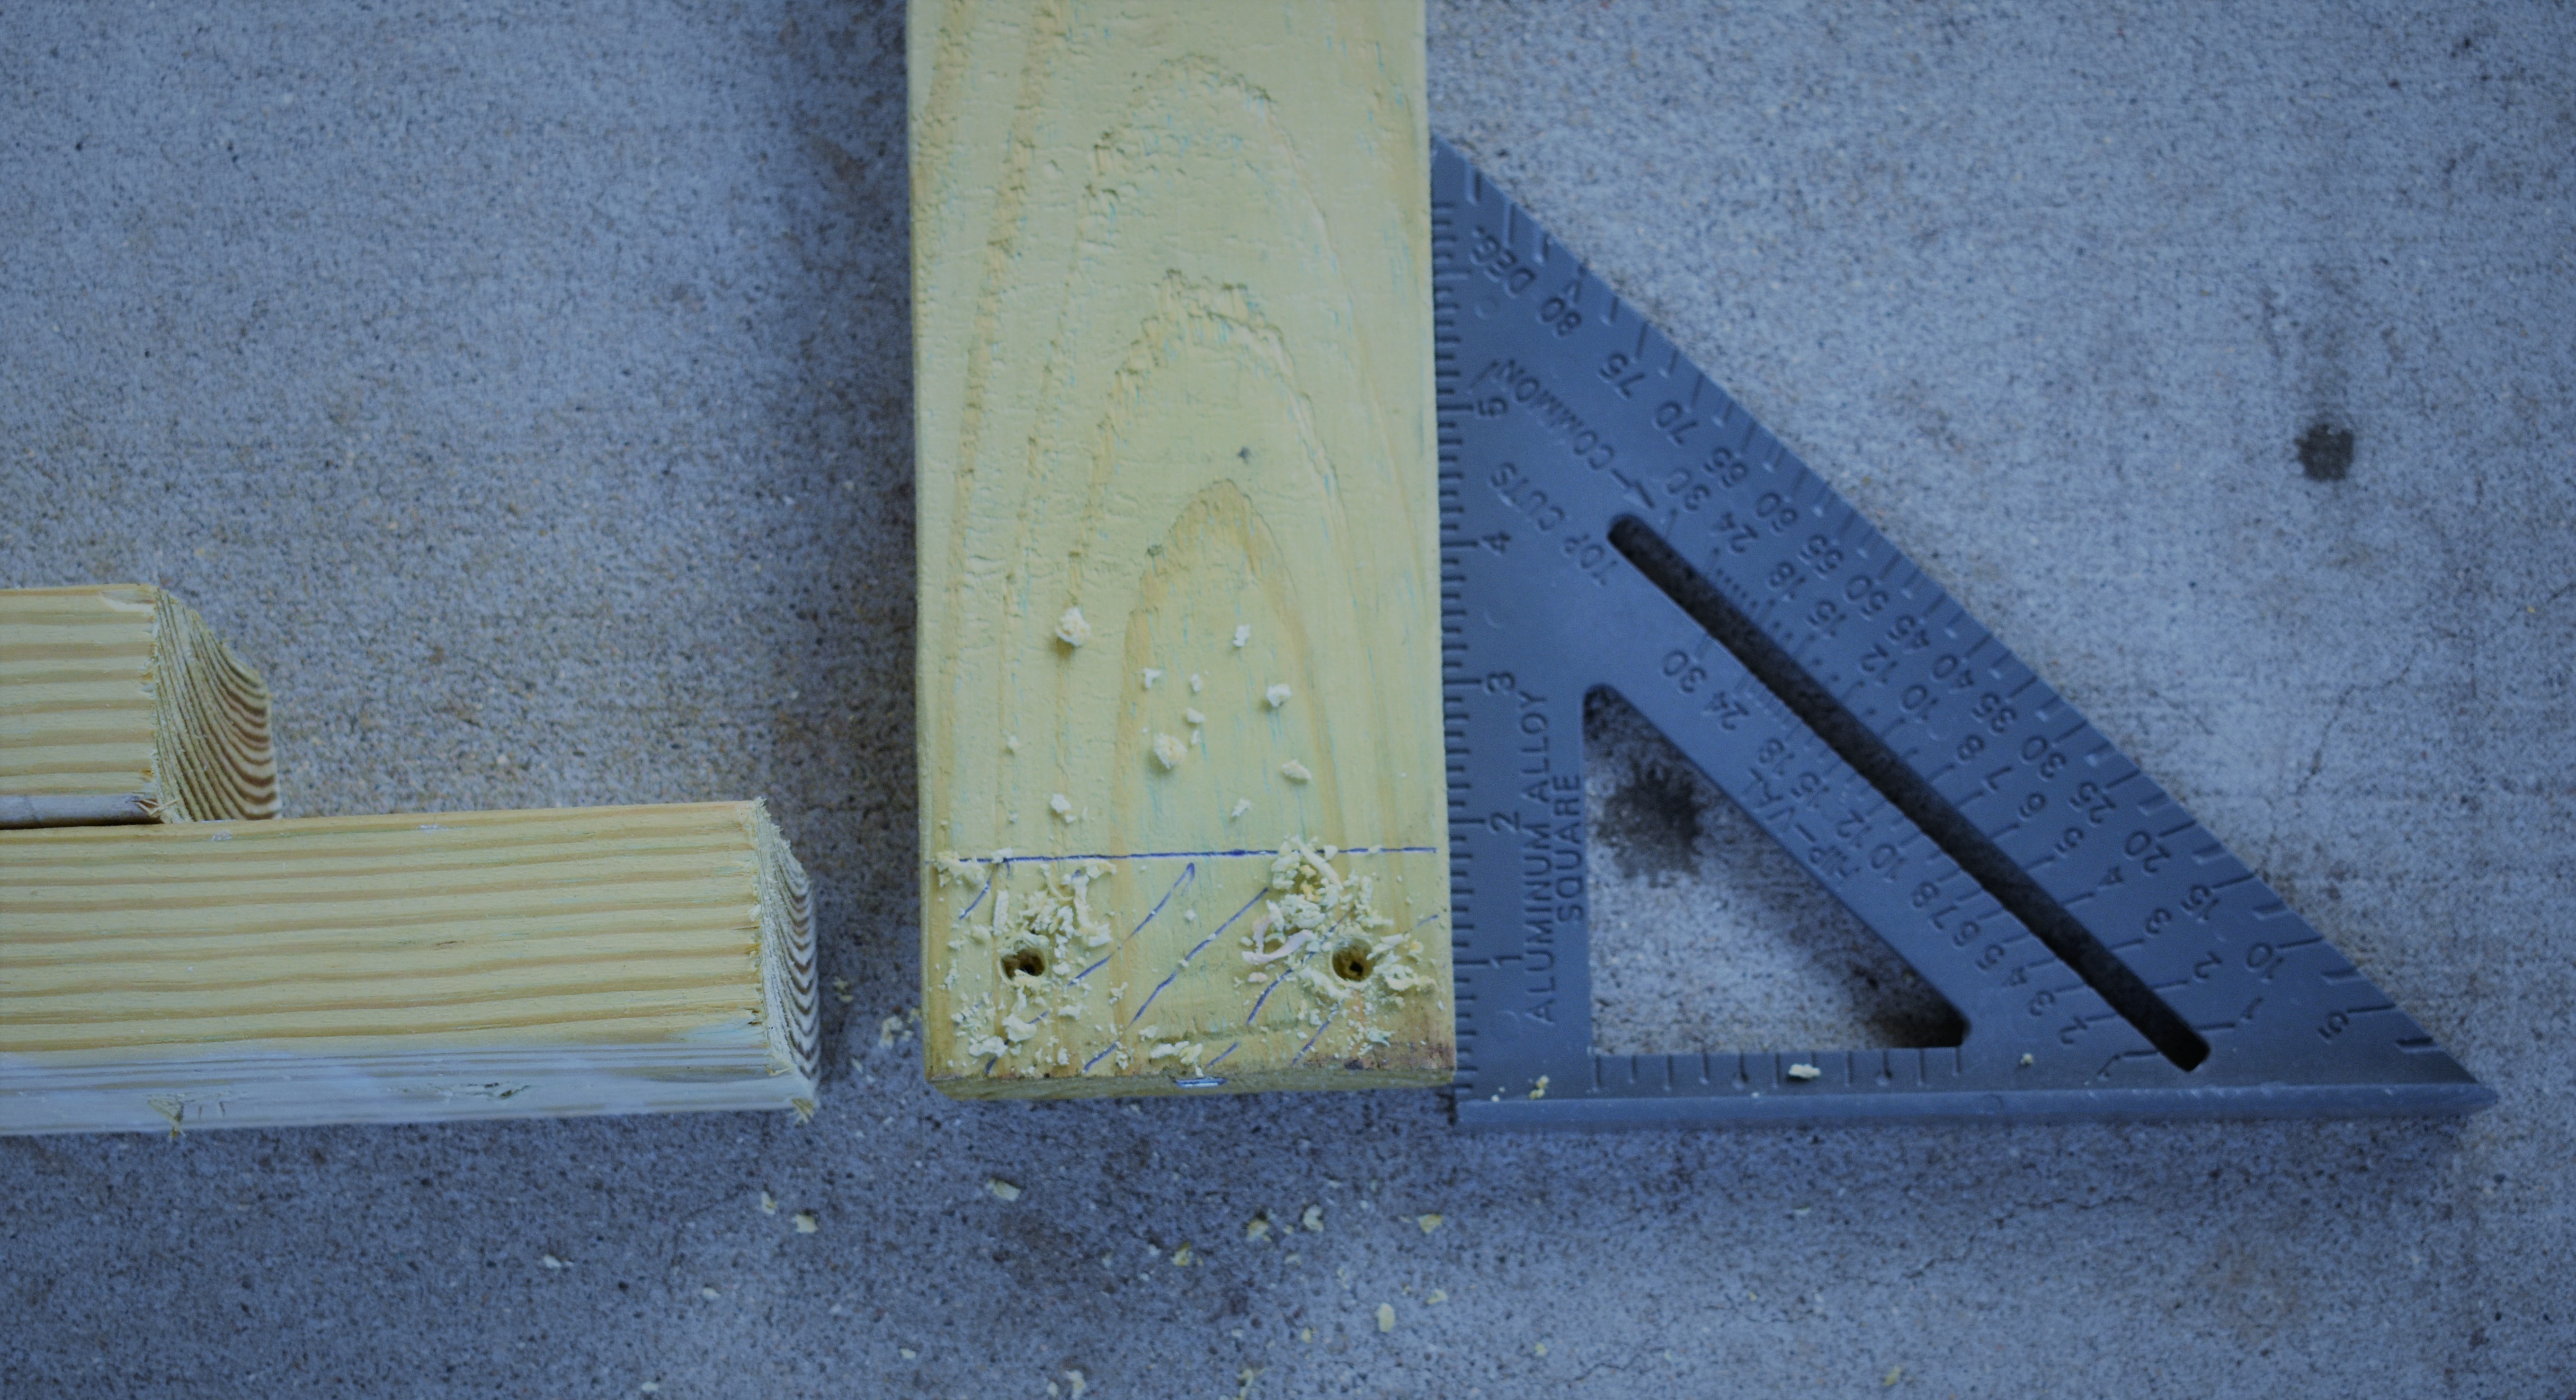
- Using your tape measure on the top side of the long boards on each corner measure 6” in from the outside of the board and make a mark. The marks should be centered to the width of the board. It is not very wide to begin with but get it as center as you can. You will be making 4 marks.
- With your 4 outside marks using your tape measure again, measure 28” in from each mark you just made and make another mark. Center just like the last one. You are making 4 marks again.
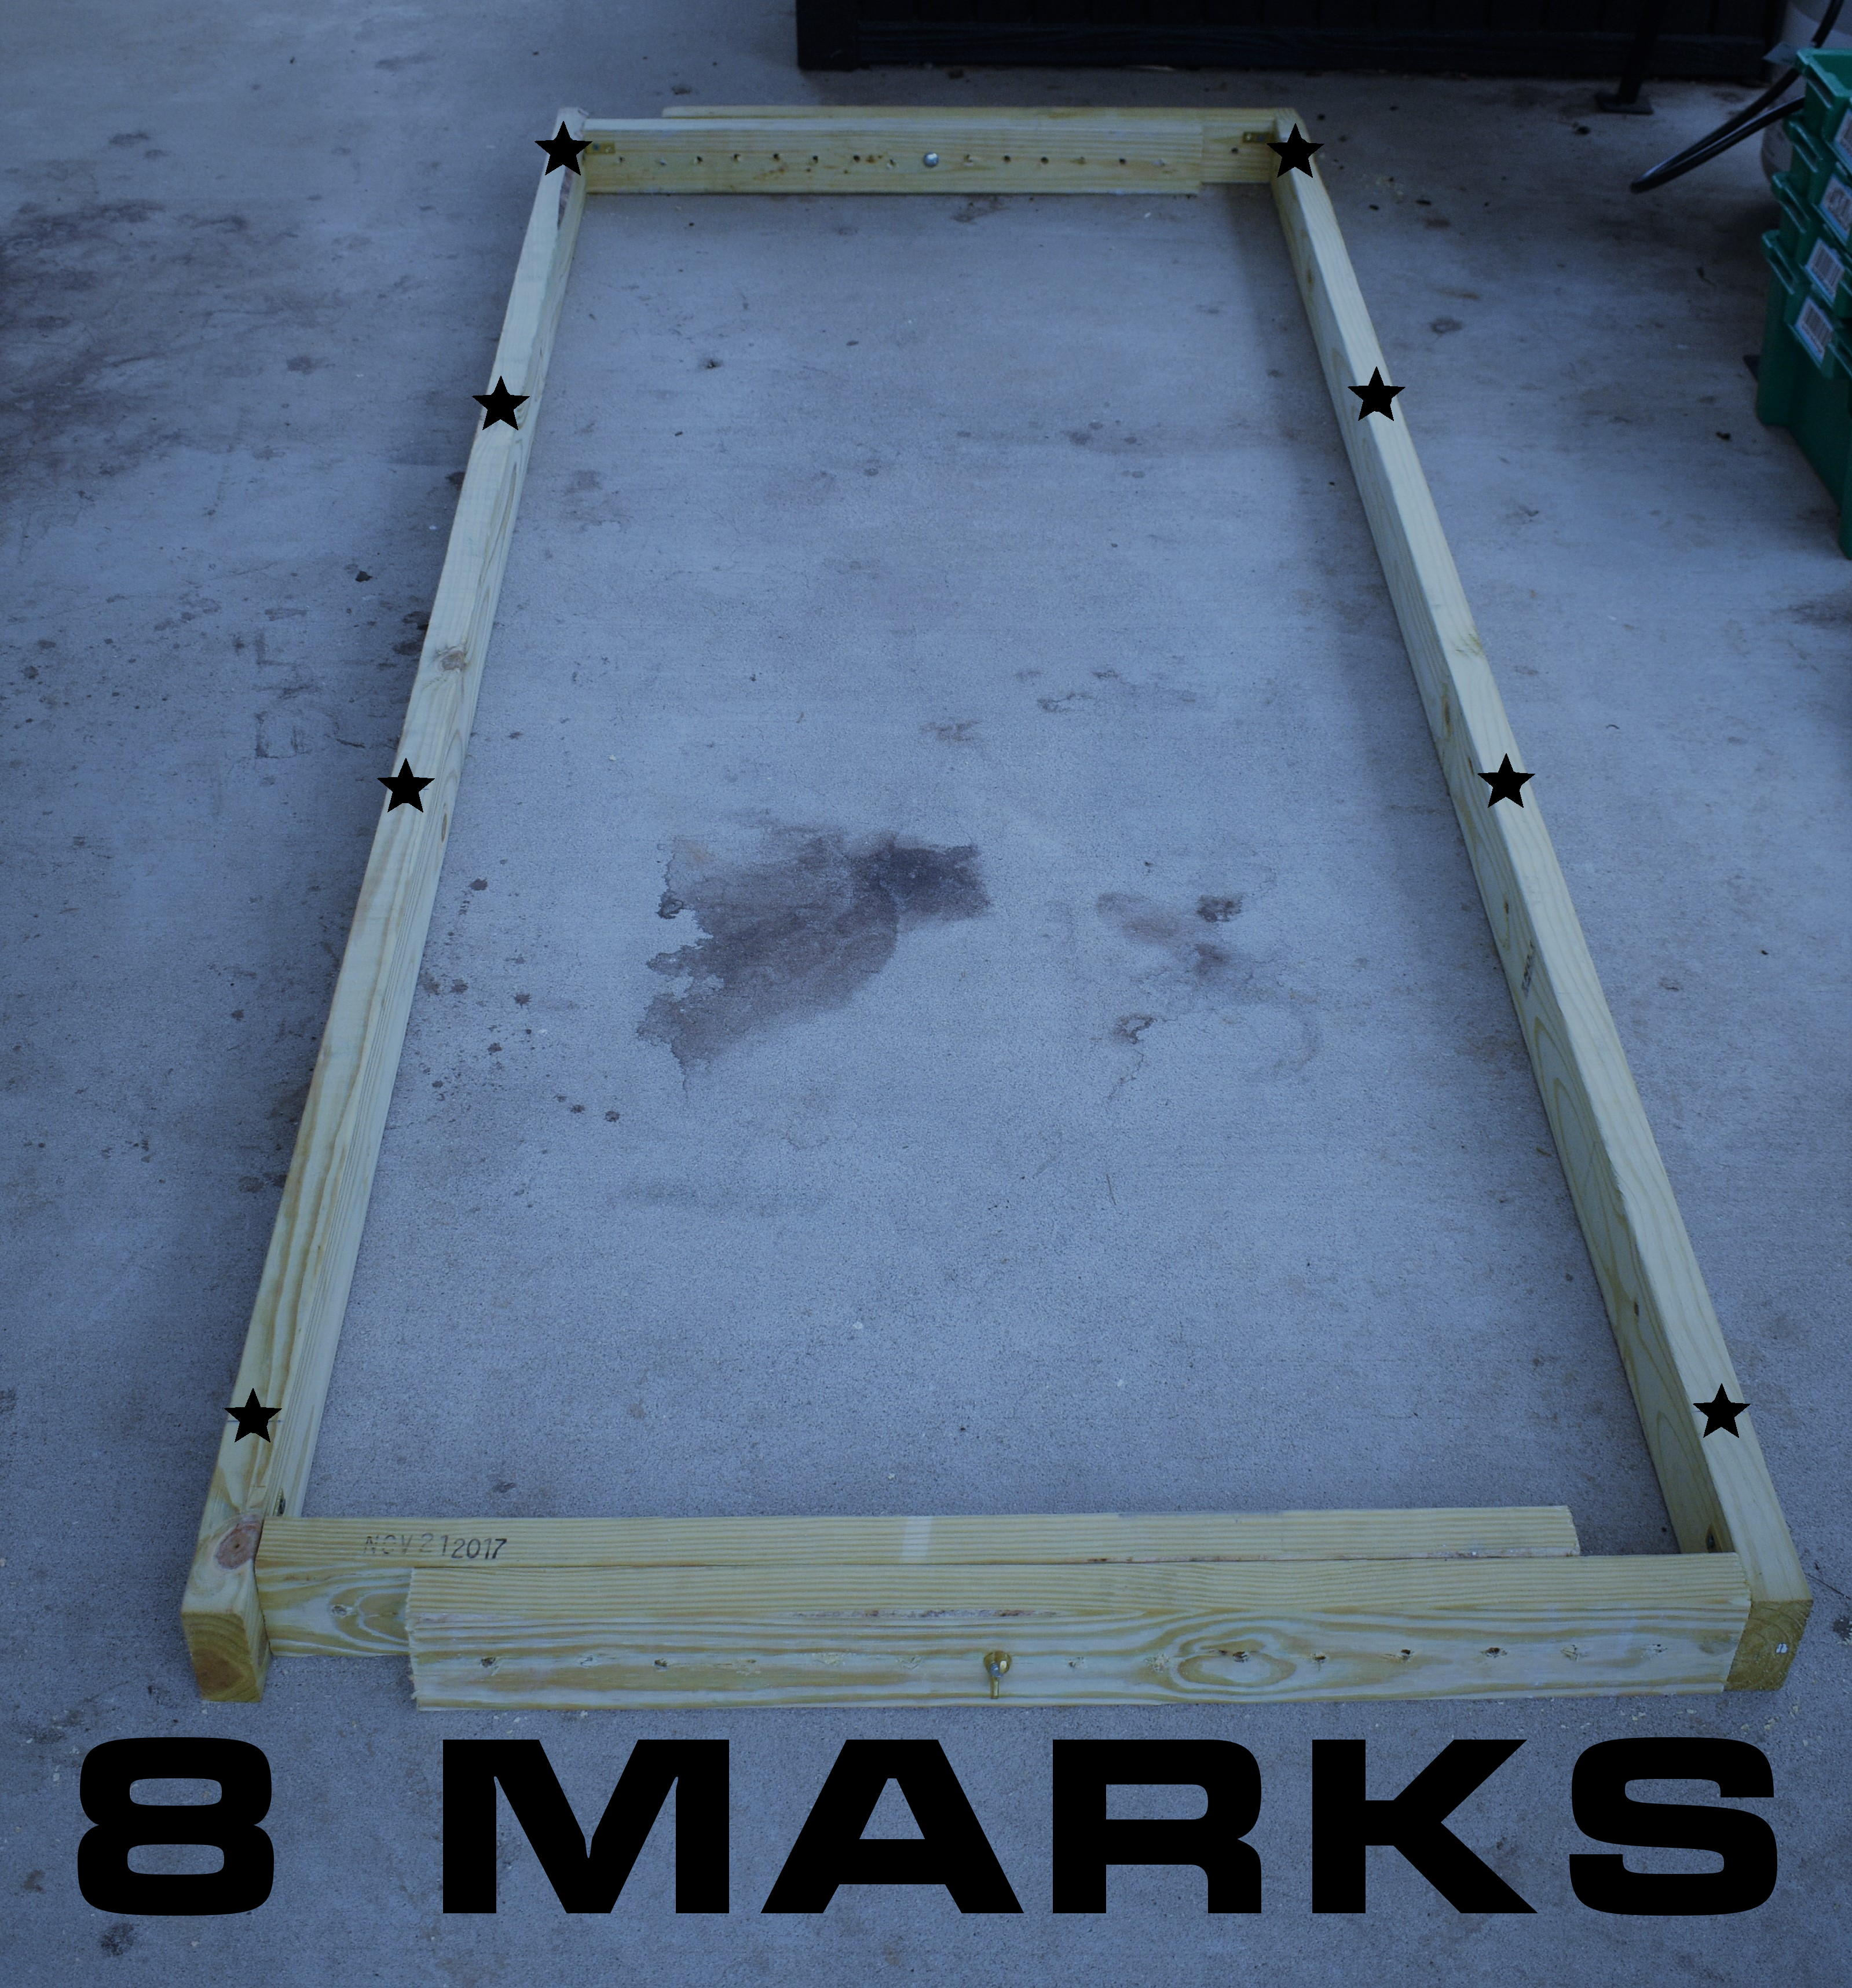
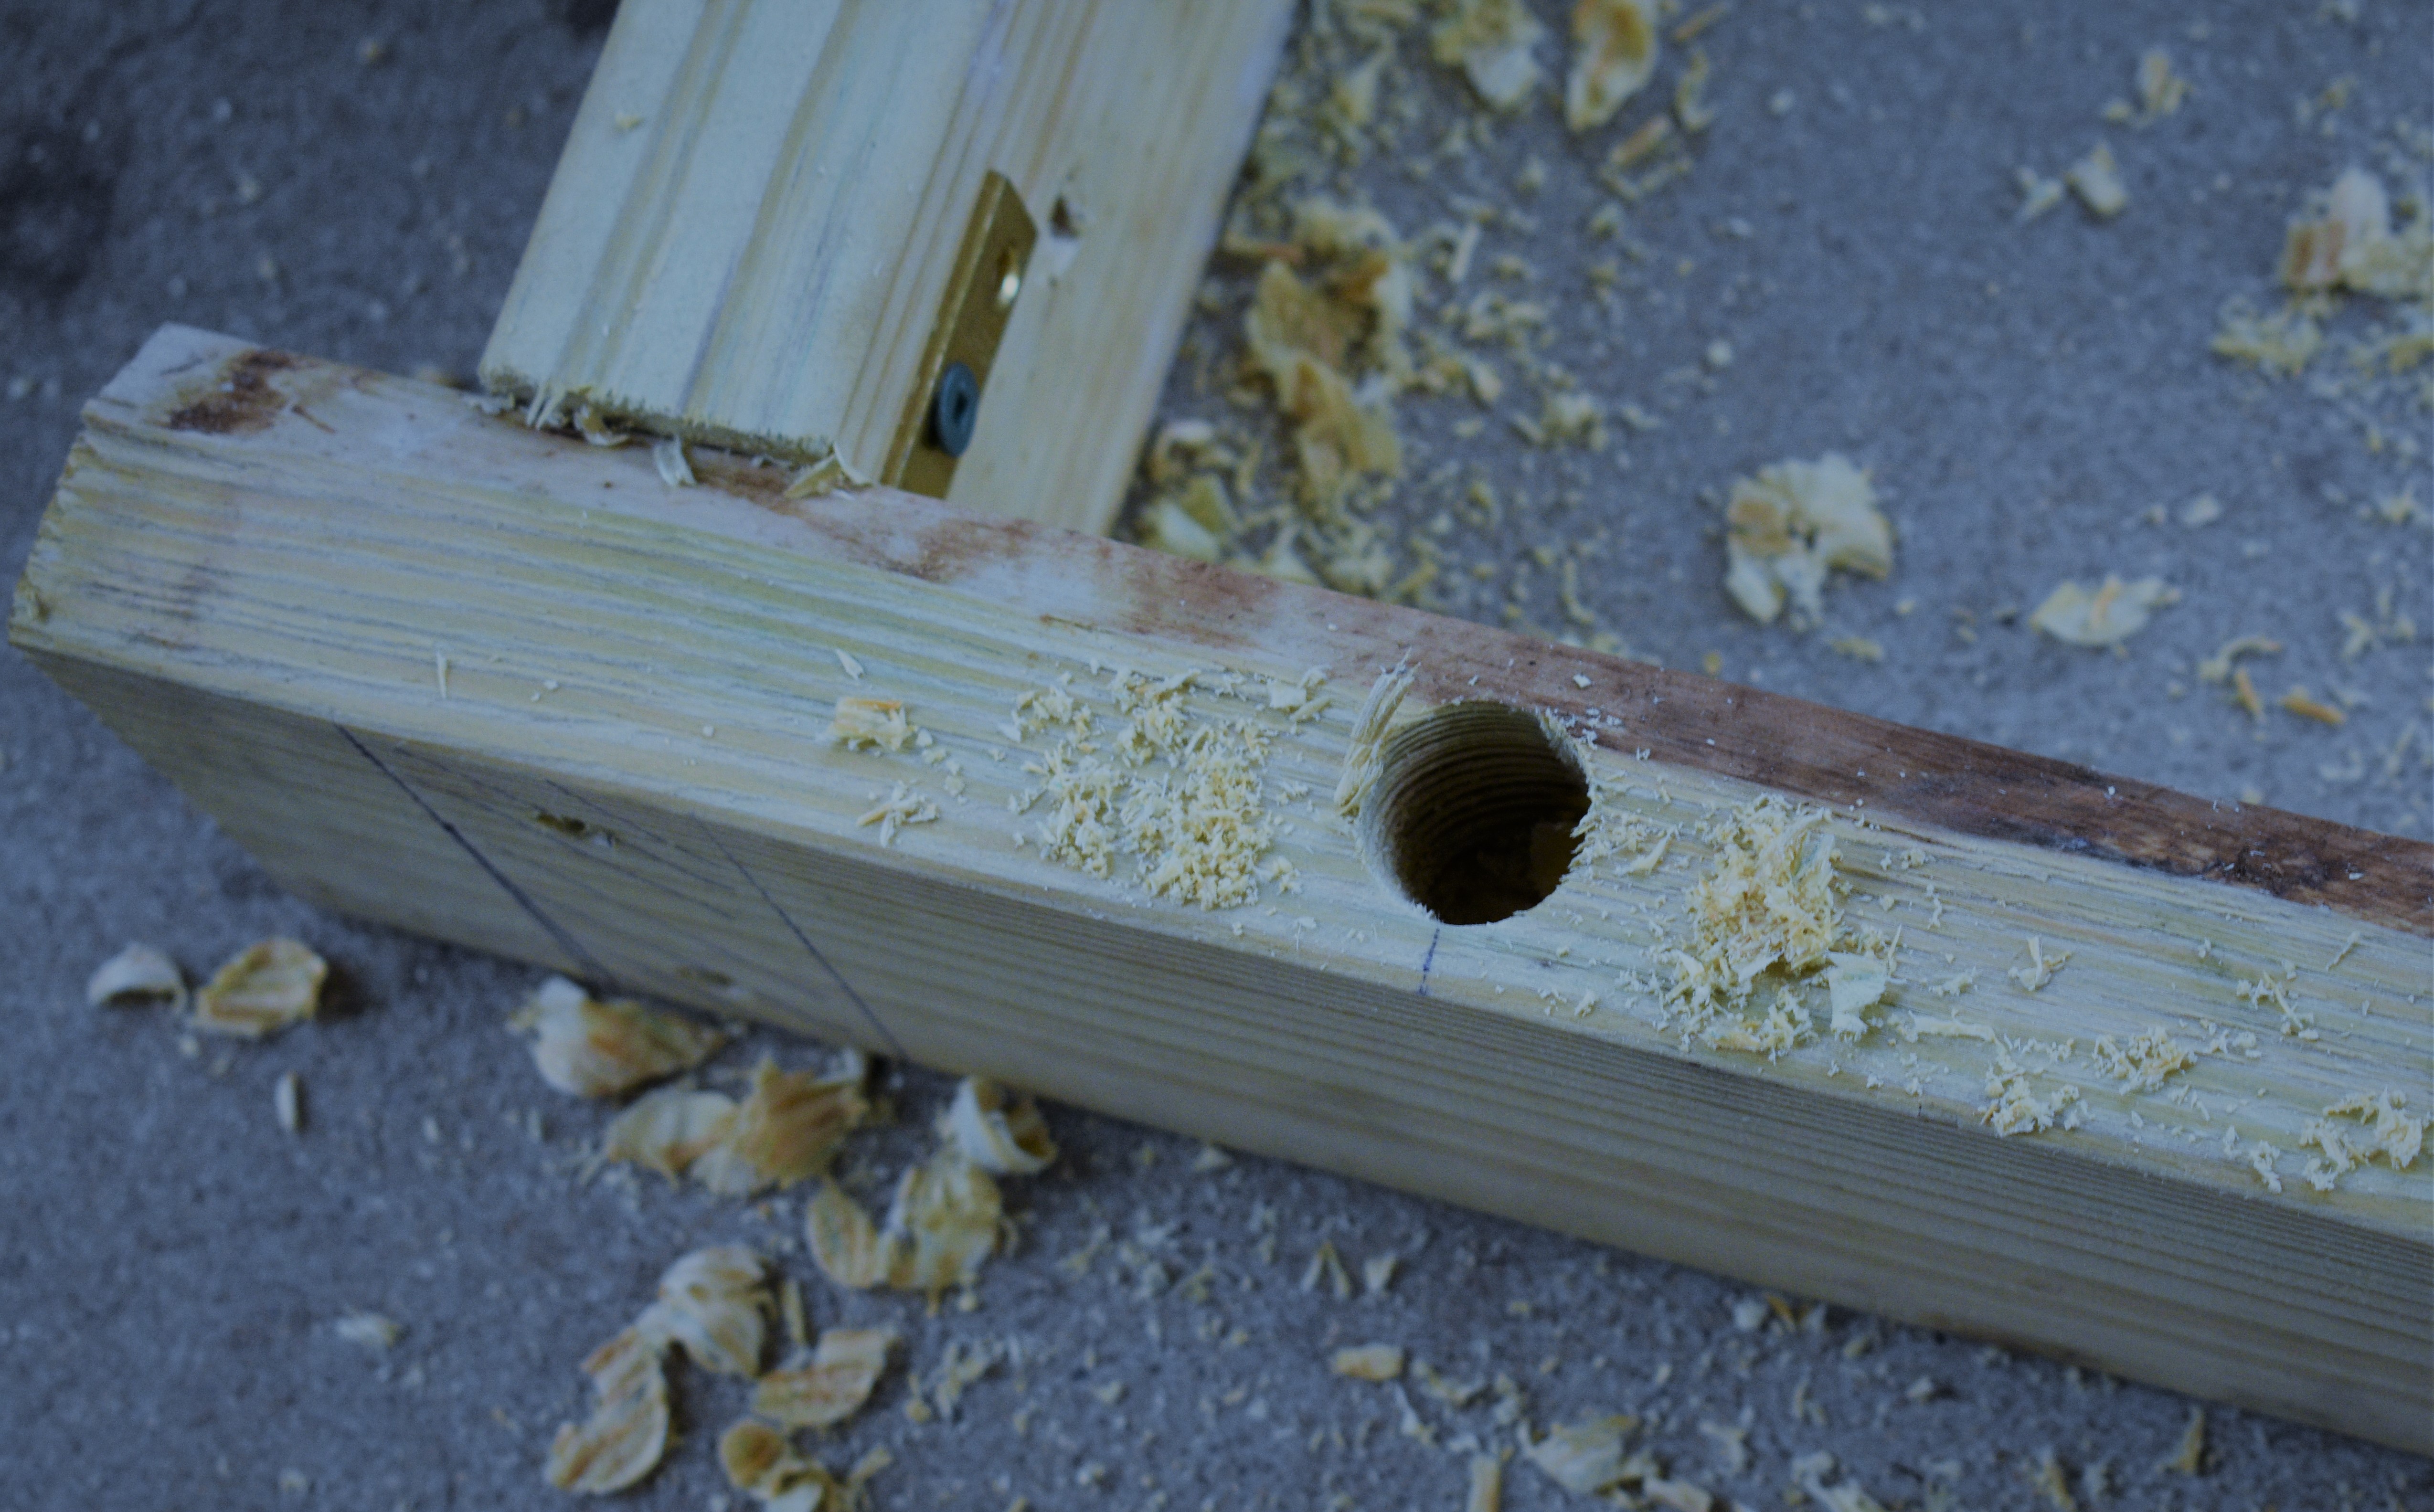
- With all 8 marks in place using your ⅞” paddle drill bit make 8 holes, 1 at each mark, about 1-1.5” deep going downwards. Make sure your bit is square and in the middle. You do not want the hole going through the side of the board.
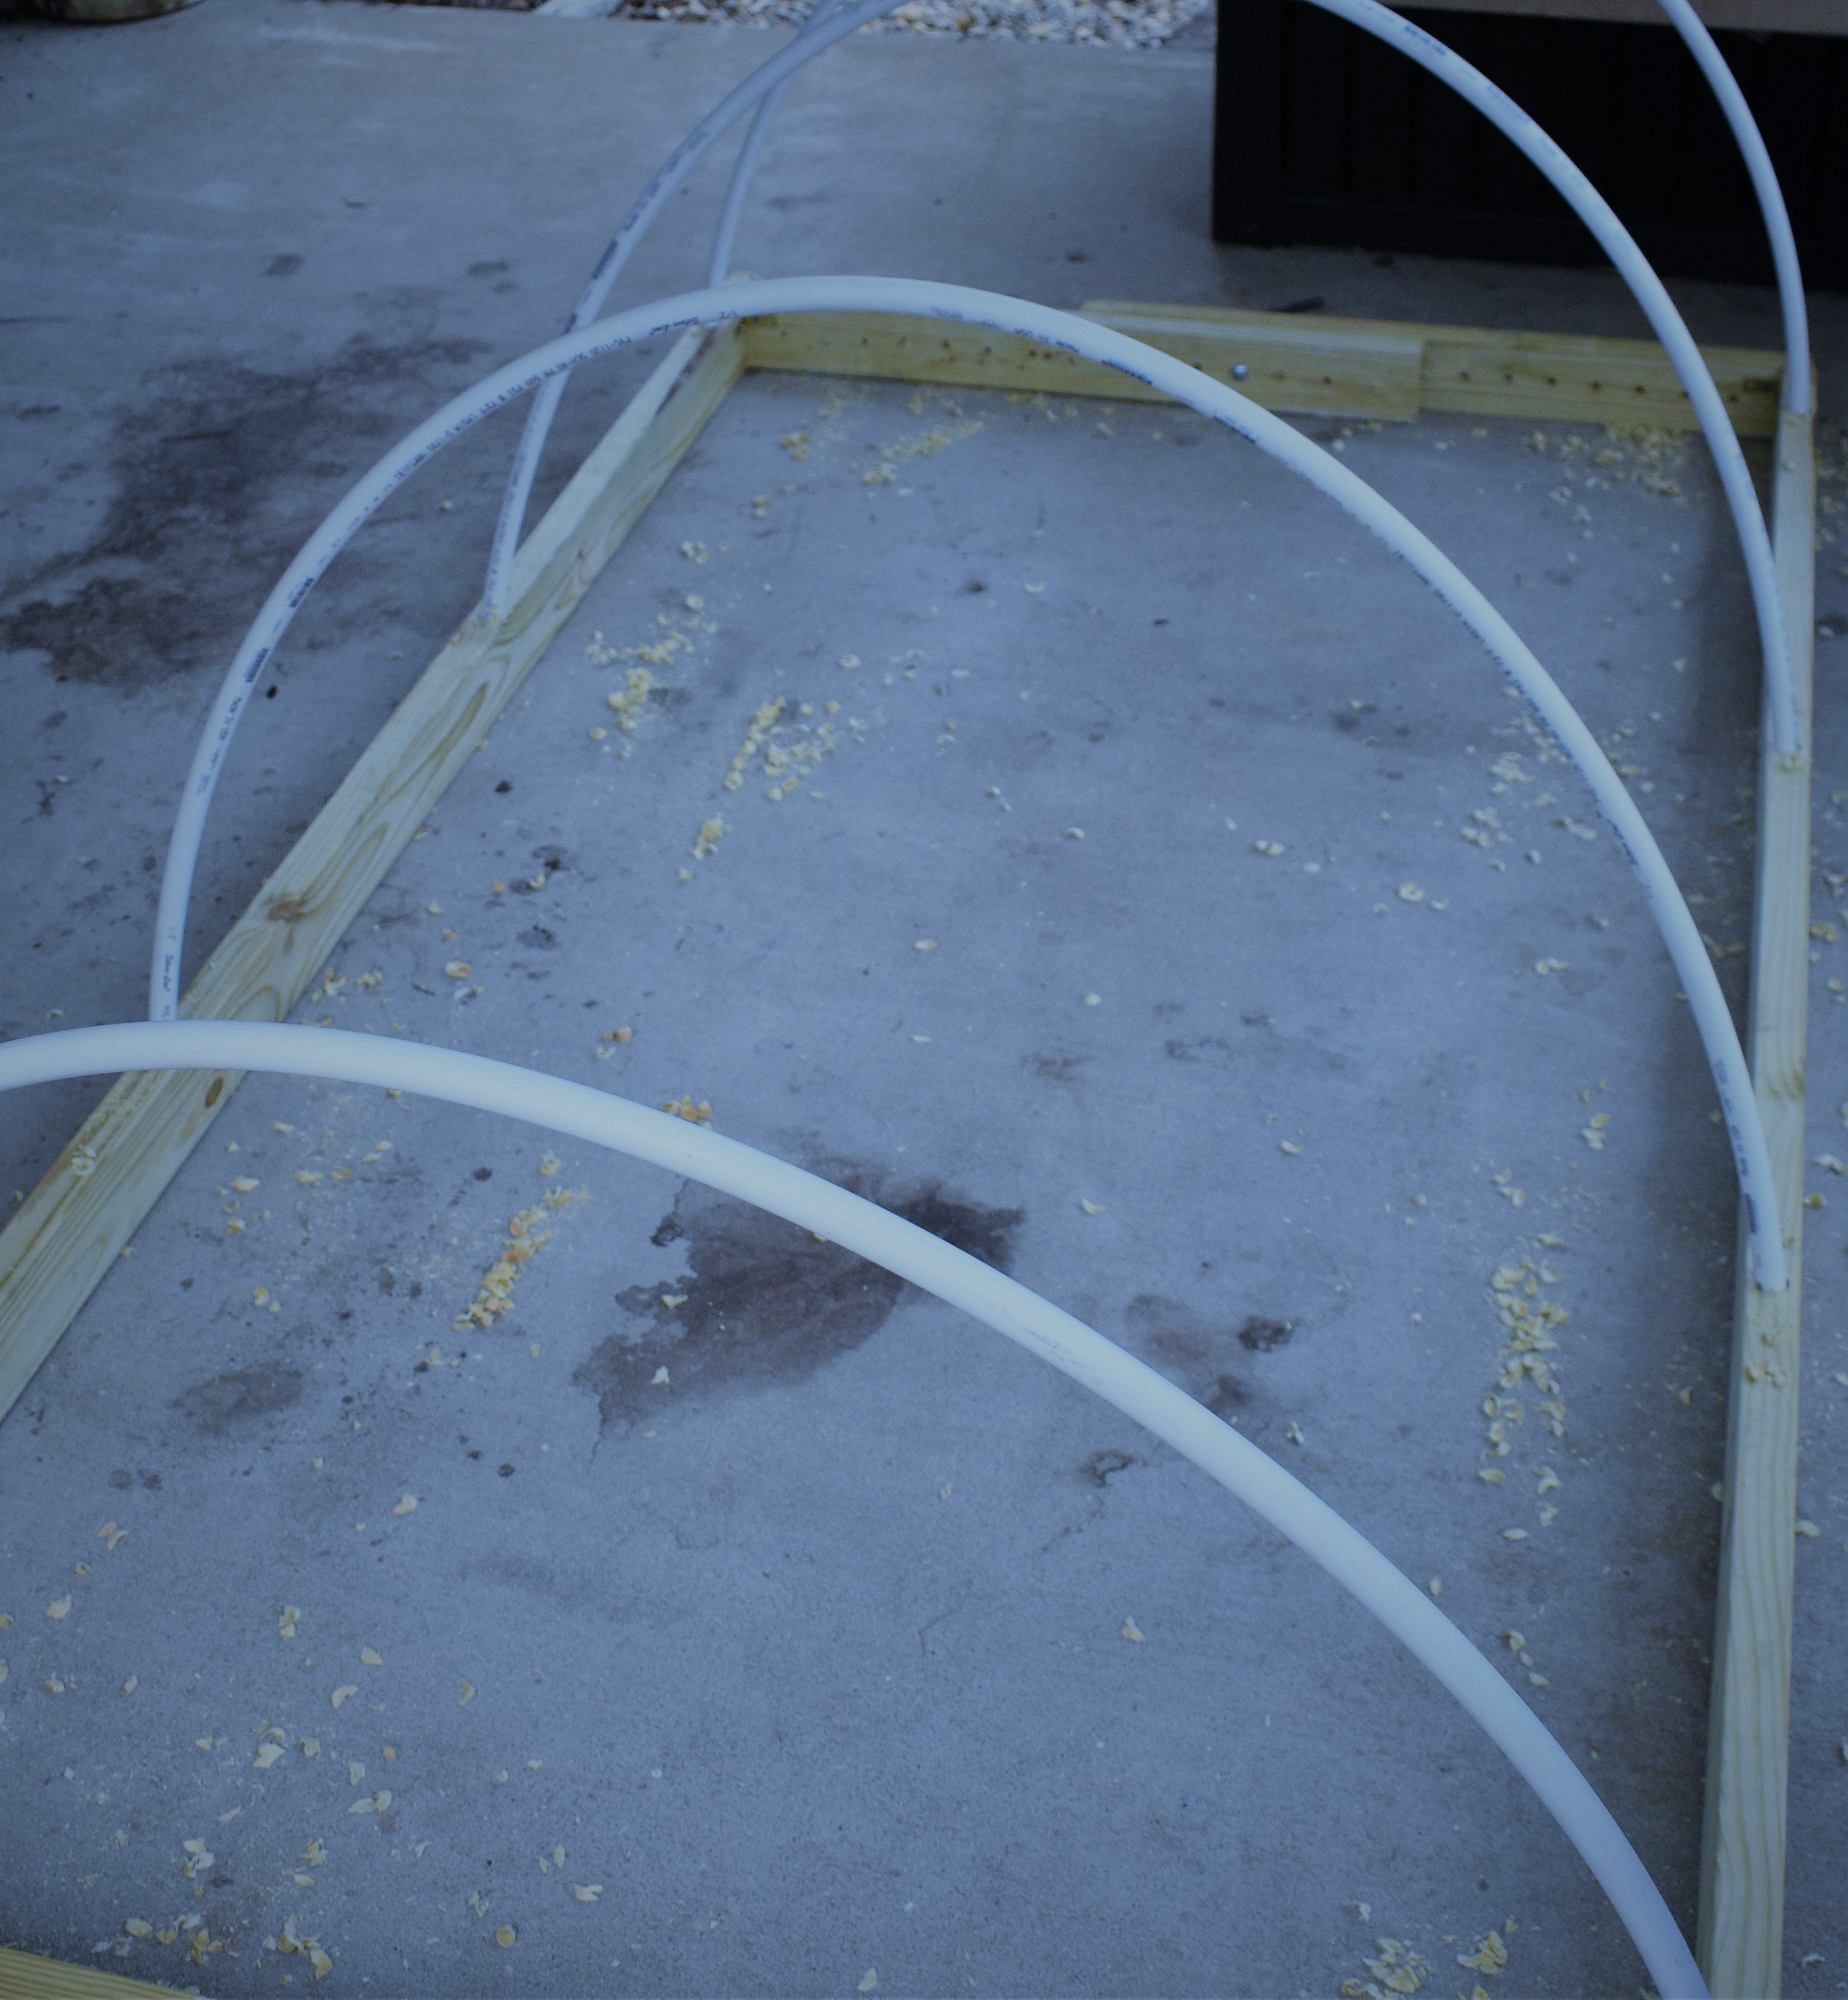
- We are going to step away from the frame for a second now and get the pieces of ½” PVC pipe. Cut the pipes to length at 6’6”. I just use the saw but there are various ways to cut PVC. By cutting them 6’6” you can use a PVC butt connector if desired and connect 2 x 3’4” scrap pieces together and trim to make another 6’6” pole. This saves PVC and again money. You need 4 poles, 6’6”.
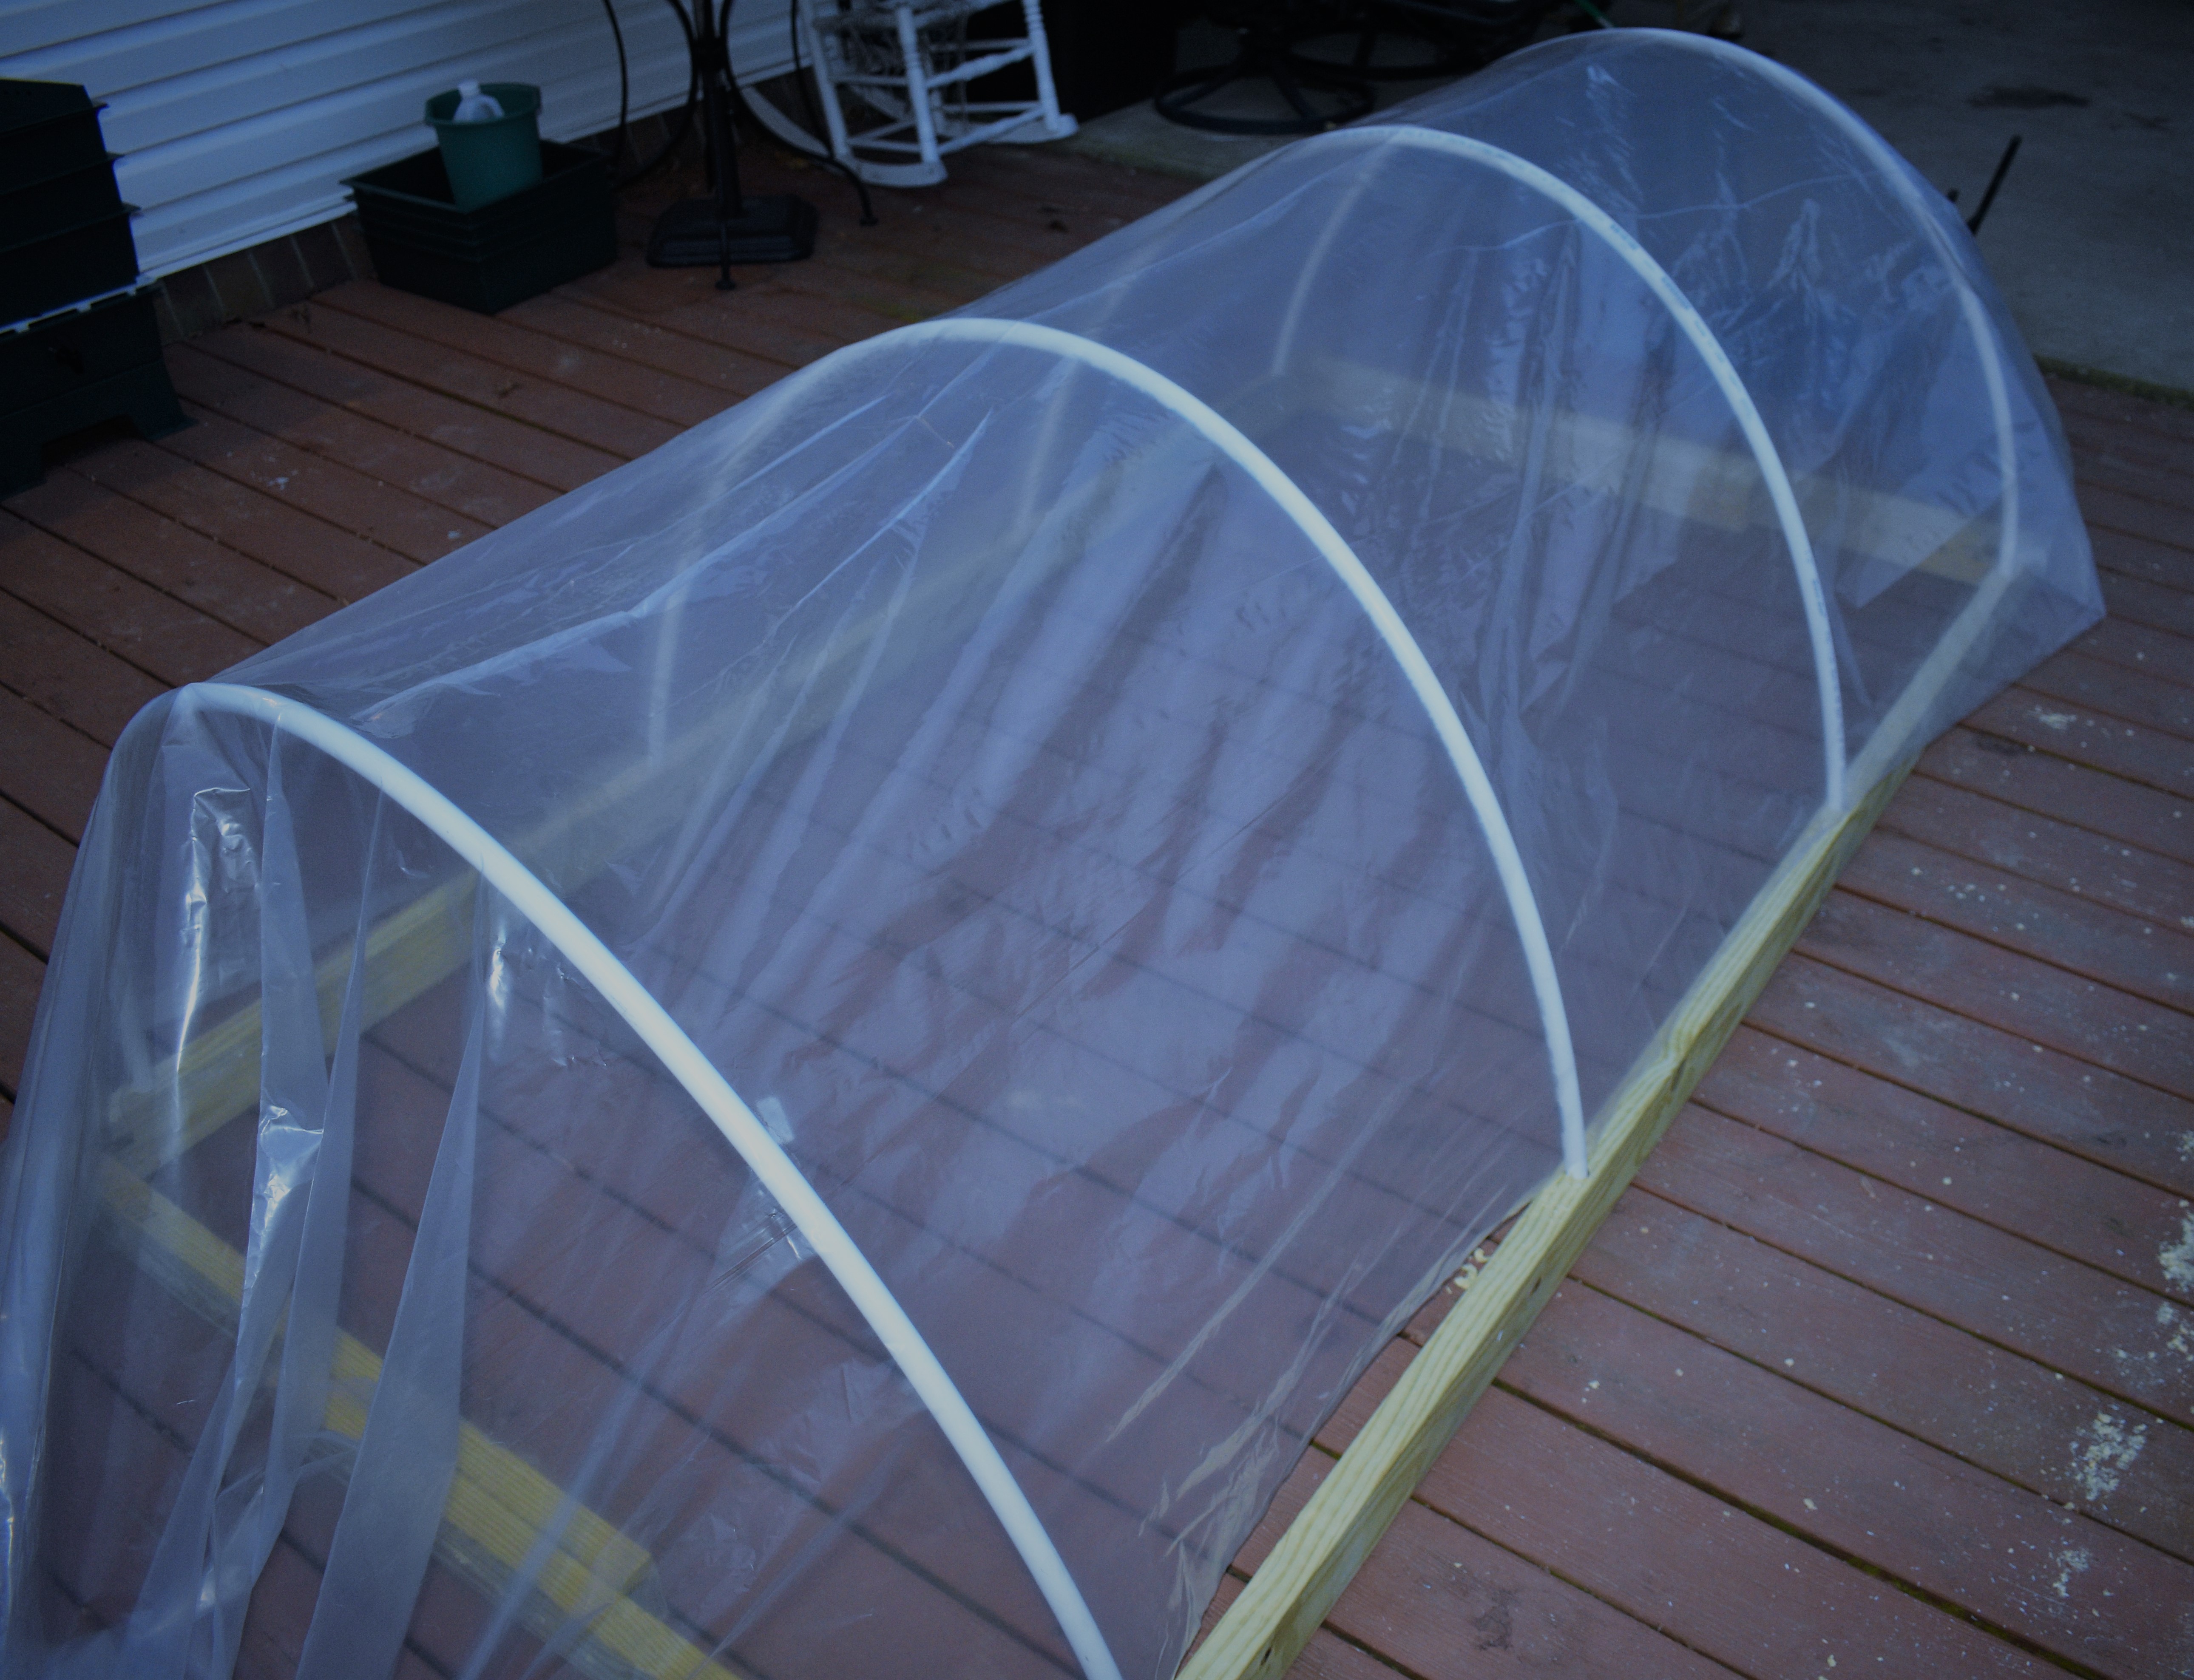
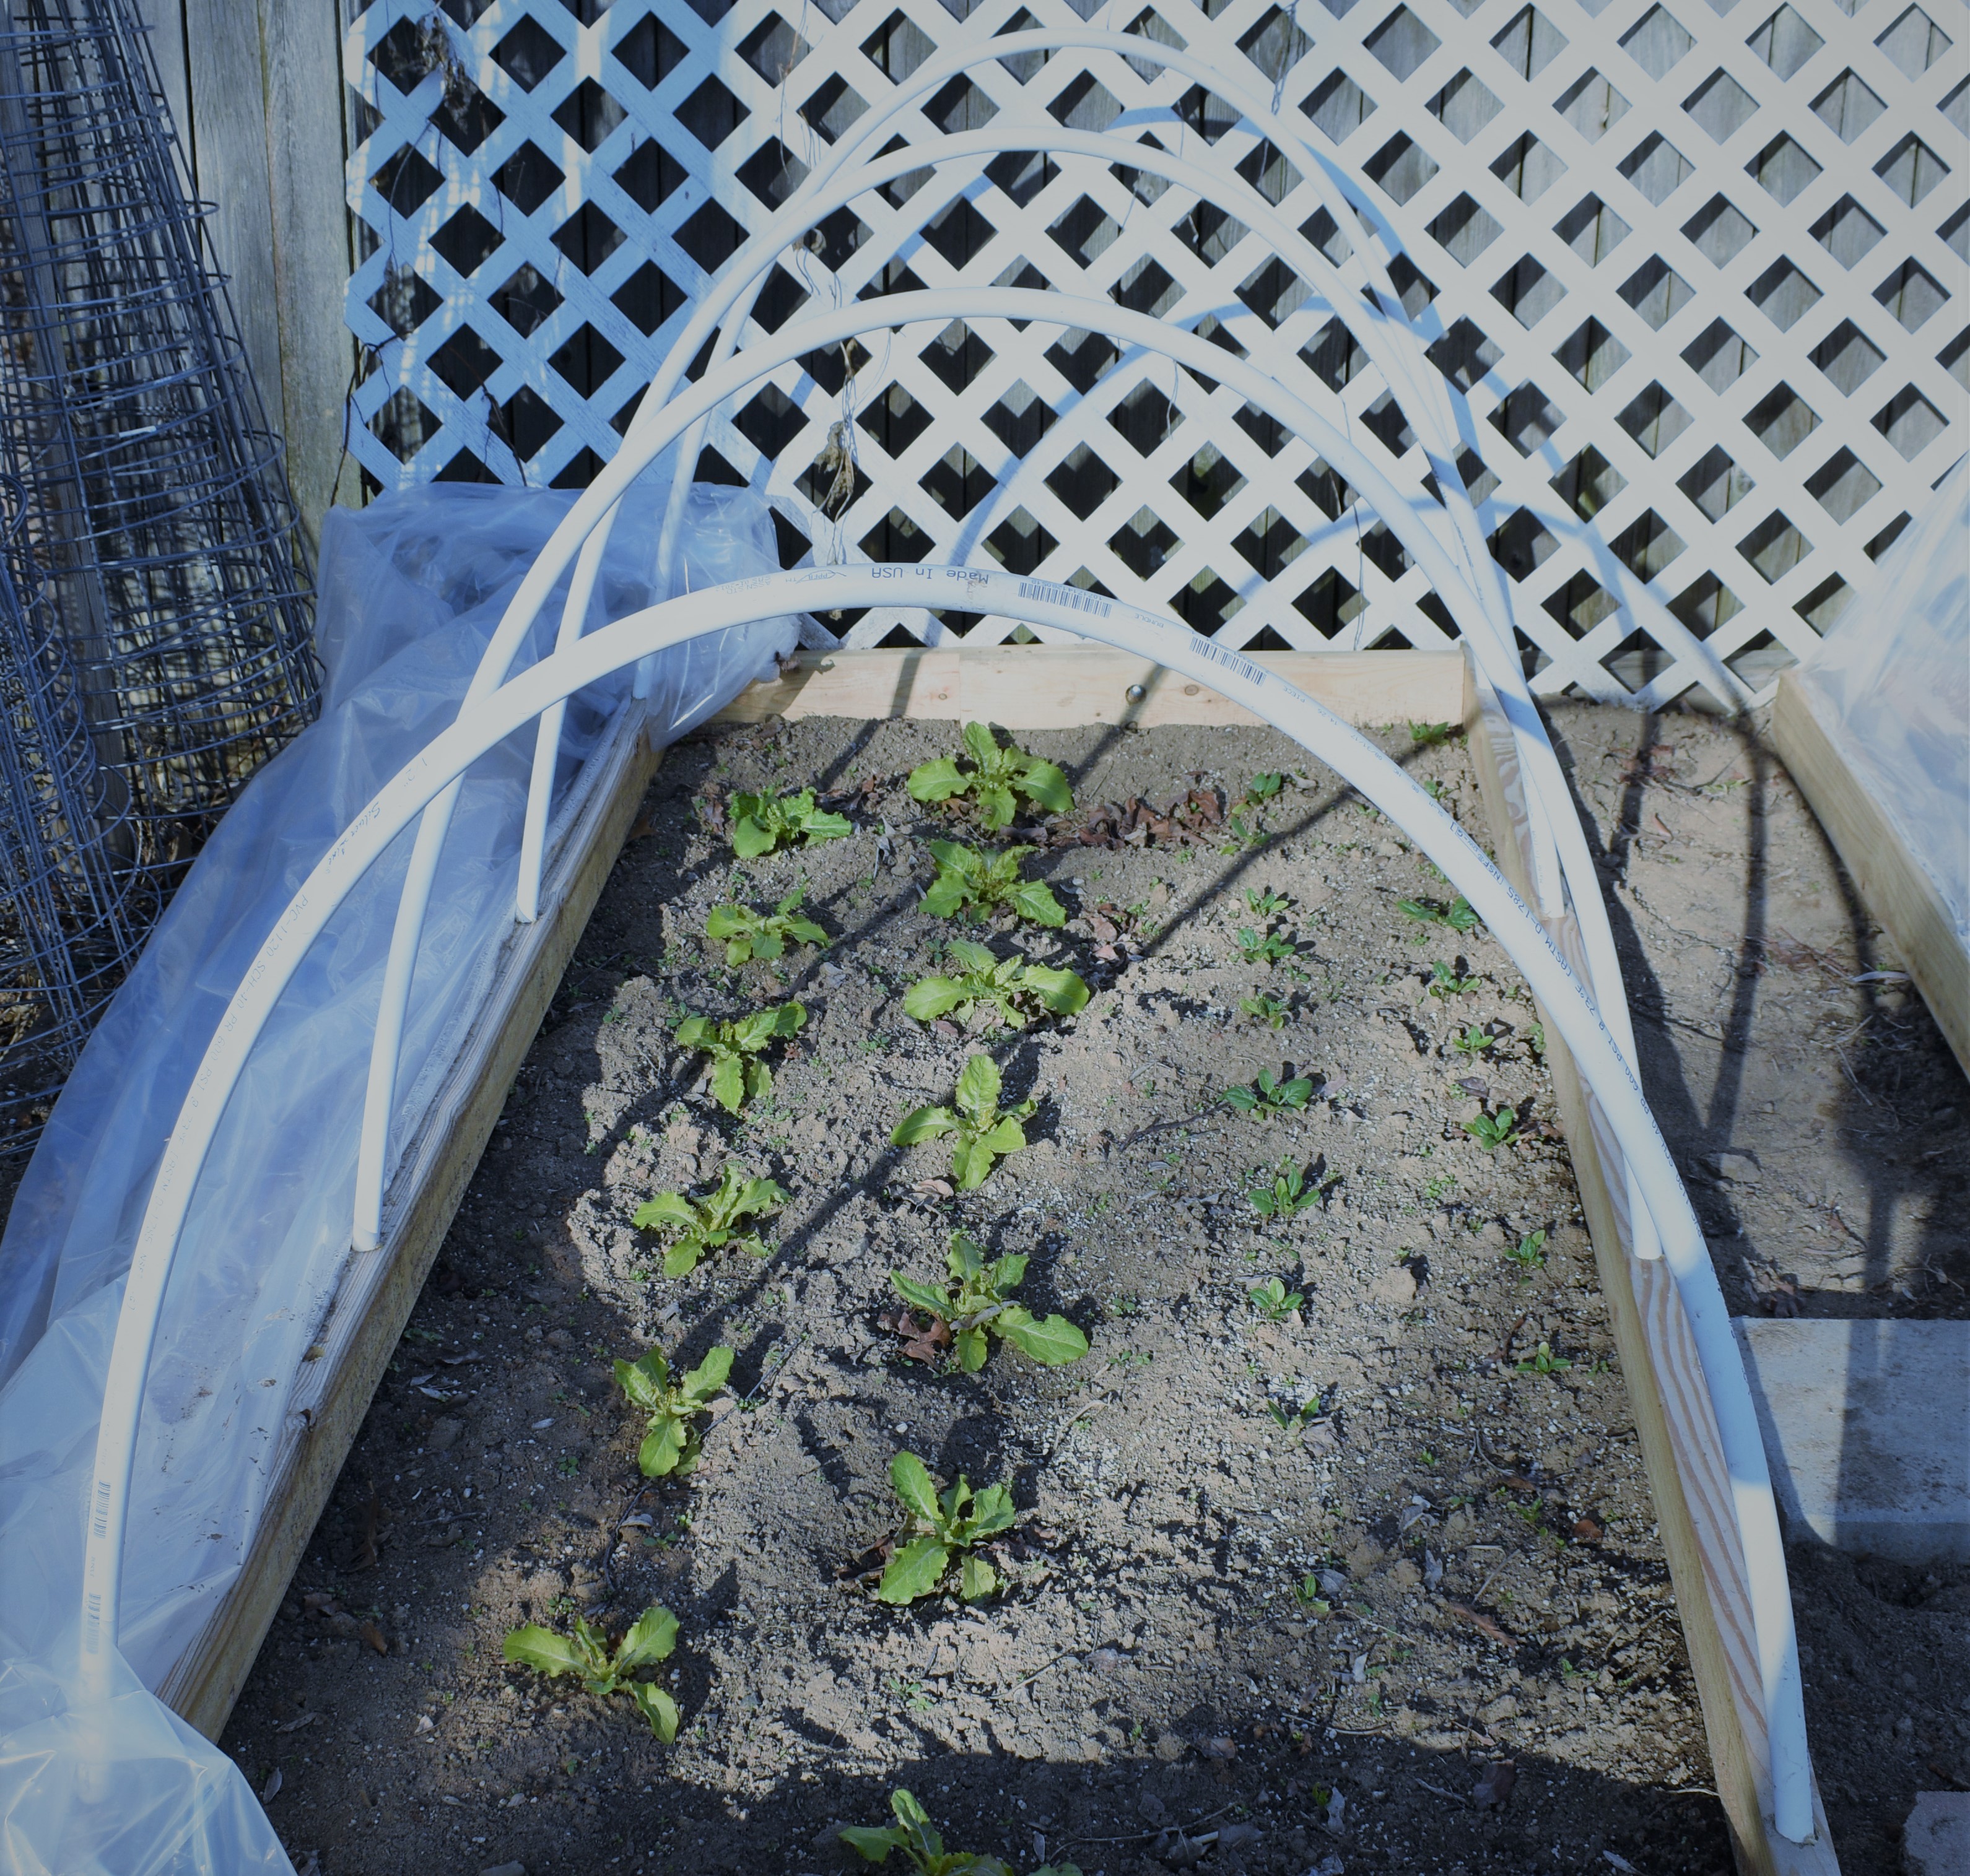
- Now that you have your 4 poles take one end and stick in one of the ⅞” holes you drilled in the frame. With one end in the hole bend the pole over and stick the other end in the adjacent hole. This is going to make the hoop shape which provides support for your cover. Bend it slowly, apply even pressure. It will bend and go in the hole without breaking, do not worry. Repeat this step for all 4 poles.
- Now you have the frame finished, remove all remaining clamps. You can put the other bolt in a hole if you want. You do not have to use 4 bolts. I only use 2 in these instructions, but 4 is better.
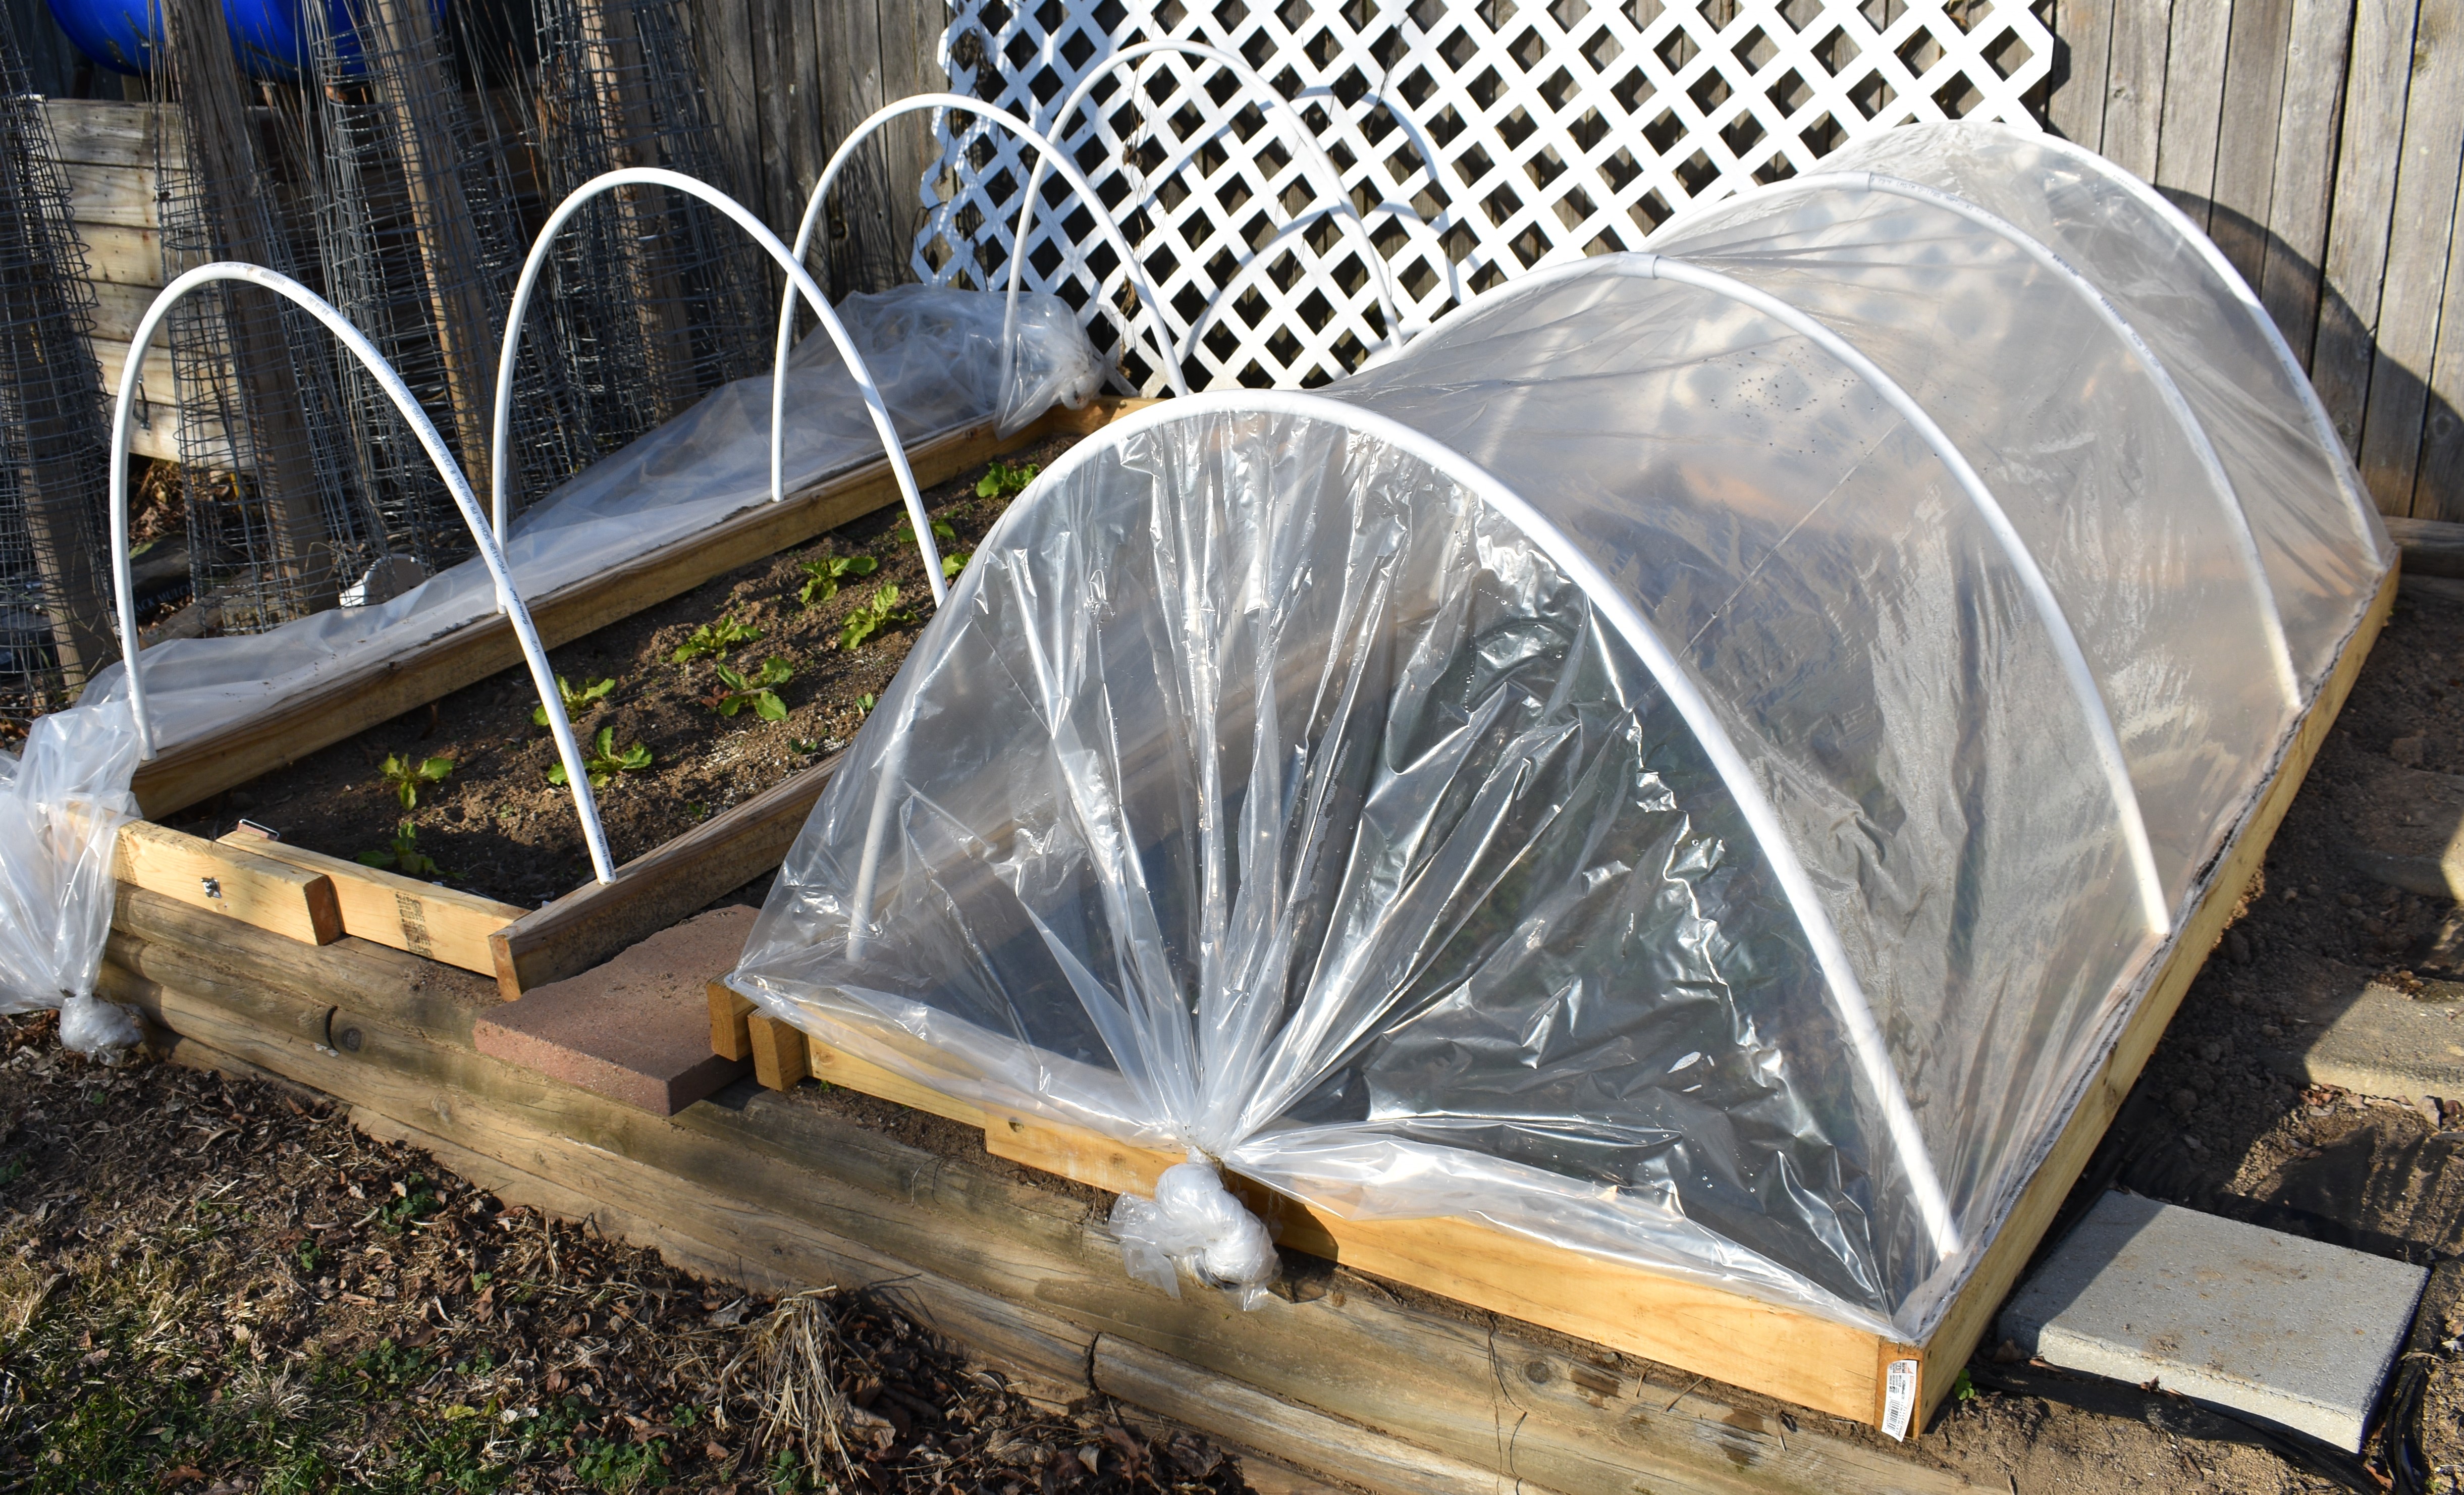
- Time to put the top on. Get the 16’+ piece of plastic you have decided to use for the top. It has to be at least 6’ wide to work, you might get by with a bit less than 16’ length but the width is non negotiable. Drape the plastic over top of the tunnel. Even it up and leave about 4 feet extra on each end. This is going to allow you to seal up the ends somewhat once the sides are attached.
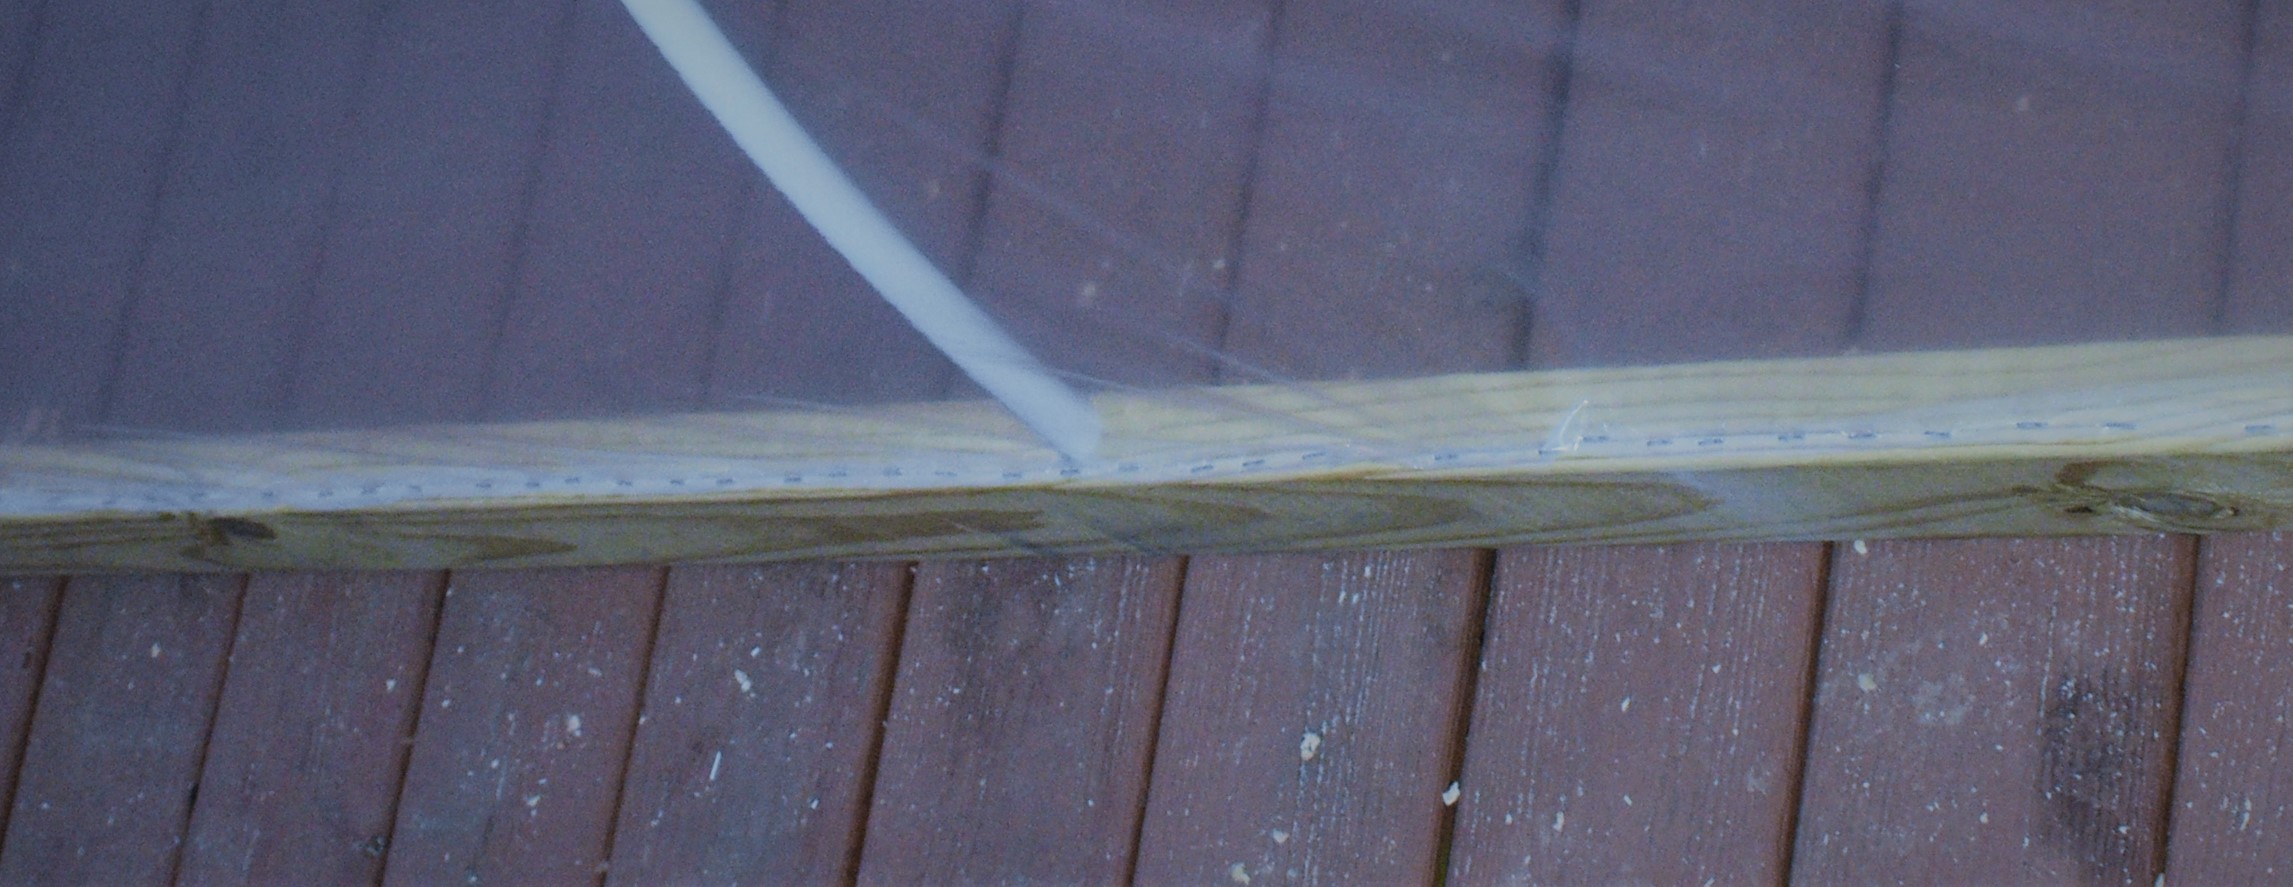
- With the piece dry fitted and about even go all the way down one side and staple the plastic to the frame you built. I usually fold the plastic about ½” and staple through that. It gives a better hold than stapling through just the one layer. USE TONS OF STAPLES! I mean seriously use a bunch. About 1 per inch or more. You want the plastic to be holding on at as many points as possible. This distributes the tension so that it does not rip away from the frame easily and can stand up to wind and weather.
- Once the first side is done, go get your last 8’ 2x4. Take it to the opposite side of the side you just stapled to the frame. Lay it right beside the 8’ piece your poles are being held in. You are going to be stapling this side of the plastic to this 2x4 not to the frame. The reason for this is it allows you to pull the top off easily and put it back the same. If you staple it to the frame, well it is not removable anymore. Then if you have a warm day, want to water, or get rain, you are stuck moving the entire frame. This is one of the features that really makes this tunnel so nice.
- Staple the other side of your plastic to the separate 2x4 just mentioned. Again tons of staples. The more the better. Pull the plastic tight but not too tight just get it mildly snug.

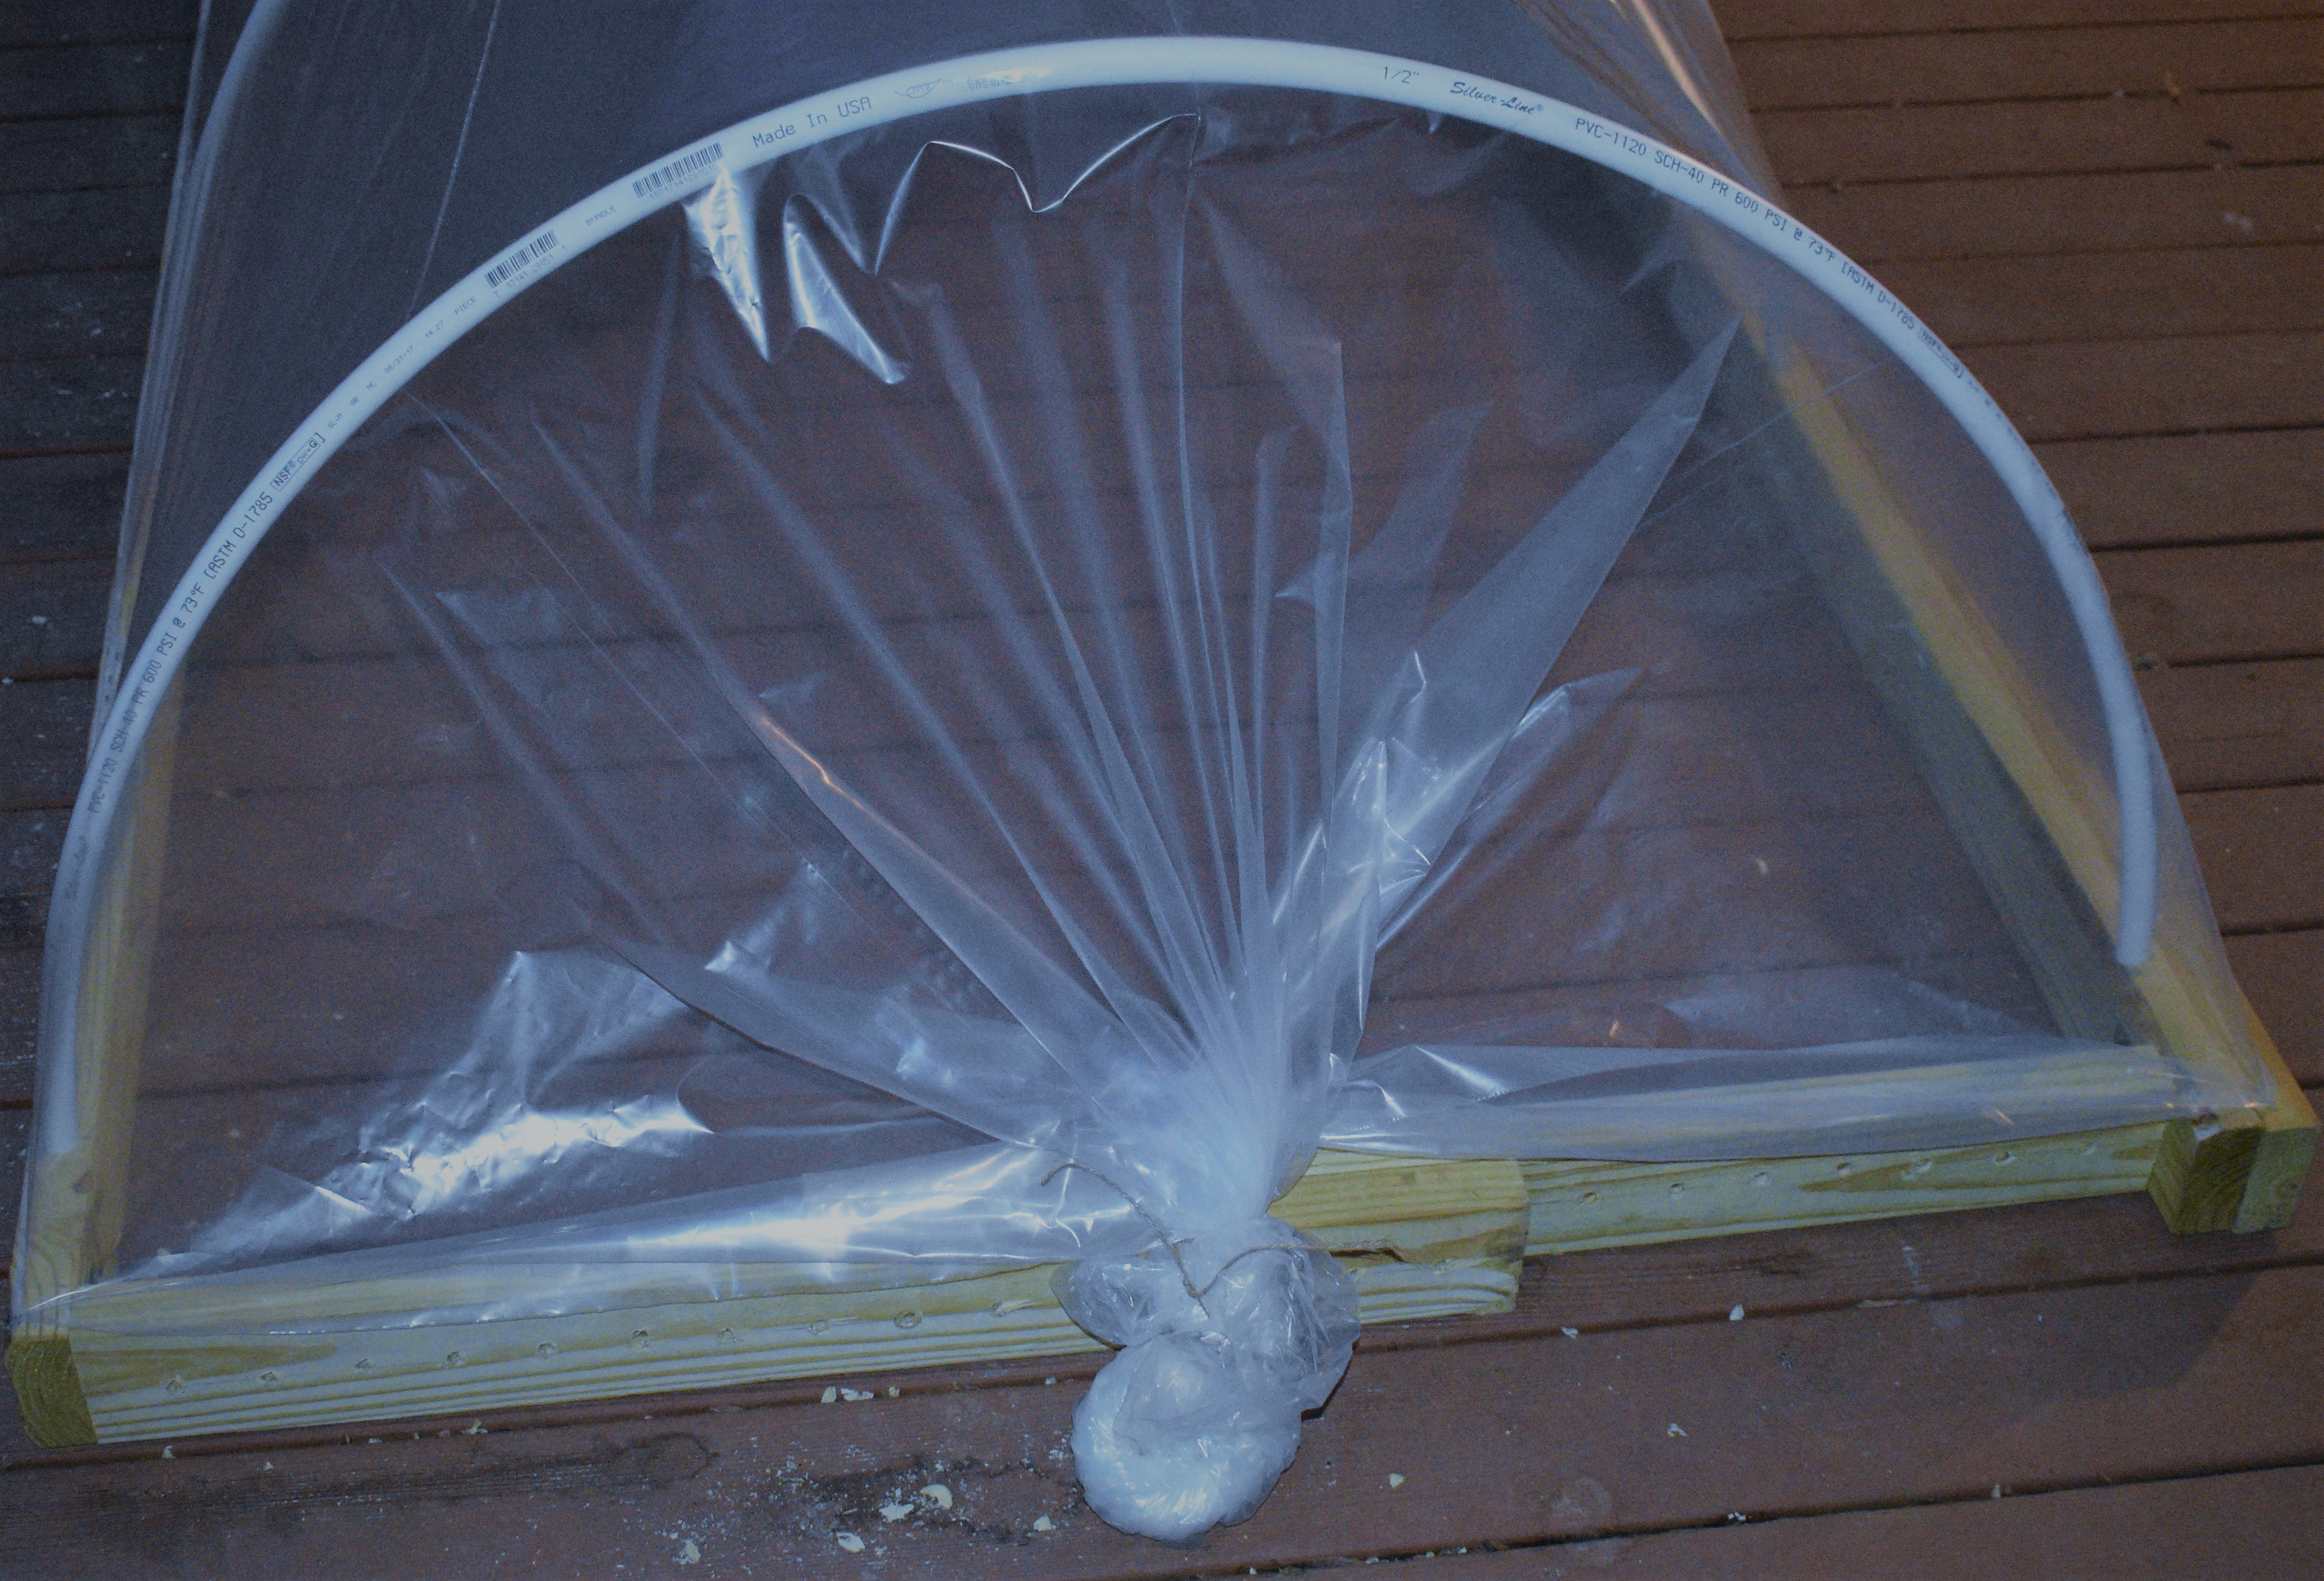
- Now you have both sides stapled and holding the plastic on. You are left with a bunch of excess on each end. Take this excess, twist it up and tie it at the end of each side. It doesn't have to be pretty just make sure it holds. You can use some twine to tie around the big knot to hold it together. Now if you want to switch sizes you just untie the knot and retie it once you adjust the frame size. The extra length gives you the ability to adjust to whatever size you want without having to put on new plastic.
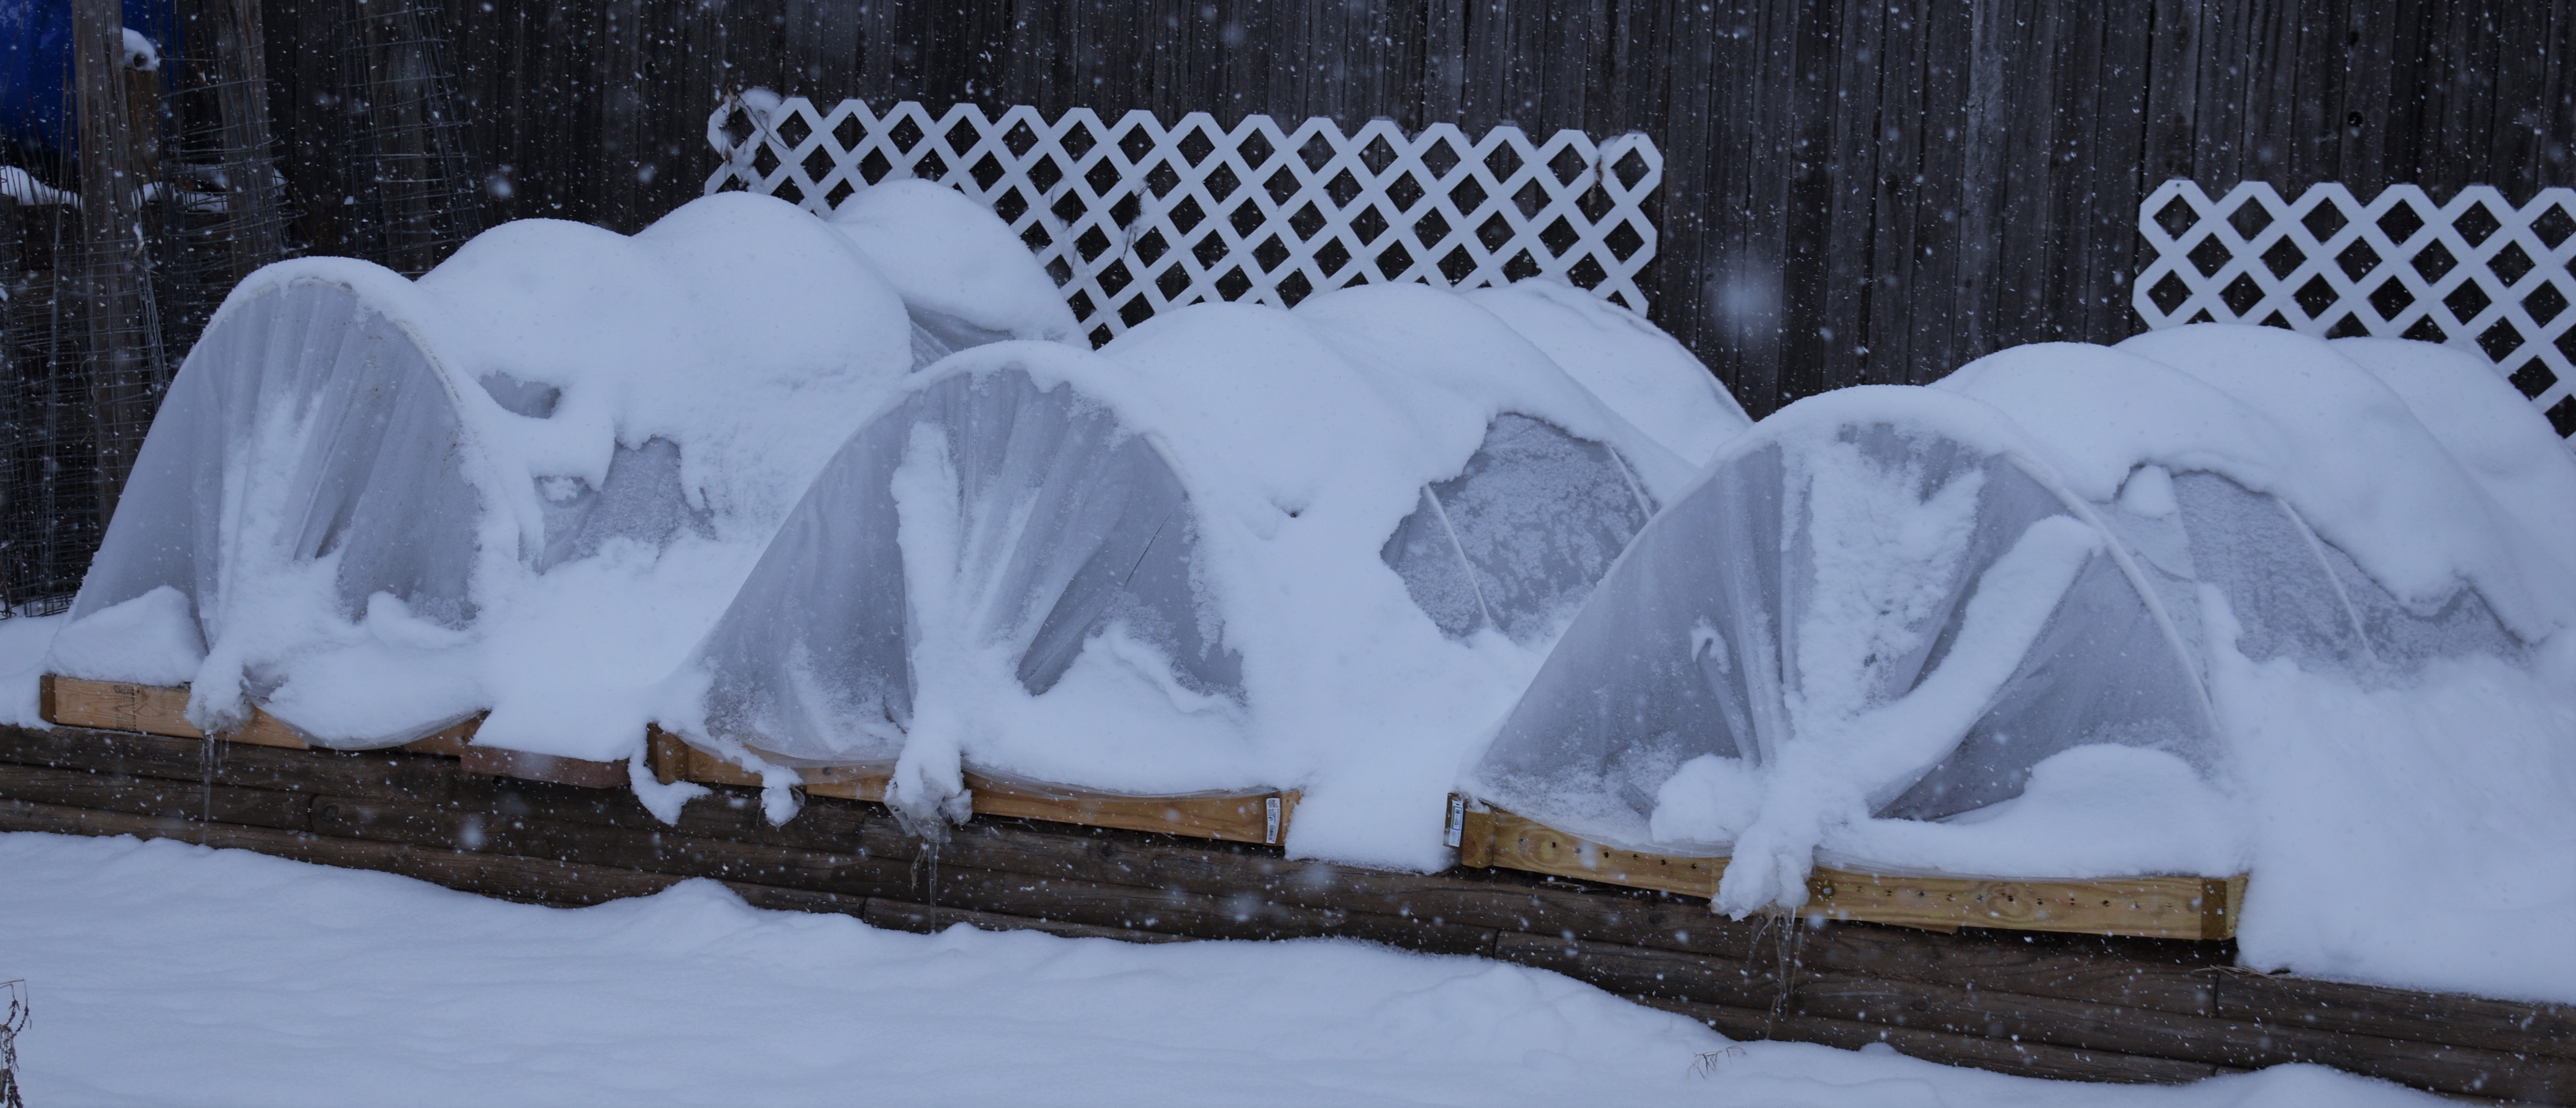
- You are done, go put it on your garden bed to protect your plants. Enjoy the bigger, earlier, and later harvests!
I hope these instructions have been helpful. If you have any questions you can direct them to me. info@organicheirloomgardens.com
Make sure you visit my website if you are not already there.
http://www.OrganicHeirloomGardens.com

![]()