
ASPARAGUS CROWN PLANTING GUIDE - Organic Heirloom Gardens
Posted by Organic Heirloom Gardens on Mar 6th 2019
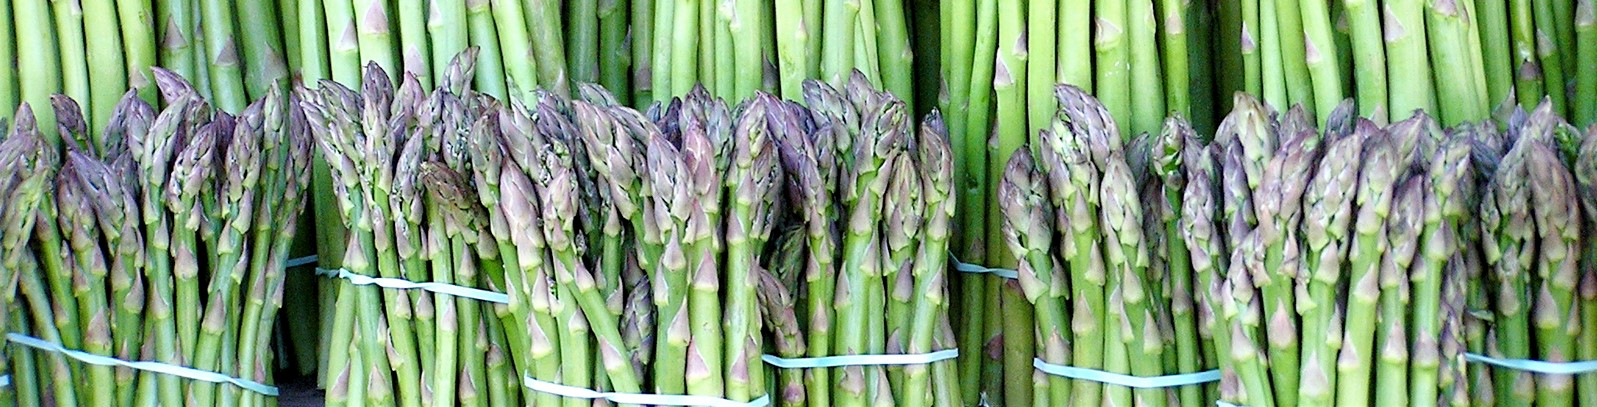
Asparagus is a favorite of gardeners everywhere for its tasty young spears or shoots which are harvested in early Spring each year. As a perennial it is always going to be one of the first plants year after year you will see popping out of the ground. Once established a patch of asparagus can produce for 20-30 years. If planted correctly you will probably only need to plant a single patch per lifetime. There are a variety of types and colors, green of course being the most common. You will also find green with purple tops, all white spears, and even all purple spears such as Purple Passion. Whichever variety you choose rest assured you are making a great choice for your health. Asparagus is packed with vitamins B, C, Calcium, and Iron. Asparagus thrives in all regions here in the US, from north to south and east to west. Raised bed gardening works well and will allow you to grow in some wetter areas that in the past have been more difficult. Fresh asparagus harvested from your garden will taste much better than what you can buy in the store. Do not miss out on this culinary favorite, plant yours today!
- Common Name: Asparagus
- Botanical Name: Asparagus Officinalis
- Hardiness Zones: 3-10 (4-9 Most Ideal)
- Plant Spacing: 12-18 Inches
- Plant Depth: Top of Covered Covered by 2-4 Inches
- Row Spacing: 30-36 Inches
- Soil: Well Drained, Fertile (Amend With Compost As Needed, pH 6-8 Ideal)
- When To Plant: Early Spring (When Ground Is No Longer Frozen)
- Days To Maturity: 360 (You Will Get Your First Harvest The Spring AFTER Planting)
PLANTING STEP BY STEP
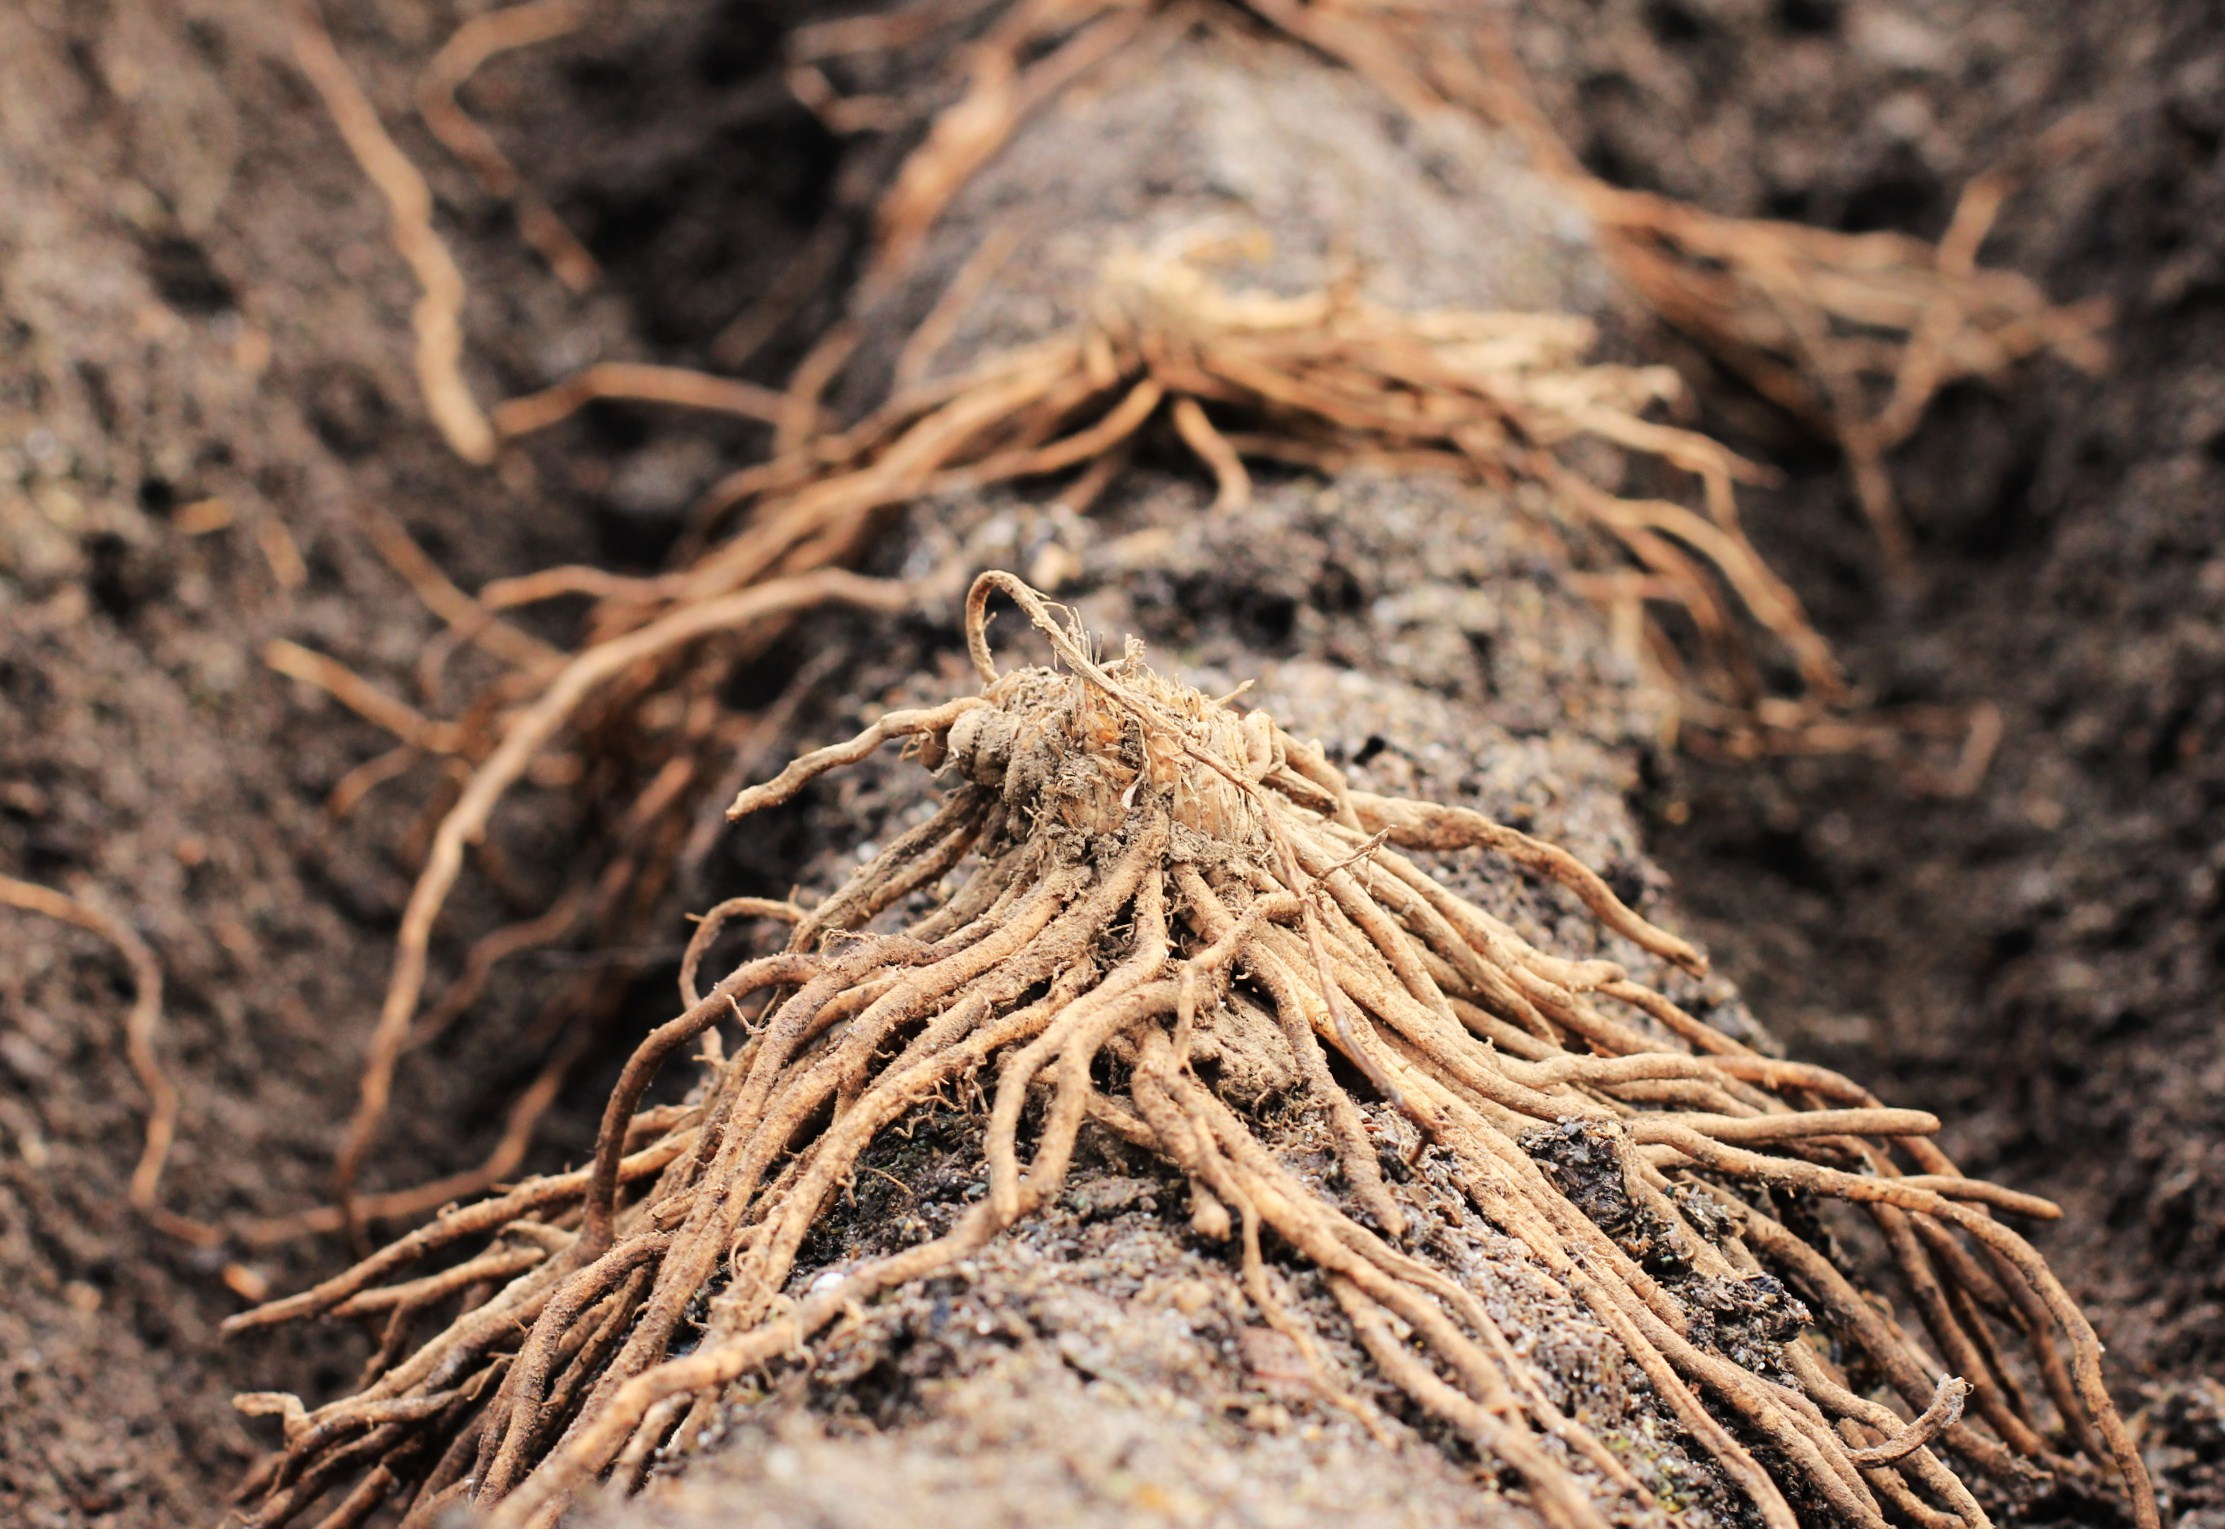
- Soak crowns (roots/plants) in water or compost tea for 20 minutes to 1 hour before planting.
- Dig a trench for each row. 12-18 inches wide, 6-10 inches deep. Rows 30-36 inches apart.
- Break up and mix soil dug from trench with compost and/or loose soil.
- Add SOME mixed soil back into trench forming a slight “hill” in the middle.
- Place crowns (roots/plants) 12-18 inches apart on this “hill” spreading roots to each side away and down into the trench.
- Fill trench with remaining soil mix from step 3. Crown (root/plant) top should be covered by 1-2 inches of soil.
- Add 2-4 inches of light compost/mulch on top of rows. Spread evenly. (Try Not To Get Tops Any Deeper Than 4 Inches)
- Water rows well to help get plants started.
CARE
- Water regularly, first year. If mulched well, established plants will not require watering often after first year.
- Make sure soil is well-drained. Mulch will help retain moisture and prevent weeds.
- Cut down dead foliage in fall when plant starts to turn yellow or brown.
- Cover with additional compost/mulch mixture in fall each year. (2-4 inches)
PESTS & DISEASES
- Asparagus Beetles
- Crown Rot
- Cutworms
- Rust
- Slugs
HARVEST & STORAGE
- DO NOT HARVEST YEAR 1.
- MINIMUM HARVEST EARLY SPRING YEAR 2.
- HARVEST FULL SEASON YEAR 3.
- Cut spears when they are 5-9 inches tall. (Cut at soil line using scissors or knife.)
- Check plants daily, spears grow fast.
- Smaller spears are more tender. Larger, longer spears will have a tougher woody exterior.
- Stop harvesting for the season when all spears coming up are smaller than ¼ inch diameter.
- Wash and dry harvested spears.
- Bundle spears together in damp paper towel, place in plastic bag.
- Store in refrigerator.